August 30th, 2018
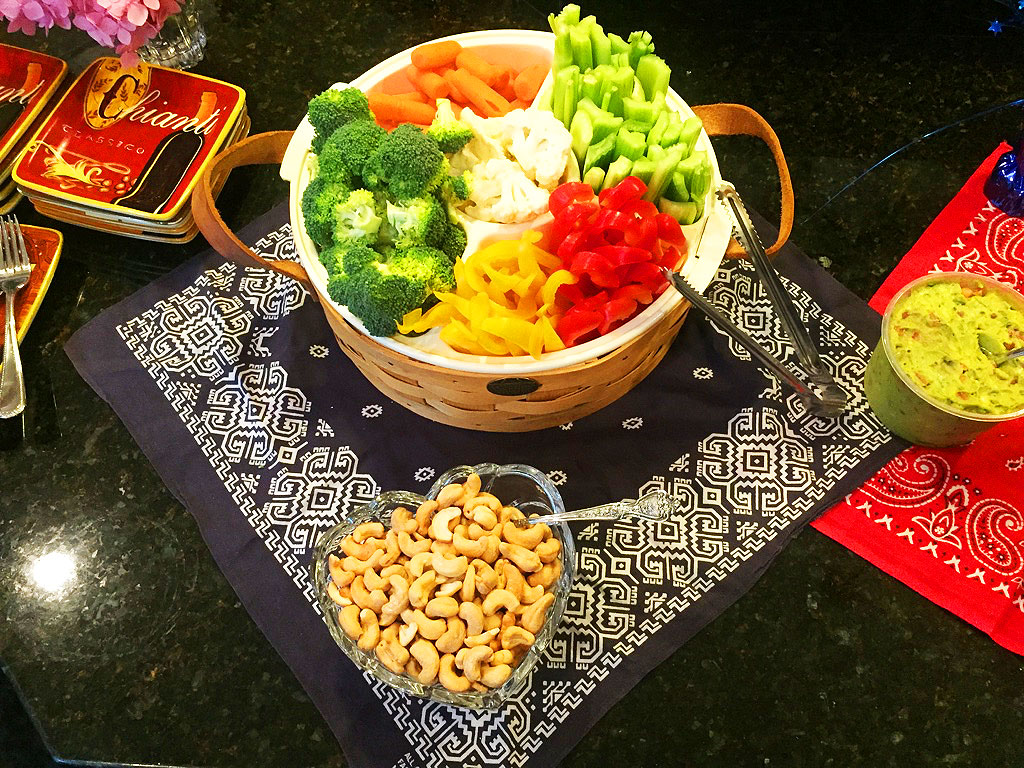
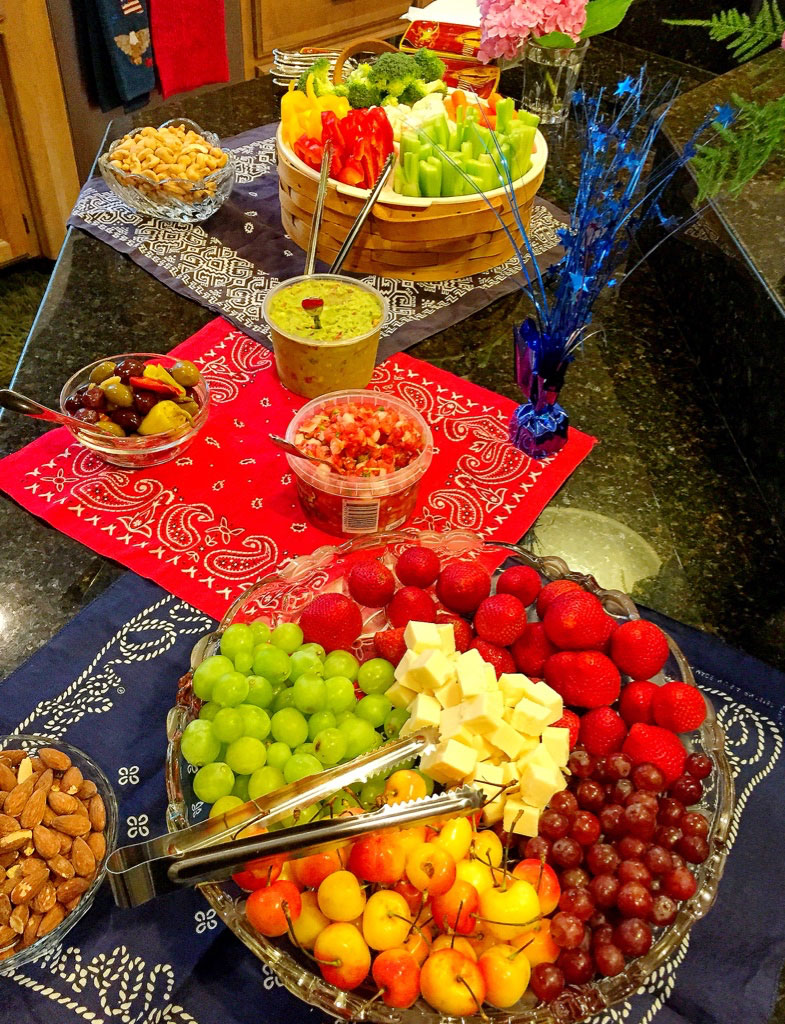 Beautiful patriotic party by my friend, Gina. Not long ago, my beautiful friend, Gina, invited me to a creative and patriotic BBQ. Her family created an unforgettable buffet filled with delicious food and beautifully arranged table. She served fruits, vegetables, chips, dips, nuts, and so much more. It was truly unforgettable.
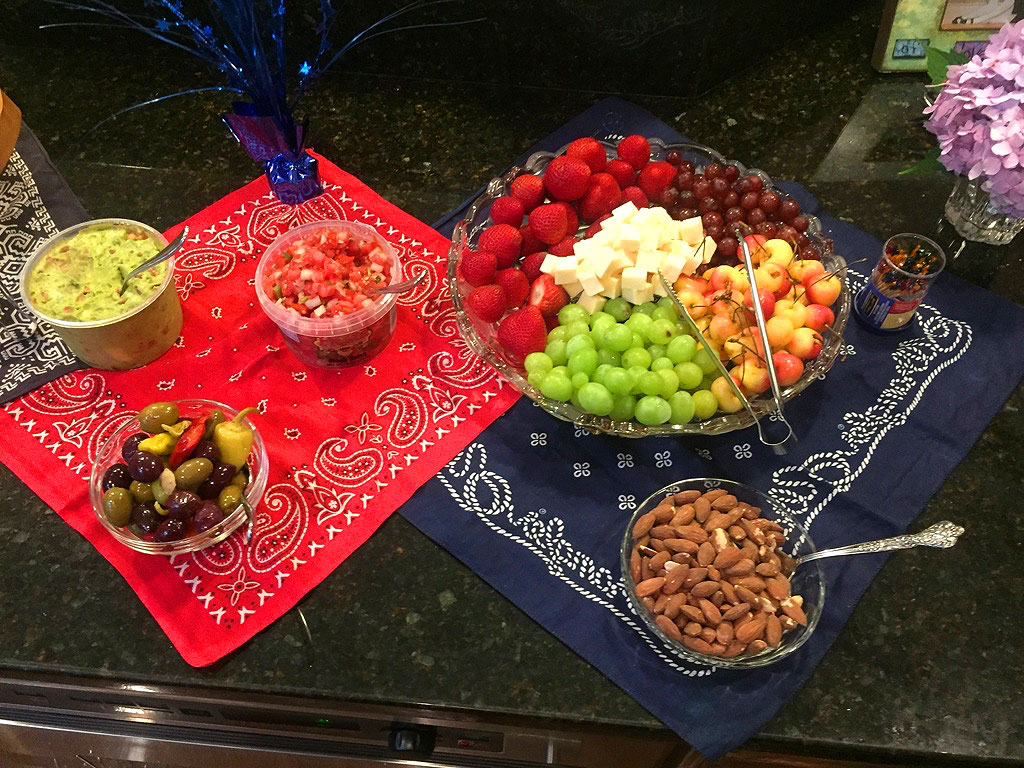
I love how Gina used red, white, and blue bandanas to create a patriotic feel to the party theme. The bandanas served as table runners and had different designs to bring some creative interest.
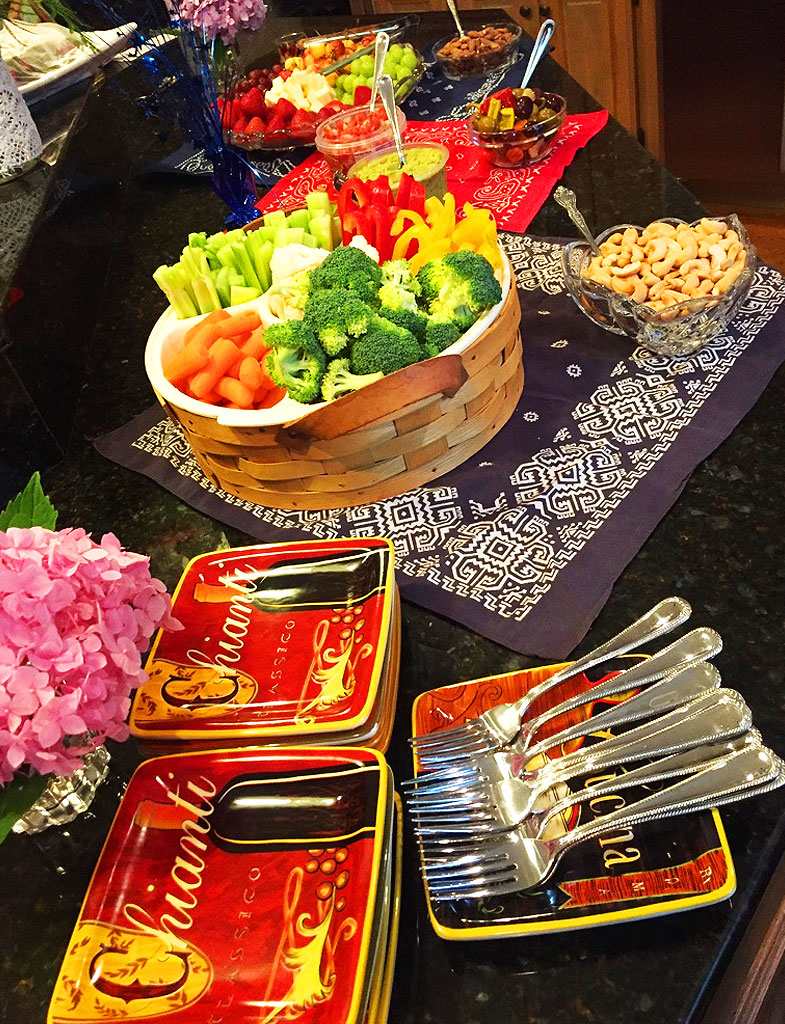
She also used baskets, melamine, crystal, glass, metal, and other dishes to make a fun eclectic look rather than making everything matchy-matchy.
Being able to use all the items you have in a creative way is one of the best skills a hostess can have. Many times, each piece has a story. I like to ask my friends how they came in possession of certain serving pieces. Sometimes they are fun stories with lots of laughs and others are just simple like “I picked it up at Homegoods or Target”.

Again, bandanas are used as napkins, tying in the decorations from the buffet. Also, her daughter made the place cards and added little fireworks images to tie in with the props they used as place card holders. Just LOVE the creativity!!
· Posted in 4th of July, Fourth of July, Labor Day, Memorial Day, Parties, Vegetable Plate ·
October 5th, 2015
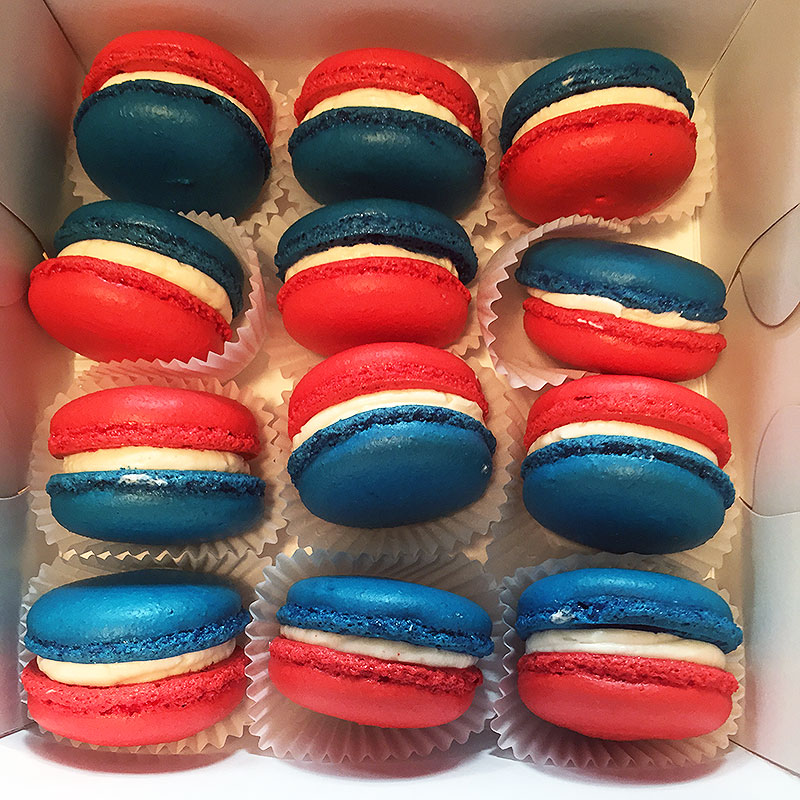
I love Fourth of July , for so many reasons! Firstly, it’s a casual celebration, which means I don’t have to stress too much about what to prepare, in fact, it is a perfect celebration for potlucks! And that is exactly what I did this year. I just wanted it to be relaxed, fun, and easy. So, I asked several of my friends to bring their favorite dish while I prepared a few surprised for the kids! After dinner, we went to my friend Danna’s house and enjoyed watching the kids do sack races and a plethora of other fun activities. Danna made mint juleps while my friend Rhae provided the red, white, and blue macarons. It all turned out great and below are some photos from this fun day!
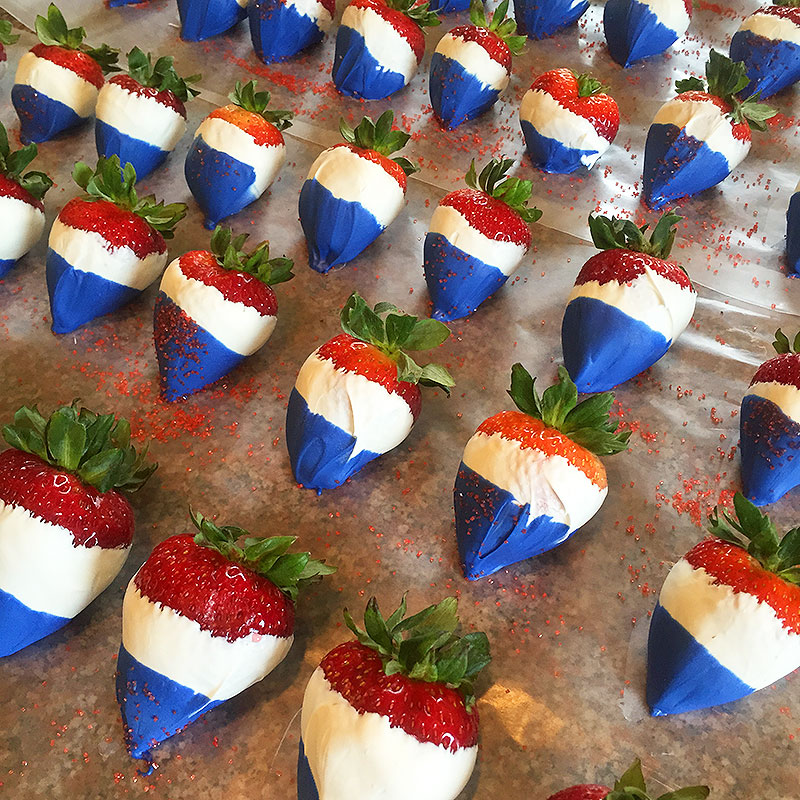
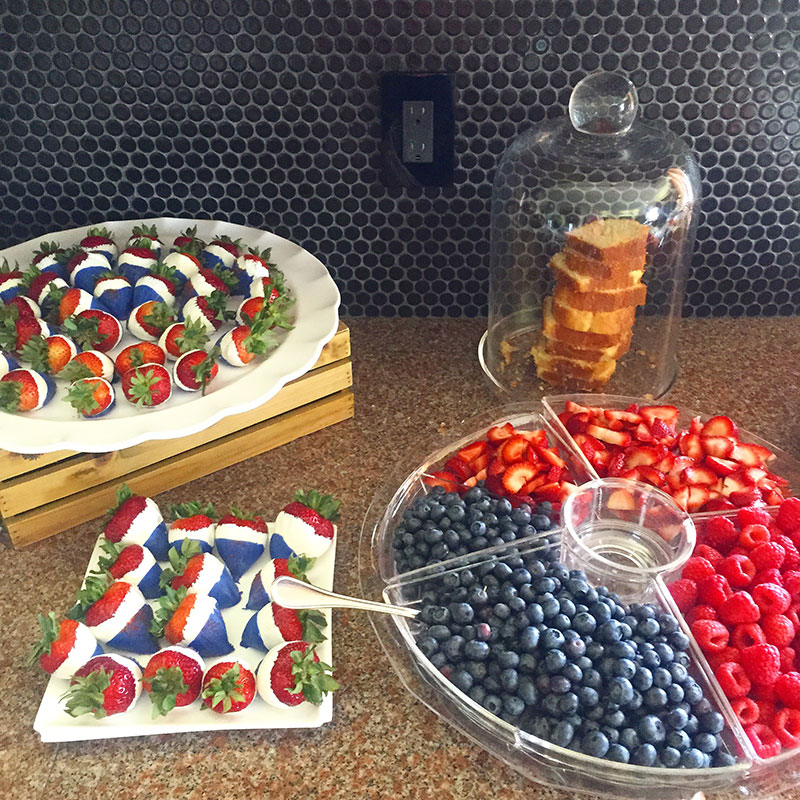
Red, White, and Blue Strawberries. Just buy white and blue candy coatings and dip away!!
Fruit shortcake dessert bar. Just combine fruit, pound cake, and whipped cream and allow your guests to build their own masterpiece which they can top off with some patriotic strawberries.
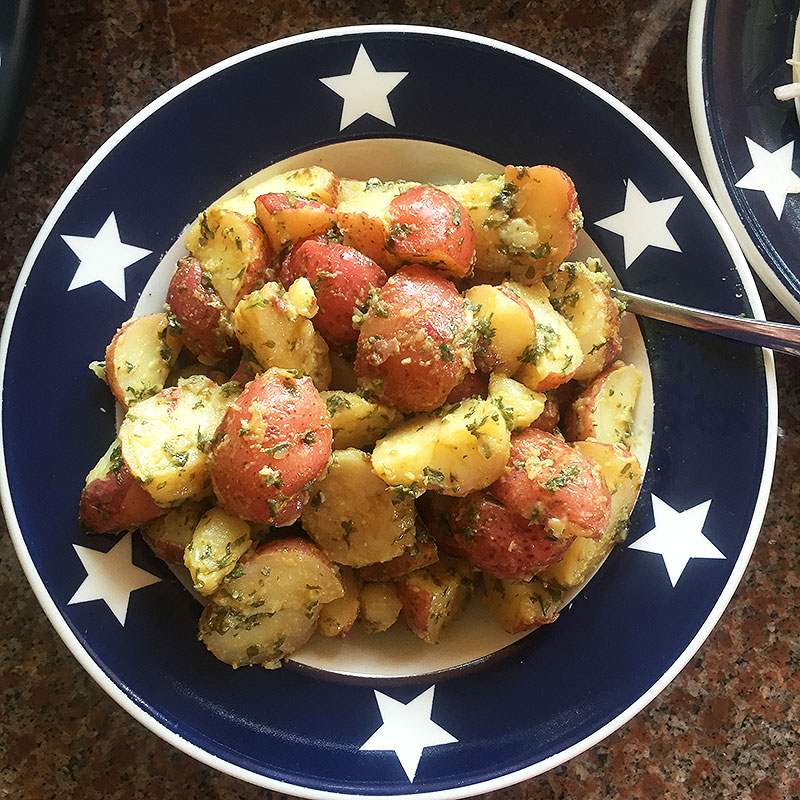
Danna’s gorgeous potato salad
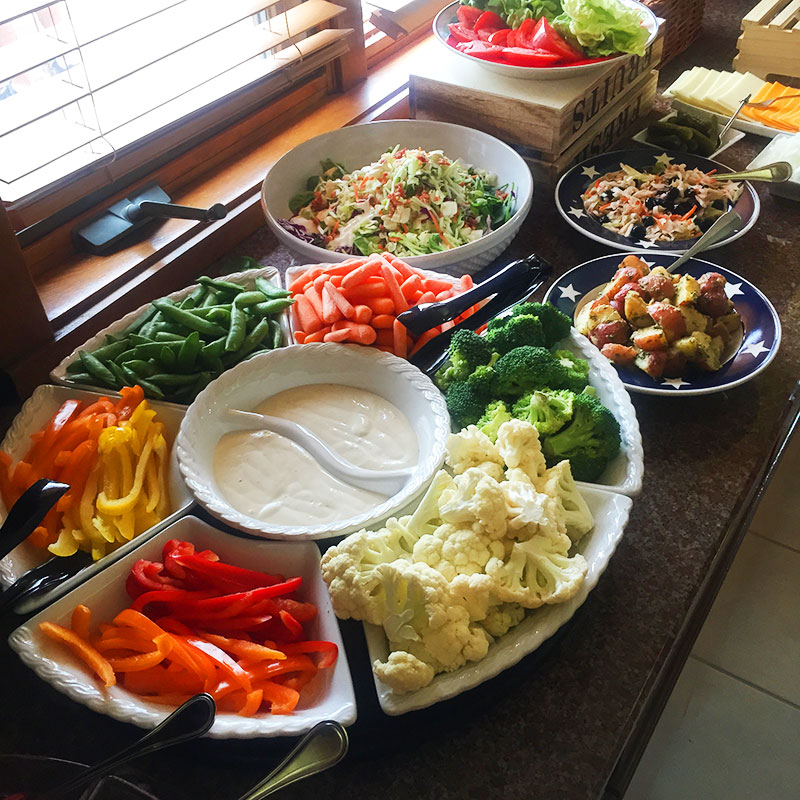
Our 4th of July potluck buffet with a burger bar.
Hanging out at Danna’s house

Rhae’s red, white, and blue macarons.
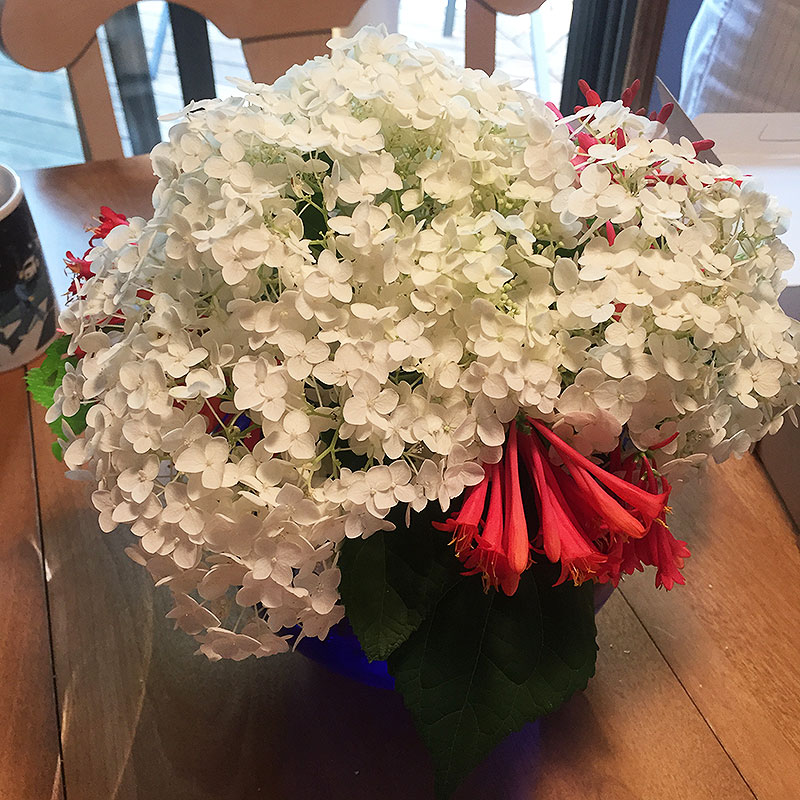
Danna’s beautiful red, white, and blue centerpiece straight from her beautiful garden.
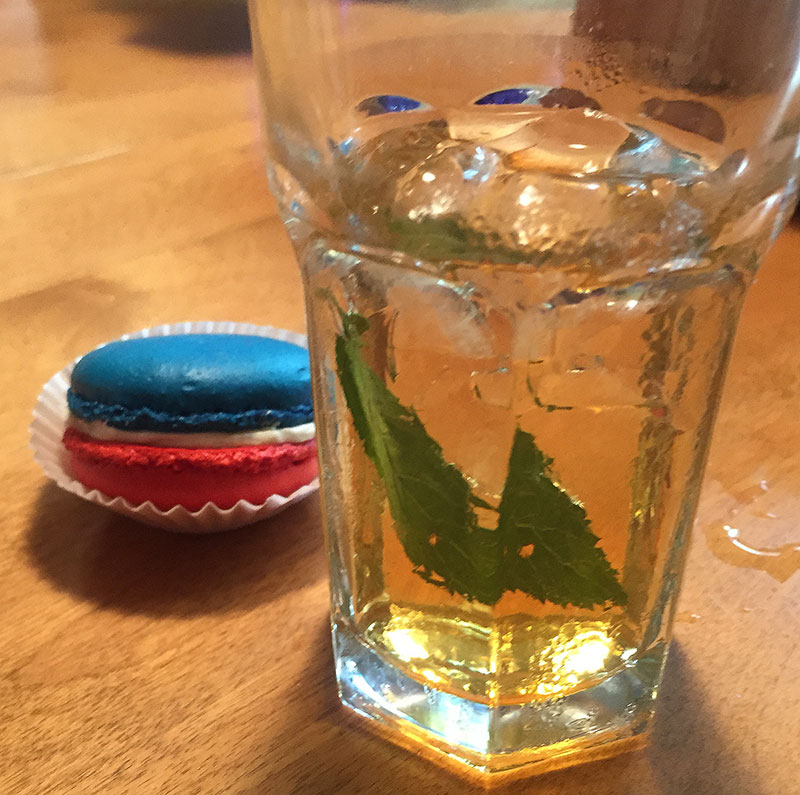
Danna’s mint julep paired with Rhae’s macaron… DELICIOUS!!!
Our kids watching fireworks… priceless!!!!!

· Posted in 4th of July, Fourth of July, Parties, Salads ·
October 27th, 2014
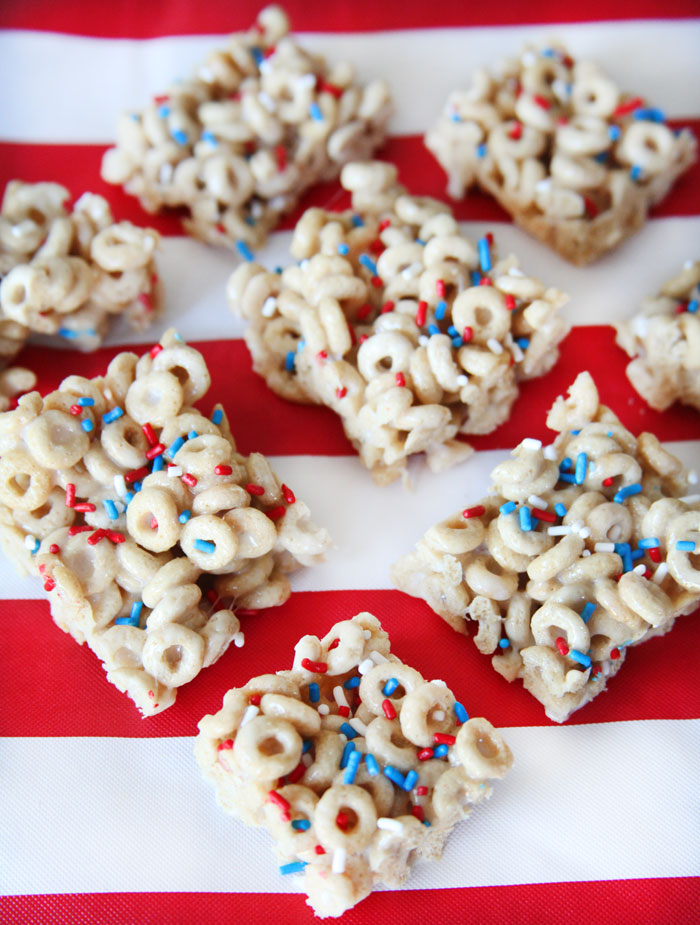 Do you love marshmallows and Cheerios? I do too! And as much as I would love to tell you that I came up with an incredible new recipe, that just isn’t the case. But I’m on a 4th of July recipe marathon, so this should count… soldes chaussures adidas right? As you can tell, this is a simple modified recipe of Marshmallow Treats and I used Cheerios instead of rice cereal. Chaussures Asics Femme Honestly, you can substitute any cereal for this and it will come out delicious! Don’t forget the red, white, and blue sprinkles for the 4th of July feel! WARNING: These lasted about 10 minutes in my house… nike air max 1 ultra flyknit femme chances are, they’ll disappear just as quickly in yours! Do you love marshmallows and Cheerios? I do too! And as much as I would love to tell you that I came up with an incredible new recipe, that just isn’t the case. But I’m on a 4th of July recipe marathon, so this should count… soldes chaussures adidas right? As you can tell, this is a simple modified recipe of Marshmallow Treats and I used Cheerios instead of rice cereal. Chaussures Asics Femme Honestly, you can substitute any cereal for this and it will come out delicious! Don’t forget the red, white, and blue sprinkles for the 4th of July feel! WARNING: These lasted about 10 minutes in my house… nike air max 1 ultra flyknit femme chances are, they’ll disappear just as quickly in yours!
Ingredients
- 4 oz butter
- 10 oz bag Marshmallows
- 4-5 cups Cheerios
- red white and blue sprinkles
- 9 x 9 square pan
In a small saucepan cook the butter over low heat, until the butter is fully melted. Add the marshmallows little by little and stir until they are fully melted. goedkoop nike air max 2017 Add the cereal cup by cup. If you like to have super gooey bars, you may want to use 3-4 cups of cereal. shirt-tshirt If you like to have a nice balance, add more cereal 4-5 cups (or even six). Believe it or not, but I don’t like my bars to be super gooey, so I use more cereal. Stir until the cereal is fully coated.Press it into the pan. You may want to put some butter on your hands or a rubber spatula to prevent it from sticking. Sprinkle with sprinkles. Cool in the refrigerator for an hour. nike schoenen nederland Cut… serve…
· Posted in 4th of July, Fourth of July, Parties, Recipes ·
October 17th, 2014

Get ready for the ultimate 4th of July dessert… Red, White, and Blue Cheesecake Stuffed Strawberries! Place them on top of a cupcake or eat them on their own, I guarantee that it will be a huge hit at your next patriotic party! CLICK HERE FOR THE RECIPE.
· Posted in Fourth of July, Memorial Day, Parties, Recipes ·
June 28th, 2014
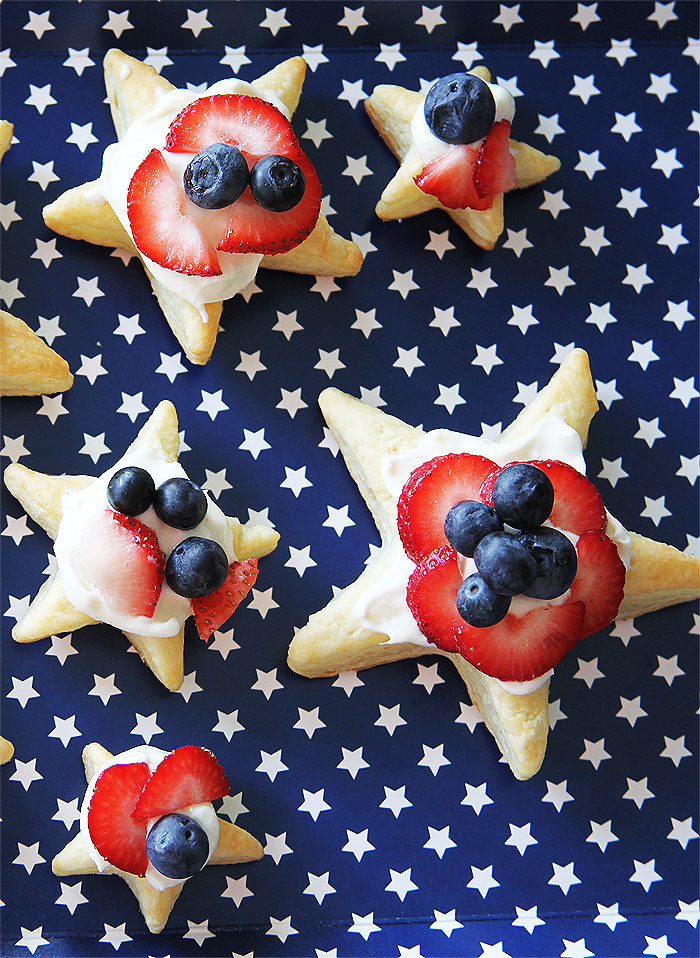
As some of you may know, I went on a 4th of July recipe marathon this month. I tried a bunch of great recipes. Some worked and some didn’t. Here’s a recipe that was really each, fun with the kids, and delicious… Puff Berry Stars!
Ingredients
- 1 sheet puff pastry dough
- 8oz container of cream cheese
- 1/2 cup powdered sugar
- 1 tsp vanilla extract
- 1 cup various berries (strawberries, blueberries, or blackberries)
- Star cookie cutters (various sizes)
Preparation
Preheat oven to 400 degrees.
Thaw the puff pastry sheet at least 45 minutes and roll out a bit to make slightly thinner, wider, and longer.
Take your cookie cutters and cut out star shapes using as much of the dough as you can (the bigger the stars, the better). If you are left with dough, you can roll out the dough and cut out the stars again, but I have to warn you, manipulating the puff pasty does something weird to it, so those stars will come out looking “different” then the original ones.
Bake the stars for 15-20 minutes, depending on your oven, until they are slightly brown. Make sure they do not burn. You can also brush them with egg wash to make them a bit darker on top.
In the meantime, create the cream cheese filling by beating the cream cheese at medium speed with an electric mixer until creamy; gradually add sugar and vanilla, beating well.
When the stars are done baking, let them cool about 15 minutes.
Spoon or pipe the cream cheese filling on top of each star and top off with berries. Best when eaten right away.
· Posted in 4th of July, Fourth of July, Memorial Day, Recipes ·
June 28th, 2014
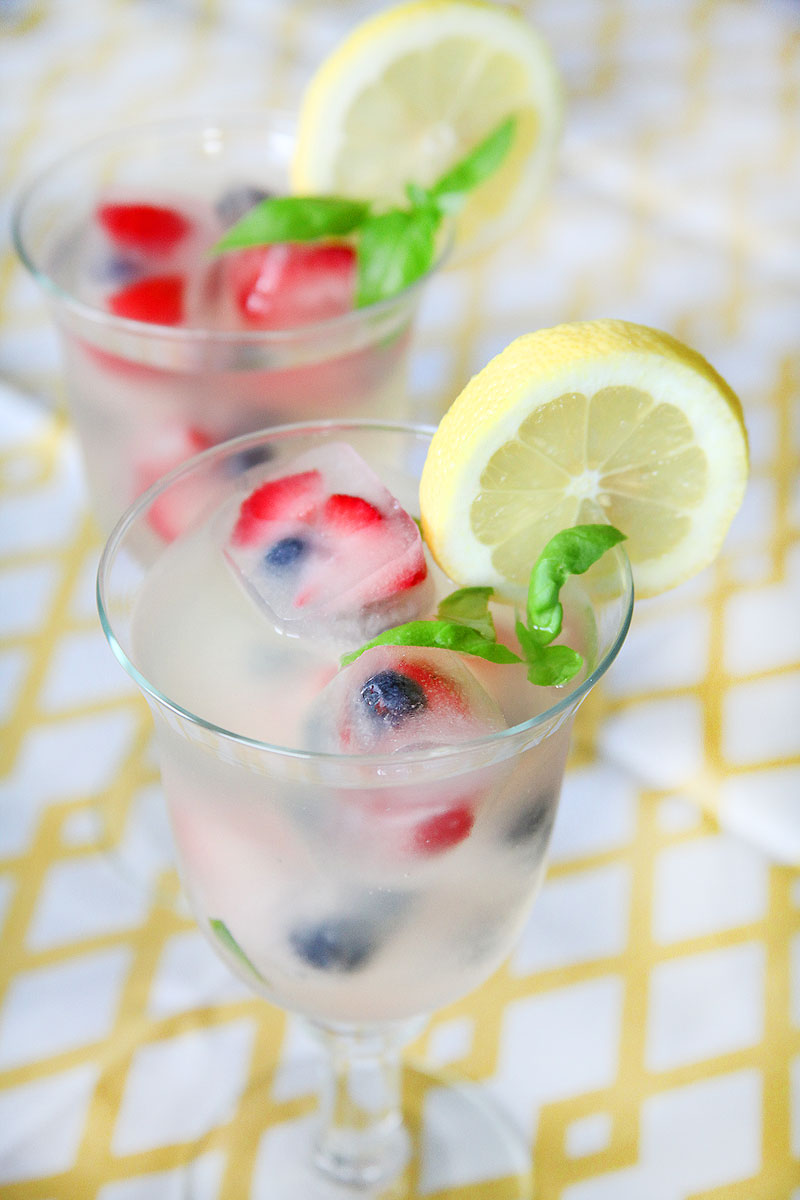
Brace yourselves, because I’m about to introduce you to a fabulous drink that not only YOU will enjoy, but your party guests as well. Its key ingredient… of course lemons… but the other is agave nectar! I’ve heard “agave this” and “agave that” for years. But to be honest, I don’t have too many issues agains sugar, so as long as there is moderation, I don’t really mind using it in my drinks and desserts. HOWEVER… I had to learn more about this agave nectar everyone is buzzing about. So, I did and I must say… I really like it! Plus, it’s kind of cool to tell people that they are drinking a delicious concoction you created with agave nectar! If you are interested in learning the difference between agave and sugar, here’s a link to a great article.
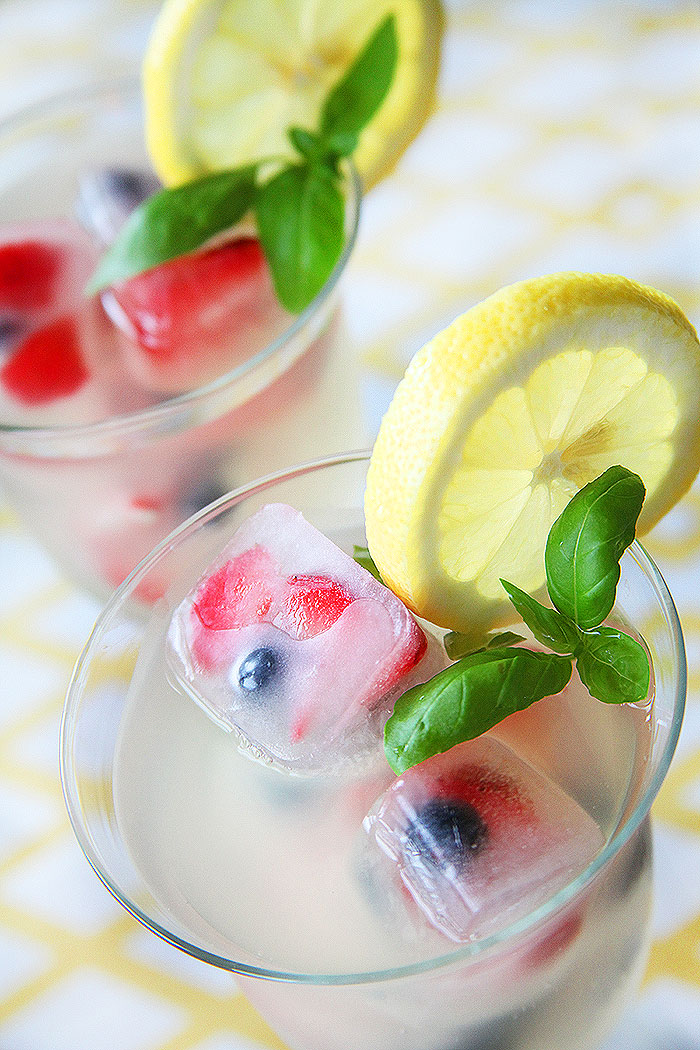
Lastly, I highly recommend you make the ice-cubes. They really add personality (and the actual blueberries) to this drink. Oh, one more thing… if you would like to save calories, you can flavor your Fresca with this lemonade. I will use 1/2 glass of lemonade and 1/2 glass of Fresca and it makes a wonderful lower calorie version of this drink. Also, if you would like to take this drink up a notch, add a shot of vodka, and you’re set! Well enough talk… here is the recipe.
Ingredients
Ice Cubes (these are very important)
2/3 cup agave
2 cups water
1 cup blueberries (I added strawberries as well)
Fresh Lemonade
2/3 cup agave
4-5 cups water
1 cup fresh squeezed lemon juice (about 5-6 lemons)
1 fresh-sliced lemon
3-6 basil springs
For Blueberry Ice Cubes
Combine agave with water. Pour into an ice cube tray. Add whole blueberries (I added strawberries too) and freeze for 3 hours or more.
For Fresh Lemonade
In a large pitcher, combine lemon juice, 4-5 cups of cold water and agave until desired sweetness is achieved. Chop 2-3 springs of basil or mash up the leaves. The goal is to get the oils out of the leaves. You may drop the chopped pieces in the lemonade. You may want to fish out the basil before serving, although I leave mine in the lemonade. Chill in the refrigerator for one hour. Serve with blueberry ice cubes, fresh lemon slices, and basil springs.
· Posted in 4th of July, Fourth of July, Fun Cocktails, Memorial Day, Parties, Recipes ·
June 27th, 2014
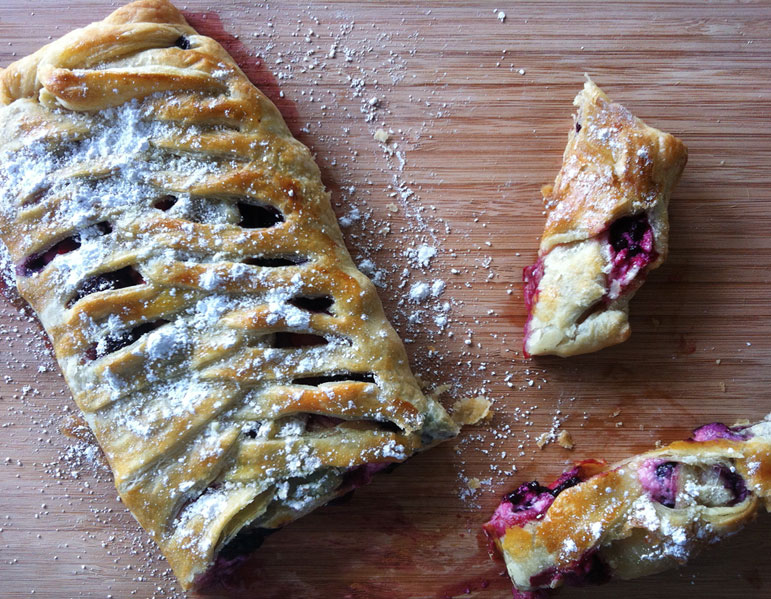
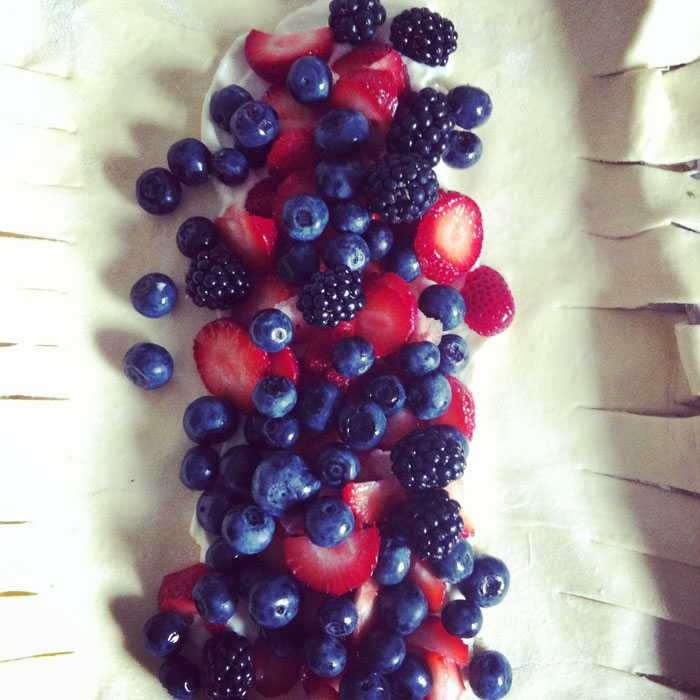
There are great recipes and then there are “trendy” great recipes. This is one of the trendiest things to do this summer… braiding and pastry puffs! I’ve watched several shows on HGTV where similar desserts have been showcased and even though braiding and pastry puffs have been done for many years (especially with meats and fish), this year, it seems to be the “thing to do”. I’m not opposed to trendy recipes… but when it’s coupled with the words “super easy” and “delicious”, it’s an absolute must for me to try. And so I did, and from the very first try, I came out with a stunning dessert that my family gobbled up within minutes. Seriously, this is a no-fail! This is wonderful to serve with whipped cream, cool-whip, or the my ultimate favorite, a scoop of ice cream (while the tart is hot!). Okay, enough with the chit chat, here’s my recipe. Also, the Pepridge Farm Puff Pastry web site has TONS of recipes, including one similar to this. A great resource if you love to bake with puff pastry.
INGREDIENTS:
1 Sheet of ready-made puff pastry dough (thawed at least 45 minutes)
2 cups of mixed berries (you can use strawberries and blueberries for the patriotic look or add blackberries and raspberries for a wild berry feel)
1 8-0z package of cream cheese (softened)
1/2 cup of sugar
1 tsp vanilla extract
1 egg (for brushing)
powdered sugar
PREPARATION
Unfold your puff pastry and roll it out a bit to make it flatter and larger. Place it on top of a well-greased baking pan.
Heat the oven to 400°F. Beat the egg and water in a small bowl with a fork.
Beat cream cheese at medium speed with an electric mixer until creamy; gradually add sugar and vanilla, beating well.
Spoon the cream cheese filling lengthwise down the center of the pastry. Then top the cream cheese filling with berries. Cut slits 1 inch apart from the 2 sides of the pastry rectangle to within 1/2 inch of the cream cheese mixture.
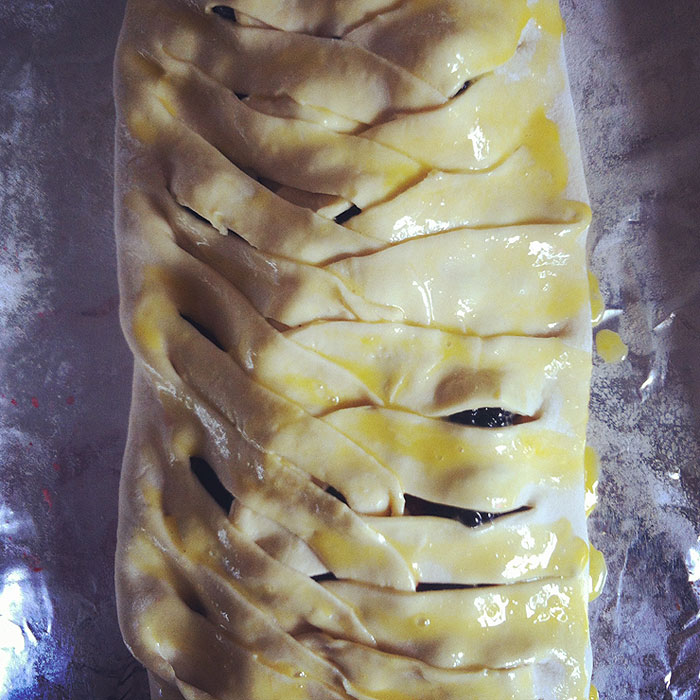
Starting at one end, fold the pastry strips over the berries and cream cheese, alternating sides, to cover cream cheese and berries. Brush the pastry with the egg mixture.
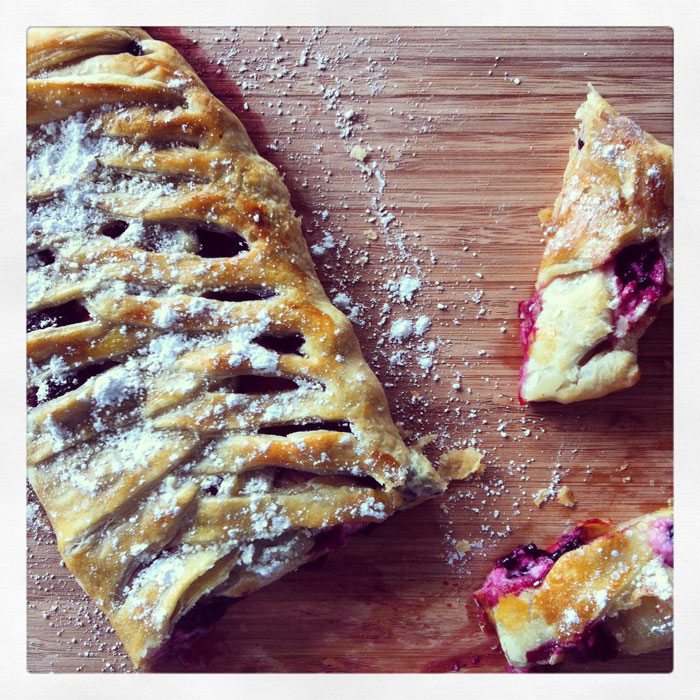
Bake for 15-25 minutes or until the pastry is golden brown. Let the pastry cool on the baking sheet on a wire rack for 20 minutes and sprinkle with powdered sugar. Enjoy with whipped cream, ice cream, or even on its own!
· Posted in 4th of July, Fourth of July, Memorial Day, Parties, Recipes ·
May 28th, 2014
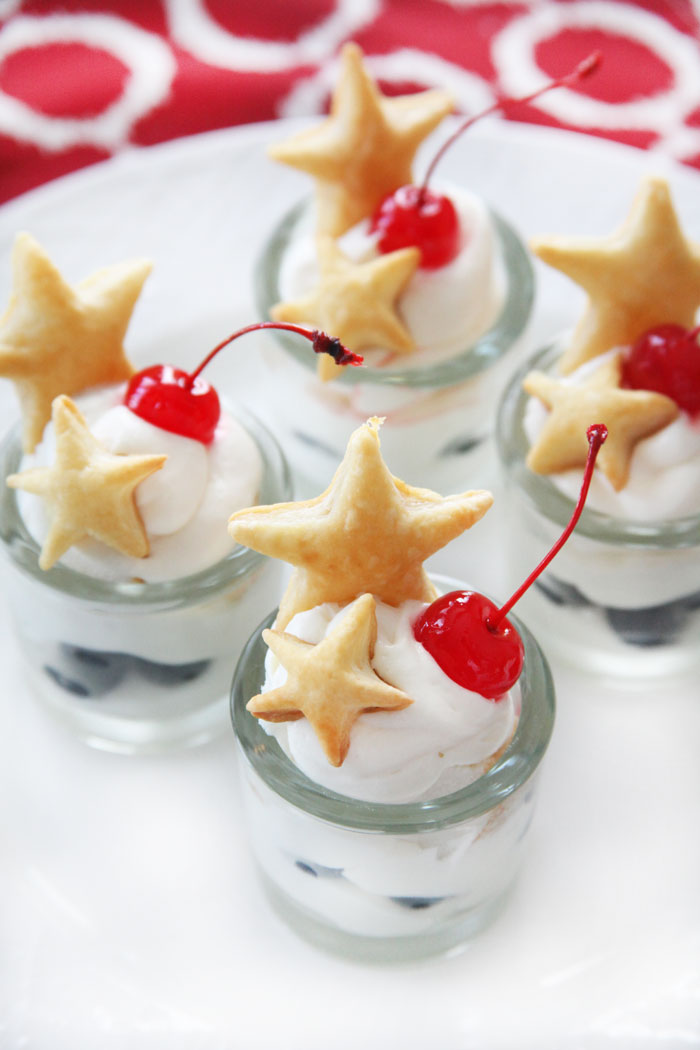
Bite sized, delicious, and of course… gorgeous!! Wait until you see these beautiful little trifles sitting on your dessert table. I highly recommend you chill them since the cream cheese filling tastes a lot better when its cold. A great “make-ahead” treat!
Ingredients
- 1 sheet puff pastry dough
- 8 oz cream cheese
- 1/2 can condensed milk (or 1/2 cup powdered sugar)
- 1 tsp vanilla extract
- 1 cup mixed berries (blueberries and strawberries)
- 1/4 slice angel food cake, cubed
Preparation
Preheat oven to 400 degrees.
Thaw the puff pastry sheet at least 45 minutes and roll out a bit to make slightly thinner, wider, and longer.
Take your cookie cutters and cut out small star shapes using as much of the dough as you can. If you are left with dough, you can roll out the dough and cut out the stars again, but I have to warn you, manipulating the puff pasty does something weird to it, so those stars will come out looking “different” then the original ones.
Bake the stars for 15-20 minutes, depending on your oven, until they are slightly brown. Make sure they do not burn. You can also brush them with egg wash to make them a bit darker on top.
Let the stars cool and set aside
In the meantime, create the cream cheese filling by beating the cream cheese at medium speed with an electric mixer until creamy; gradually add sugar and vanilla, beating well.
Spoon or pipe the cream cheese filling into a shot glass. I would highly recommend you “pipe” the cream cheese into the glass, it just makes it look better. If you don’t have a piping bag, just use a sandwich bag with a whole in it. That is how I made mine. Start piping in layers. First, pipe in a bit of cream cheese, top off with berries, then pipe in a bit more, add a few cubes of angel food cake, and top off with more cream cheese filling. Then add a few small puff pastry stars and a red maraschino or fresh cherry. You can also use berries if you instead of cherries, if you like.
· Posted in 4th of July, Fourth of July, Memorial Day, Recipes ·
May 22nd, 2014
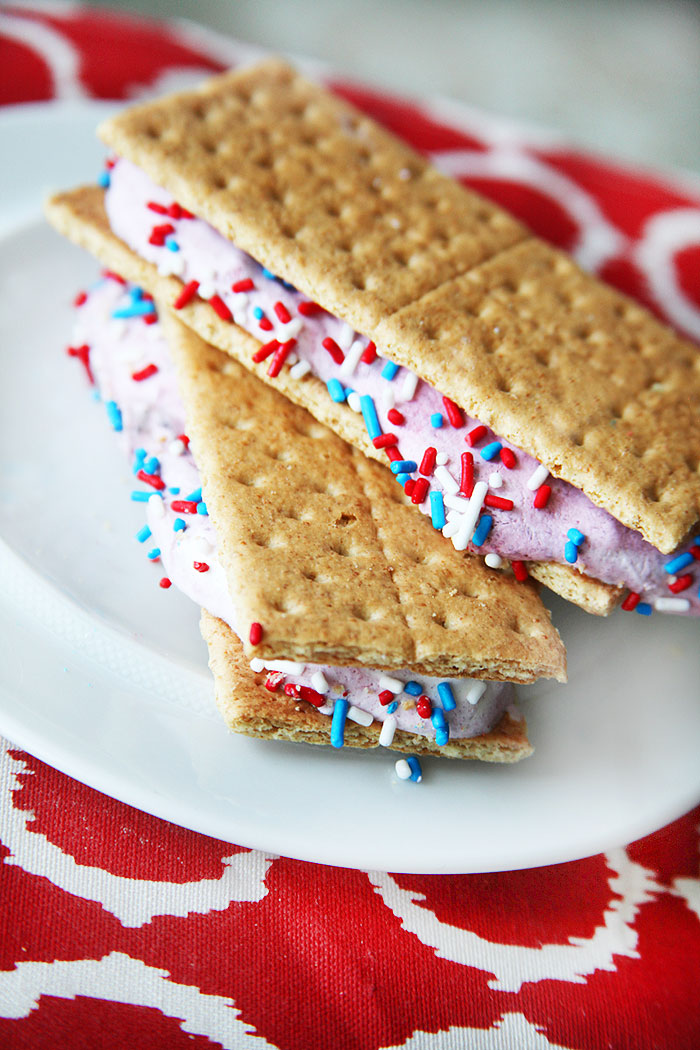
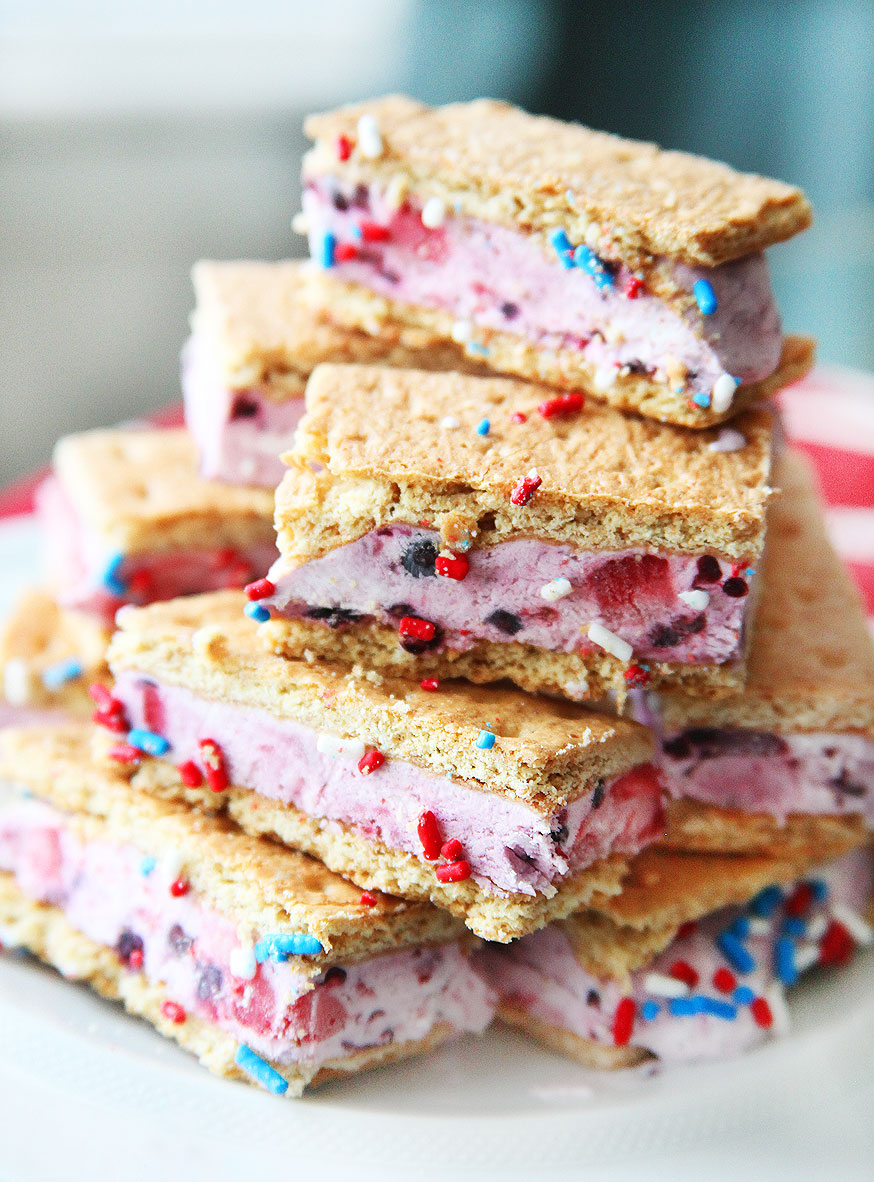
When I find a great recipe, I don’t hesitate for a moment to try it. Here’s a recipe I found on the box of Honey Maid graham crackers. I LOVE ice cream sandwiches, but let’s be honest, they are not the healthiest of choices. These however, are a winner! You’ll be using fresh berries, banana, yogurt, graham crackers, and fat free whipped topping. If you want to cut even more calories, omit the banana, these sandwiches will still come out wonderfully!! Pictured are the sandwiches “whole” or cut into smaller pieces, according to the perforations on the crackers.
Ingredients
- 10-1/2 HONEY MAID Honey Grahams (you can use the whole cracker or broken into quarters (42 rectangles)
- 1/2 cup sliced fresh strawberries
- 1/2 cup chopped bananas
- 1/2 cup cup blueberries and/or blackberries
- 1 cup vanilla nonfat Greek-style yogurt
- 1 cup (or more) thawed frozen reduced-fat whipped topping
Preparation
LINE 9-inch square pan with foil or parchment paper, with ends of foil extending over sides. Arrange half the graham pieces, in 3 rows of 7 pieces each, on bottom of pan. Or, you can use the whole cracker and arrange them into three rows of 3.
PULSE fruits in blender just until blended. (Some chunks should remain.) Alternatively, you can just mash up the fruit in a bowl, this will give the sandwiches large chunks of fruit (this is the method my family prefers). Spoon fruit mixture into medium bowl; stir in yogurt and whipped topping. Spread over graham pieces in prepared pan. Top with remaining graham pieces, aligning to match placement of graham pieces on bottom layer.
FREEZE 4 hours. Use foil handles to remove dessert from pan; cut between grahams to form 21 bars (or eat the whole thing). If you would like to add sprinkles, let stand 2-5 minutes so moisture can cover the yogurt, this way the sprinkles will stick to the yogurt.
Presentation
When cut-up, this makes 21 servings at 50 calories per serving. With 4gm of sugar and 9gm of carbs.
· Posted in 4th of July, Decadent Desserts, Fourth of July, Guilt Free Party Snacks, Parties, Recipes ·
May 17th, 2014
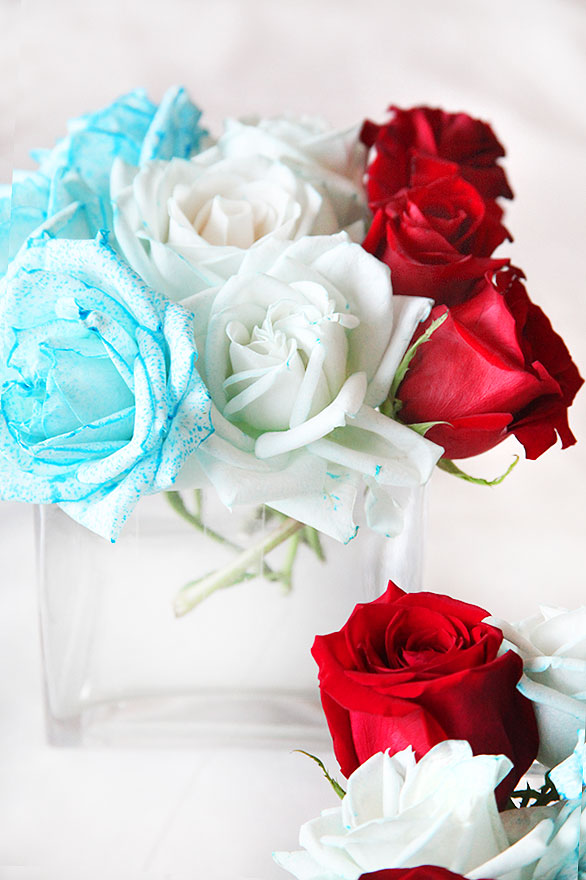
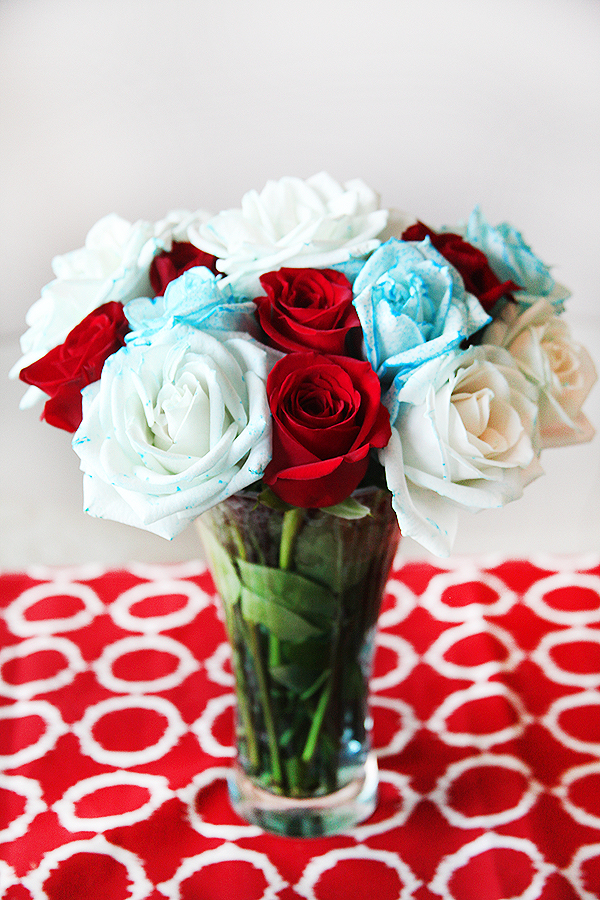
Looking for a blue flower and just can’t find it? Here’s the solution. Stem dye your flowers to get the color you want! The color that I wanted was blue since I was trying to come up with a pretty 4th of July centerpiece. I used roses, one of the easiest flowers to stem dye. And here is how I did it.
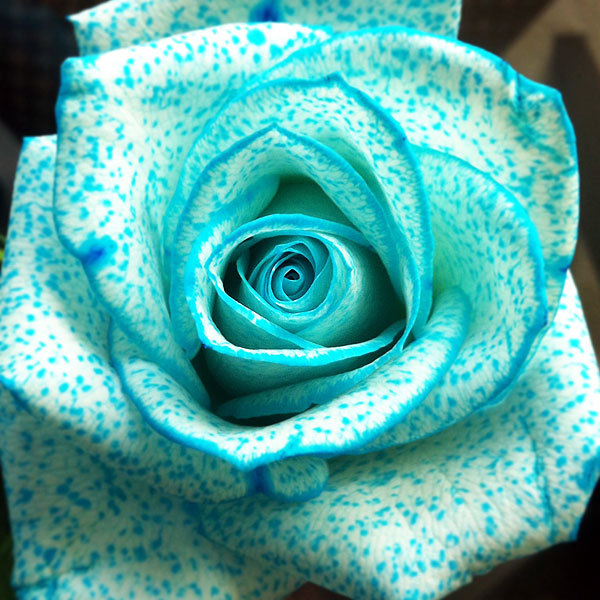
Purchase white roses. Fill a vase, which will accommodate the number of roses you purchased without crowding them, with a nice amount of water. Place 10, 20, or more drops of food coloring in the water. The goal is to make your water very dark with the blue food coloring… as dark as you can get it. Cut the stems of your roses to the length you would like to use in your centerpiece. Place the white roses inside the blue water and wait about 24 hours. If you start seeing blue coloring on the rim of your rose petals, pat yourself on the back because things are progressing just as you want them to! Within 24 hours, you should have a beautiful blue rose.
Here is the progression of how my roses went from white to blueish. As you can see, within hours, my roses starting getting the blue dye on the outer rims of their petals and then, they started to get bluer and bluer.
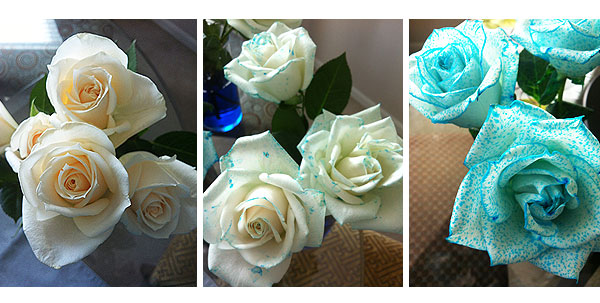
Just a warning, the rose will never become fully blue, just a fun speckled look that will still show some of the original white. The roses kind of look like they have blue freckles.
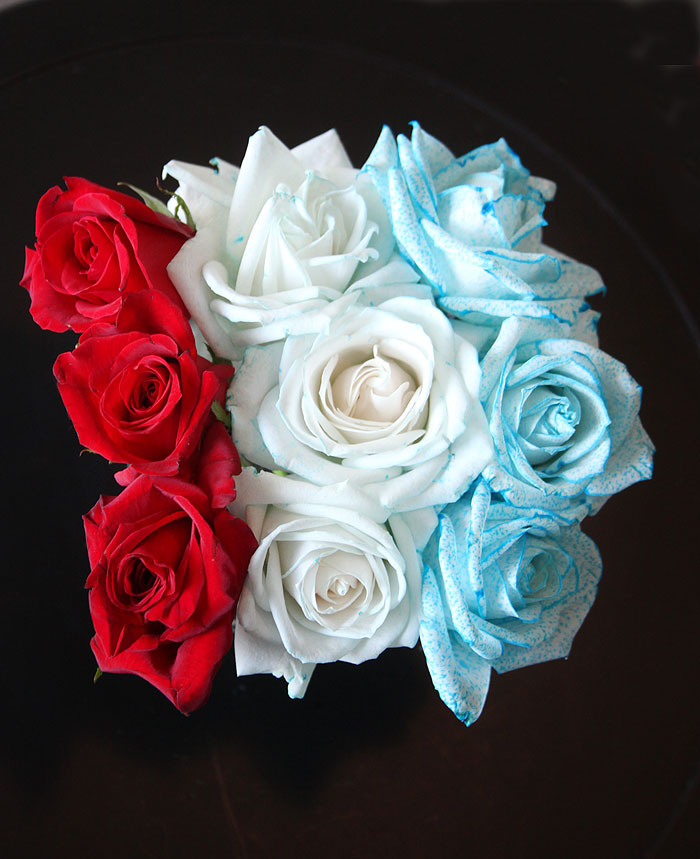
You can also get creative and use some roses that have become mostly blue with roses that only have a little bit of blue on the rims of their petals. This is what I did for my centerpieces. Most importantly use food coloring (gel or liquid) ONLY… no clothes dye or other dyes. They will just kill the flowers.
Of course, last but not least, enjoy all the wonderful comments you will get from your work and your beautiful arrangement.
· Posted in 4th of July, Crafts, Flowers, Fourth of July ·
|
|
|