November 1st, 2013
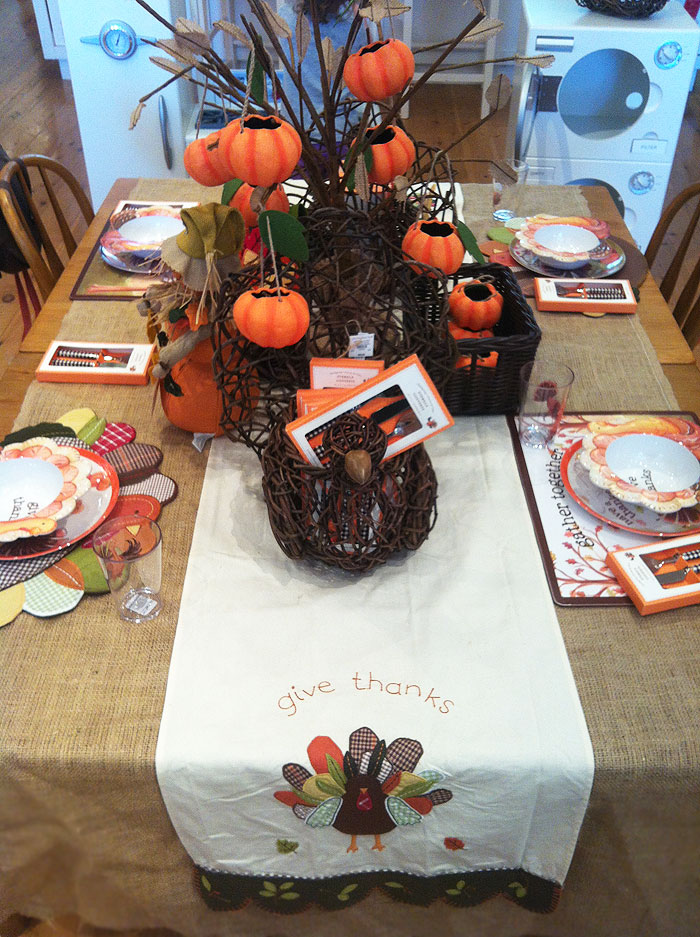
Well, it’s that time again!! Time to decorate the mantle, the front porch, the trees, and of course, the dining table! This is THE prime time for creative tablescapes and I always have my cell phone charged and ready to snap that perfect tablescape idea! These tables were photographed at Pottery Barn Kids. I know that whatever they show off at their store, will likely make it into many homes in America. So here are their favorite picks for kids’ tablescape ideas!
Love this kid’s Thanksgiving table! Especially since you can re-use the Halloween pumpkins in the centerpiece.
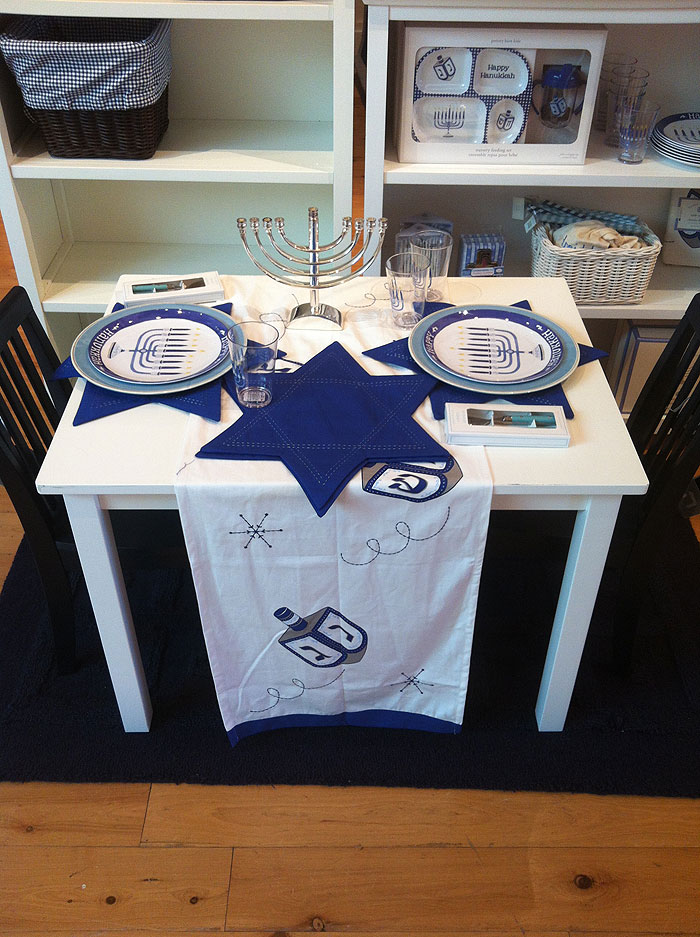
Who wouldn’t want to sit at this Hanukkah table?!
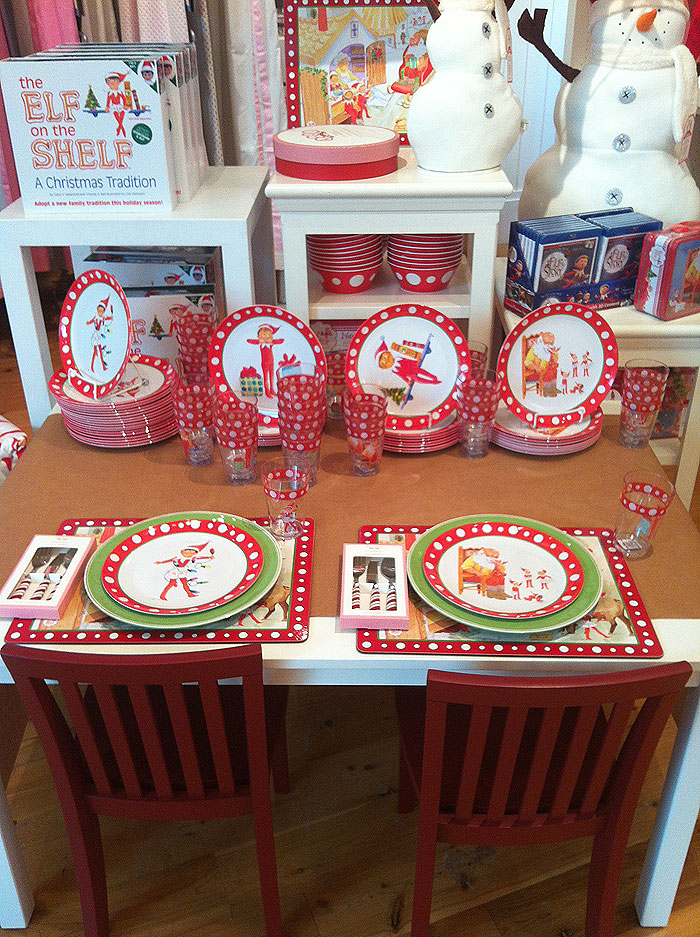
My kids wait with such anticipation for their Elf On A Shelf , this would be perfect for them.
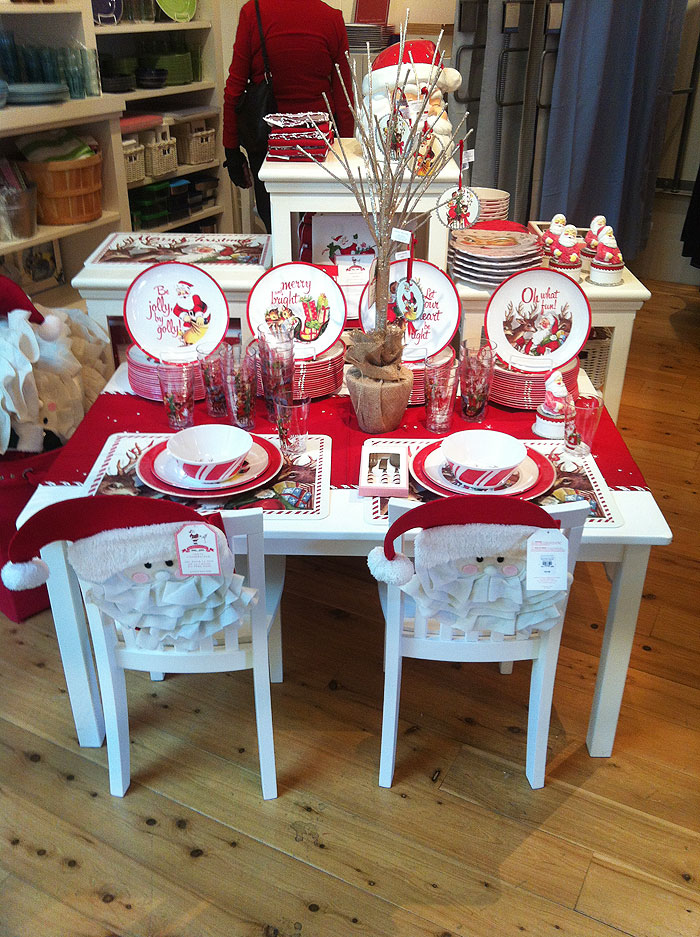
The santa chair covers are super sweet for this kids’ Christmas table!
· Posted in Christmas, Table Decore, Uncategorized ·
October 28th, 2013
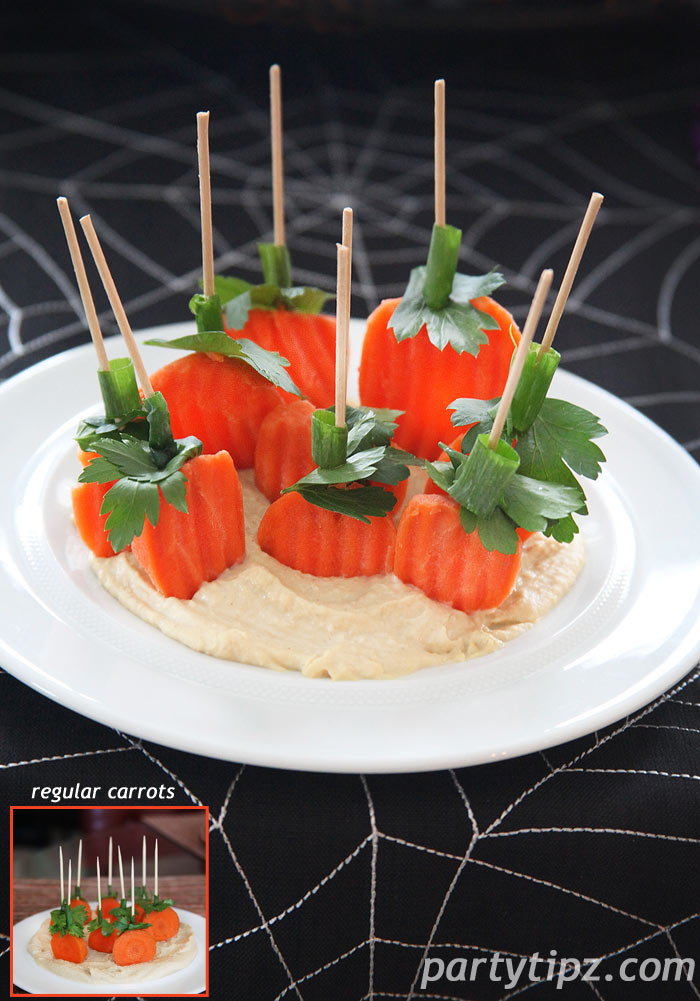
Last year I posted a wonderful appetizer…. Pumpkin Patch Hummus and Carrot Appetizer… it has been re-pinned on Pinterest almost 400 times. I can’t take any credit for it, I too got it from another pinner and thought I would try it. It turned out great, so I photographed it and shared it with everyone else. Don’t you love Pinterest???!!!
However, this year I thought of an alternate version. The taste and “concept” are still the same… you would use hummus, toothpicks, green onion, and parsley. The one thing that I did differently is that I used pre-cut carrots which are already sliced and bagged (available where baby carrots are sold). They have those fabulous ridges that look very much like the ridges on a pumpkin. Instead of buying regular carrots and cutting them, I was really happy with how the pre-cut ridged carrots worked out. They won’t be as uniform and round as the carrots you would cut yourself, but neither are pumpkins. So this may be the perfect option for someone who would like to take a short-cut but still have a fabulous appetizer!
· Posted in Uncategorized ·
October 28th, 2013
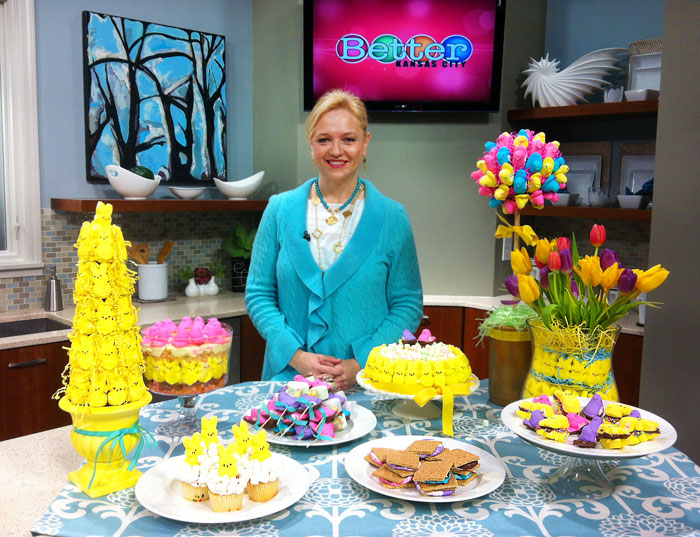
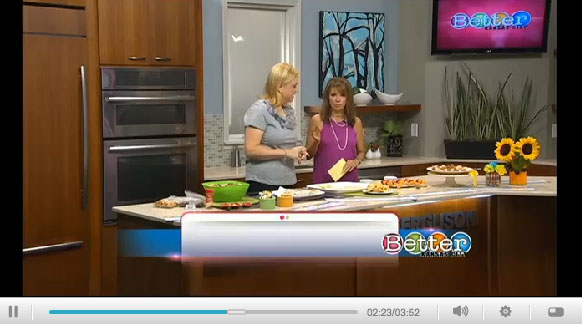
I had a great time showing off my fun PEEPS projects on Better Kansas City. To see the video segment, CLICK HERE

For some, PEEPS symbolize Easter, spring, and pure happiness! So whether you love them or hate them, these marshmallow molded sugar coated candies are one of the most popular treats in the United States! Over 4 million are created each day and 1 billion are made every year! Best of all, there is an endless variety of ways you can use them for snacking, baking, and even decorating. Here are my five favorite (super easy) PEEPS projects and the secrets to making them perfect!
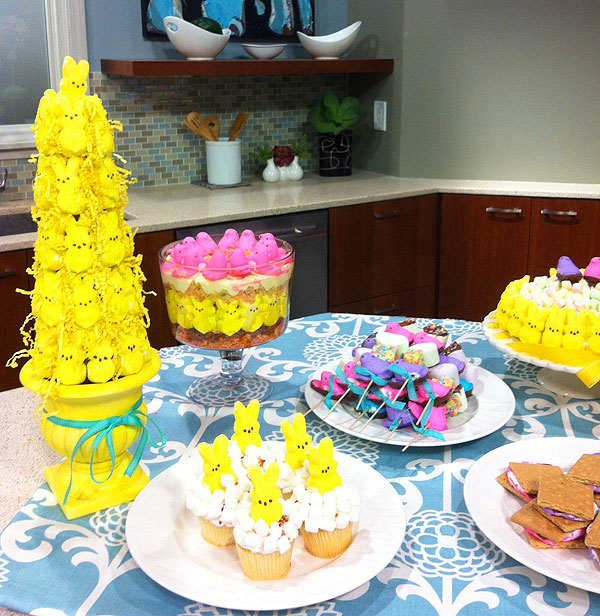
1. Secret #1 – when planning to hot glue your PEEPS, “CURE” them. Curing is another way of saying, let the Peeps dry out. As they dry, they harden and are much easier to work with when you are using any type of adhesive. I created two PEEPS TOPIARIES and cured my PEEPS for two weeks. Then, I purchased topiary forms and hot glued the PEEPS directly on them. Just be careful where you start and stop and make sure the seam is in one place, preferably the back. And yes, with a little direction, this can be a great project to do with the kids.
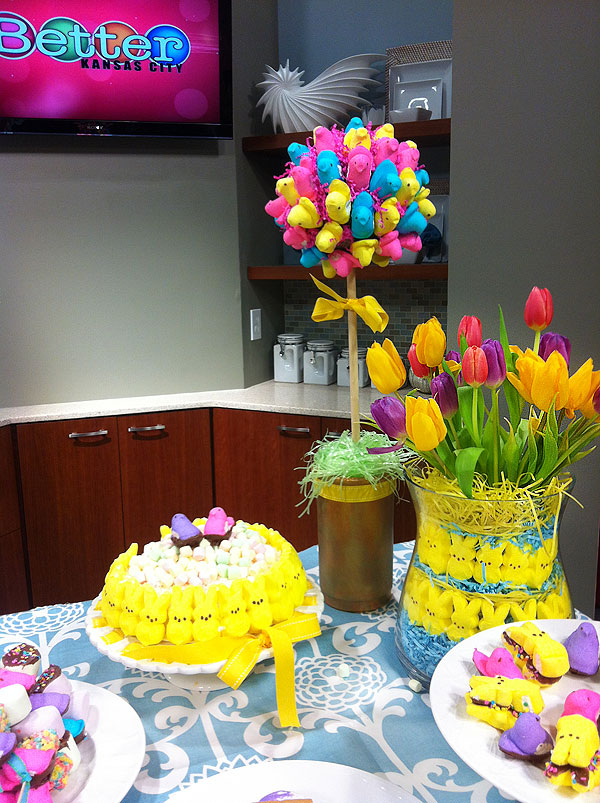
2. Secret #2 – Bunny PEEPS look great Layered! A great tip is to use the paper grass instead of jellybeans or other candies to fill in spaces between layers. It is a lot more affordable and looks great! I created a layered PEEPS CENTERPIECE (pictured above) with a “layered” look that used PEEPS and paper grass. The PEEPS bunnies are perfect for this project, because unlike the doves or chicks, which are rounded, the bunnies are nice and flat. This wonderful shape makes them perfect to layer on cakes, in centerpieces, and even wreaths.
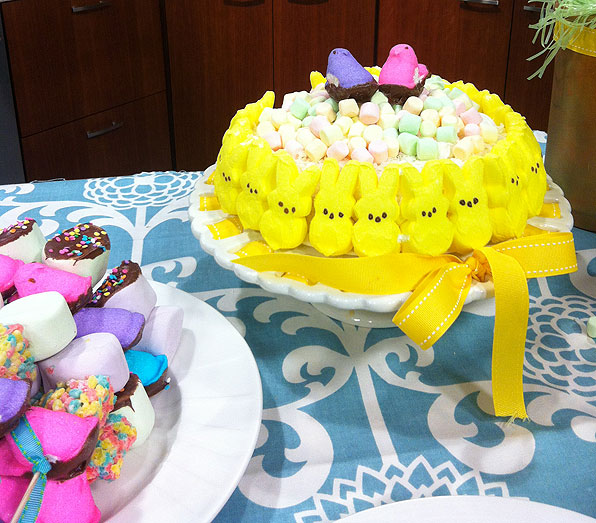
3. Secret #3 – When using for edible projects, make sure the PEEPS are as fresh as possible by embellishing your desserts right before serving them. One of the easiest and most popular projects is a PEEPS CAKE. Simply make your favorite cake in a round pan (or purchase one at the store) and embellish with PEEPS. For many, PEEPS are best when they are soft and fresh, so decorate your cake a few minutes before serving. As many of us know, Peeps harden when they are exposed to air, so the less time they are out of the package, the softer they are.
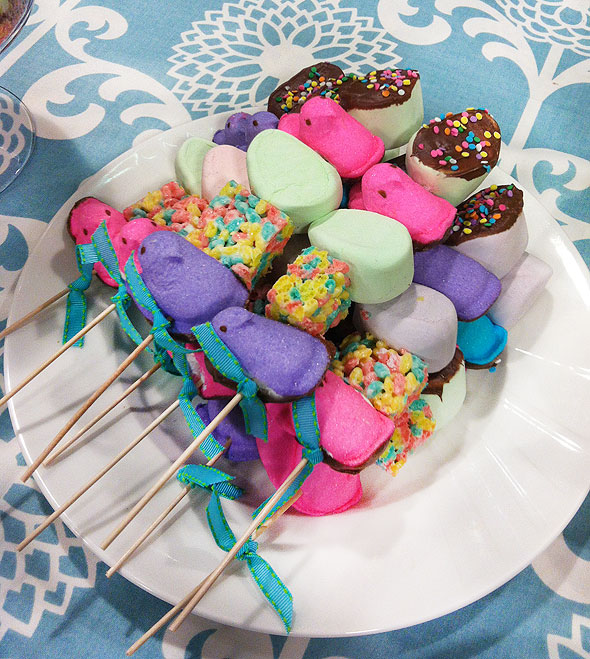
Another delicious project where I recommend you serve soft PEEPS are these wonderful PEEP-kabobs. They are made with Little Debbie’s Easter marshmallow treats, and chocolate covered marshmallow eggs. If you have some extra time, dip your PEEPS in chocolate and give the PEEPS some drying time so the chocolate can harden. I use the candy chocolates you can buy at any craft supply store that has a baking section. Or check your grocery store, now you can purchase ready-made chocolate dipped PEEPS. Absolutely DELICIOUS!!!
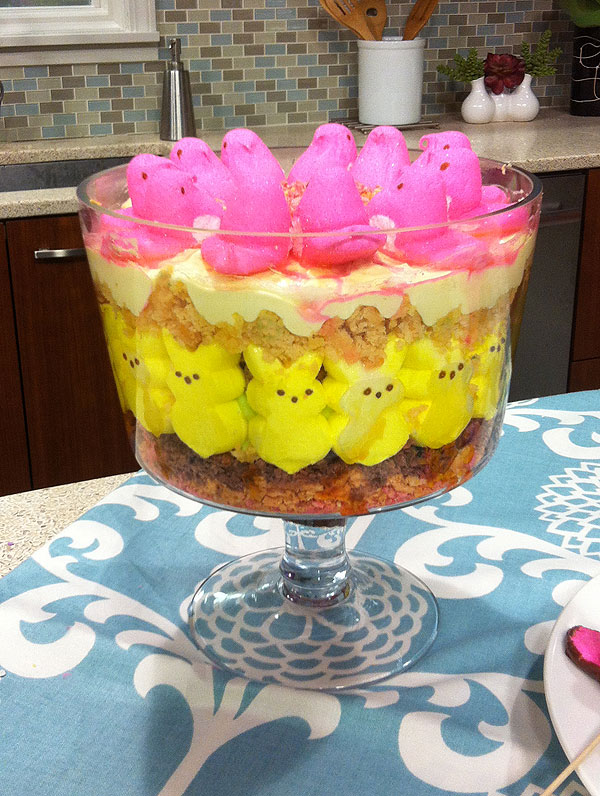
Secret #4 – PEEPS are indestructible! Peeps are famous for their 2 year shelf life and indestructibility. Scientists at Emory University could not dissolve PEEPS in water, sulfuric acid, or sodium hydroxide. What that means for the PEEPS lover is that they can submerge their PEEPS in practically anything without the fear of them being destroyed. I got excited about the possibilities and created this PEEPS TRIFLE – The trifle was super easy. My bottom layer consisted of sugar wafers. I layered the PEEPS around my trifle bowl directly on the wafers. My second layer was Lemon or Lime pudding combined with cool whip. My third layer was cake but I also highly recommend using breakfast waffles, they are less sweet and when saturated with the pudding, are delicious!! My third layer was pudding and cool whip. My fourth layer was more cake (or breakfast waffles). My fifth layer was more pudding. And my final layer was the pink Peeps on top. If you would like a slightly less sinful version, use sugar-free pudding and incorporate the breakfast waffles instead of the cake and sugar wafers. Also, give your Trifle some time in the refrigerator, anywhere from 4 – 24 hours. All the layers have time to “marry” and soak up each other’s goodness.
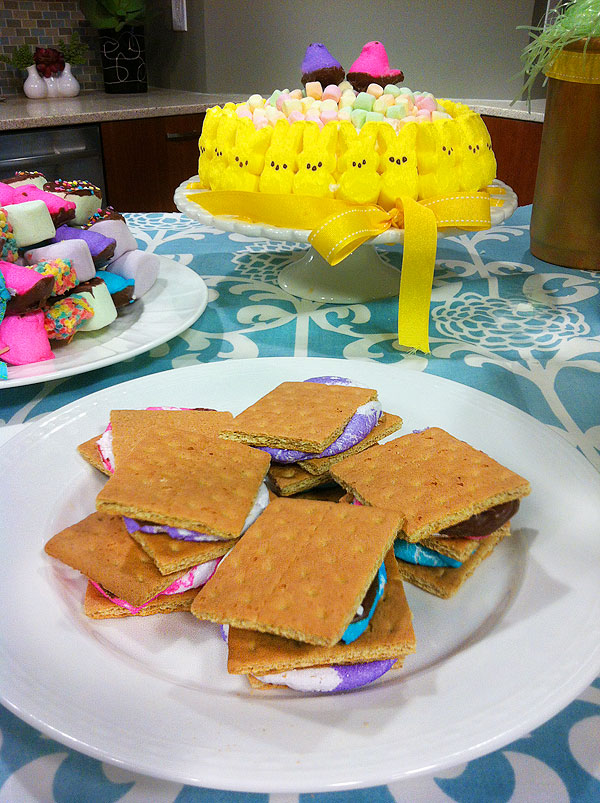
Another famous dessert for Easter are the PEEPS S’mores. It’s fun to watch the PEEPS morph in the microwave and once you put them in between two graham crackers… well… you best clear the way, because there will be a mad stampede to the dessert table! The PEEPS S’mores are really simple to create. I dipped my PEEPS in chocolate the night before. Right before I served them, I placed one on top of a graham cracker, popped in the microwave for about 15 seconds and watch them do their thing. Once I felt they were ready, I took them out of the microwave and placed another graham cracker on top. It turns out perfect every time!!!
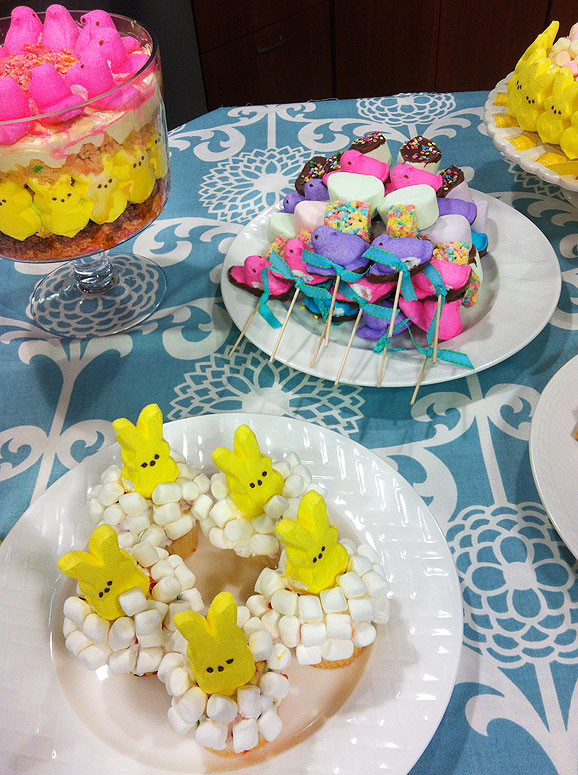
5. Secret #5 – PEEPS are cute when you “stage” them! You may or may not be aware that there are over 60 national contests that take place every year involving PEEPS one way or another. Many of them are Diorama contests. The Dioramas show PEEPS doing all sorts of crazy things (Star Treck scenes, Harry Potter, scenes, etc.) Just google “PEEPS Dioramas” and you will have a plethora of funny things to look at. And if you want to stage your own PEEPS, here are some PEEPS bubble bath cupcakes that take just a few minutes to put together. Your kids will love doing this. Simply make cupcakes and frost them with white icing (or purchase ready made cupcakes at the store with white icing). Put a PEEP on a toothpick and stick the toothpick and peep into the cupcake. Then, open a bag of mini-marshmallows and decorate your heart out. Super simple and incredibly adorable!!
· Posted in Uncategorized ·
October 11th, 2013
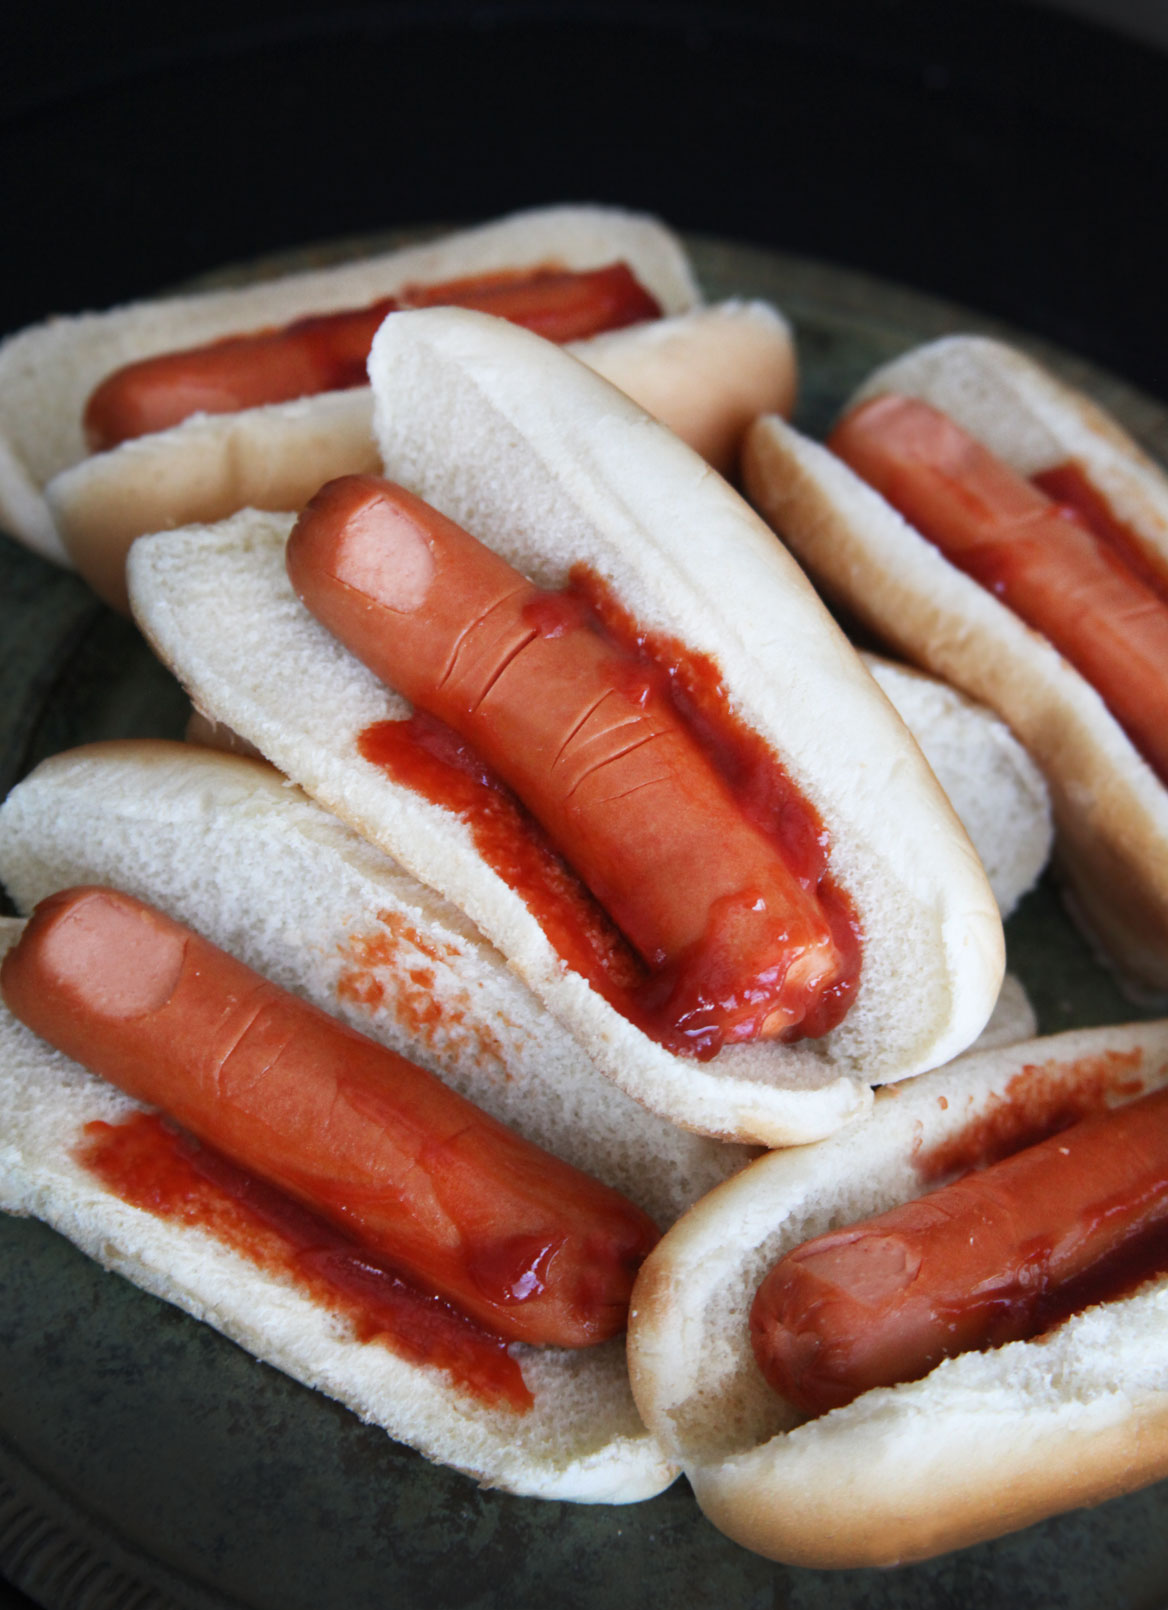
Yes, yes, I know it’s gross… but it’s Halloween… right??? And as your kids will get older, fun cupcakes, gummy worms, and cute Halloween popsicles, just won’t do anymore! This year, my 10 year old and I came up with “Severed fingers in a bun”. We saw so many “finger foods” on Pinterest, that we thought we would try something ourselves. If this is something you think your kids or teenagers would like for Halloween, it’s probably the easiest thing we’ve ever done! Just prepare hot dogs as you normally would, then cut out s thin section to look like a nail bed. Then, make a few cuts with a knife to represent the knuckles. Last but not least, place the hot dogs in a bun already doused with ketchup. It’s even grosser if you decide to grill the hot dogs… need I say more?
· Posted in Halloween, Recipes, Uncategorized ·
April 27th, 2013
Well, it’s back to school in my world! It’s always a bittersweet time, I miss the boys terribly but excited to finally have some time to get reconnected with my own projects. This fall, there is so much inspiration and I am constantly coming up with ideas. It probably doesn’t help that I practically live on Pinterest! That web site has been such a gift to me and I think anyone that enjoys being creative.
Yesterday, I had a TV segment on Channel 5 talking about fun ways to transform party eats into delicious and easy after-school snacks. I already knew which recipes I wanted to use, but I wasn’t sure what type of visual props I needed. Plus, I try to do “double duty” with my props, hoping that I can gift them after the show instead of simply throwing them out. Since I needed a teacher’s gift anyway, I thought creating something that could hold some flowers would be the perfect prop!
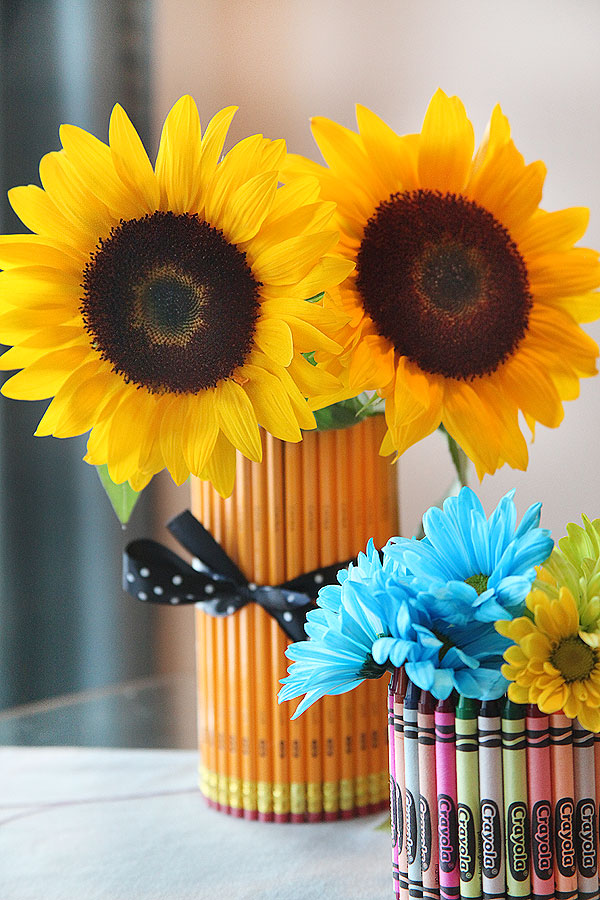
I set off to the local dollar store and purchased the cylinder vase and three packs of pencils (16 pencils per pack) for my pencil vase. I also purchased the smaller cylinder vase at the dollar store but purchased a large (64 count) box of crayons at Walmart for my crayon vase. The total cost of my project was $8. This includes the two vases, pencils, and crayons. I had the ribbon left over from another project and the cost of the flowers is not included. But I can assure you, the flowers will be the most expensive part of this project, unless of course, you have your own garden (lucky you!).
I hot-glued the pencils around the tall cylinder vase and did the same with the crayons around the smaller cylinder vase. I added the black with white polka-dots ribbon to add more interest. Filled the vases with water and arranged my flowers. The flowers looked great on the TV set (I included a photo below from my TV segment, the flowers are on the far right). I will be giving this to my son’s teacher in a couple of days and I am thrilled how it turned out. This is a NO FAIL craft project, so do not hesitate to try it!
· Posted in Uncategorized ·
April 25th, 2013
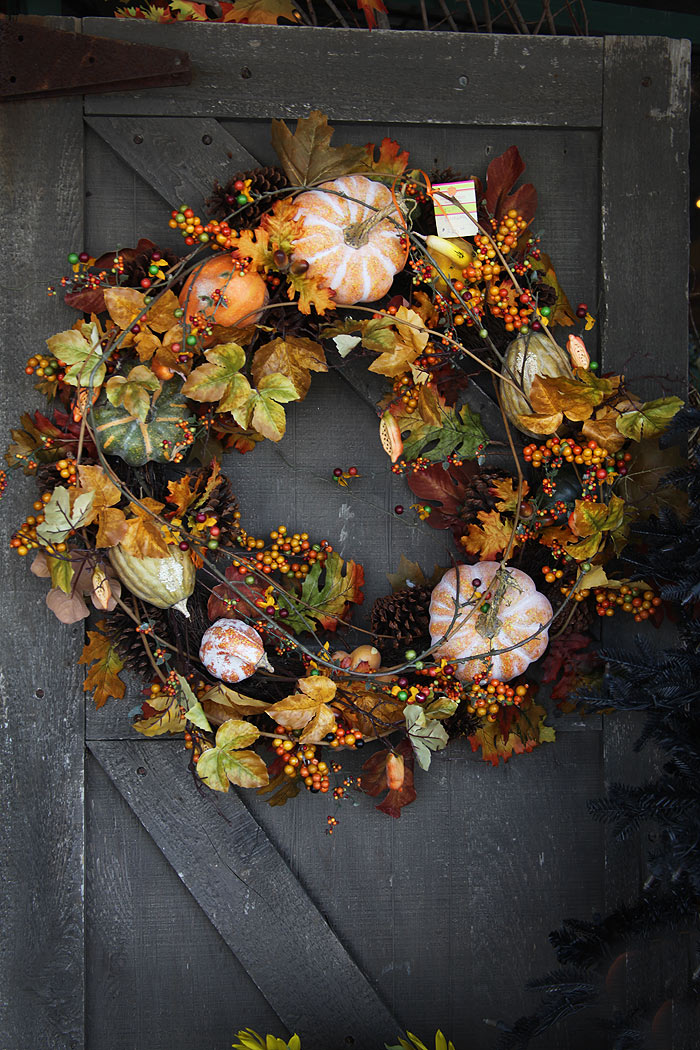
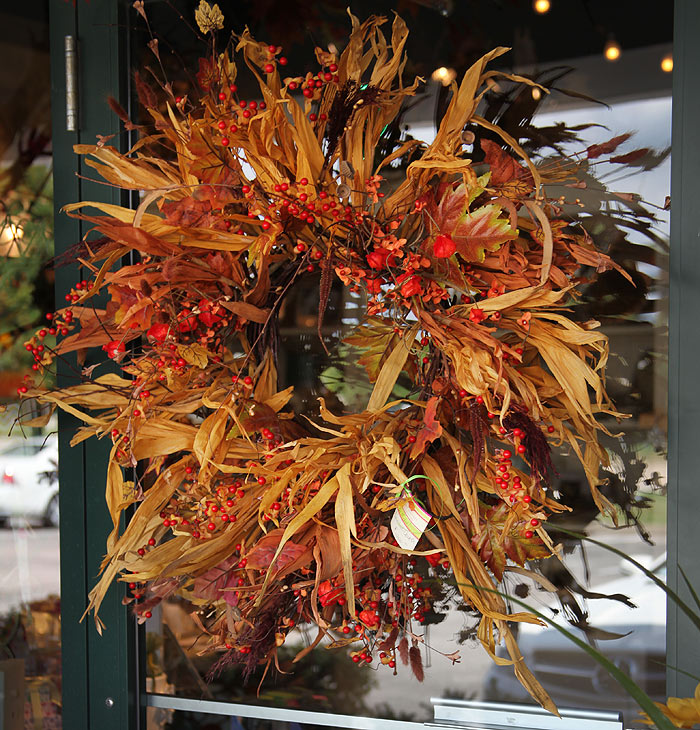
Yes, I love fall… and according to many different studies and surveys, so do many others. So, it’s no wonder we want to create an atmosphere that is cozy and comfortable as soon as fall arrives. I’m tempted to buy new pillows, candles, diffusers, and other accessories that reflect fall. My kitchen usually gets some type of a makeover with fall inspired pieces and of course, recipes! I live on Pinterest and pin as much inspiration as I can, even though I’ll just probably try one or two of what I pin (just being honest). So, it’s no surprise that one of my favorite activities is going to local stores to see their beautiful displays. My favorite store is Mary Tuttle’s which is located in Chesterfield, Missouri, a suburb in St. Louis. It’s definitely THE destination for any type of interior design inspiration. They are still very “old-school” in their design philosophy, where “more is more” and I have to admit, sometimes, I’m partial to “more”! Each fall, the in-house floral designers create a plethora of beautiful wreaths that just take my breath away! Many times, you can meet the designers on the spot and know exactly who created your masterpiece. Additionally, they will also create some custom wreaths, based on the size of your door and the fall elements you would like to incorporate. Needless to say, it’s one of my favorite places to visit along with William Sonoma and Pottery Barn. If you are in the area and have time to visit them, you should!
One of my favorite silk wreaths… so rustic!
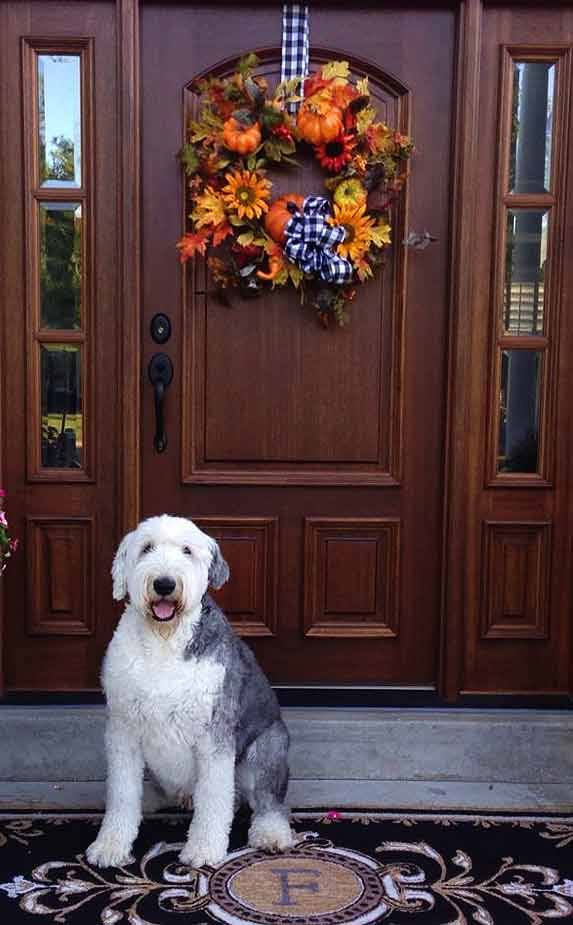
Love how great this wreath stands out from the door, the gingham ribbon, and the monogrammed rug… the doggie is adorable too!
Pumpkins, gourds, berries, just love everything about this wreath! Perfect for hanging on a Window

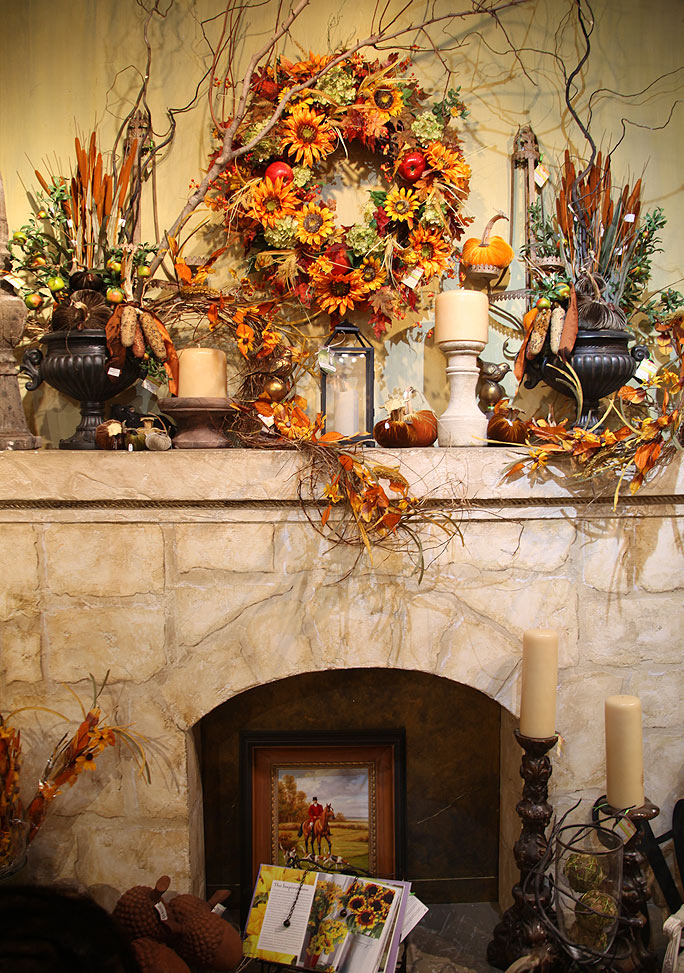
This Mantle is the a great example of the “more is more” design philosophy of Mary Tuttle’s!
 www.punapharmacy.com www.punapharmacy.com
This wreath is a perfect fusion of fall and winter elements… can easily transition into the holiday season!
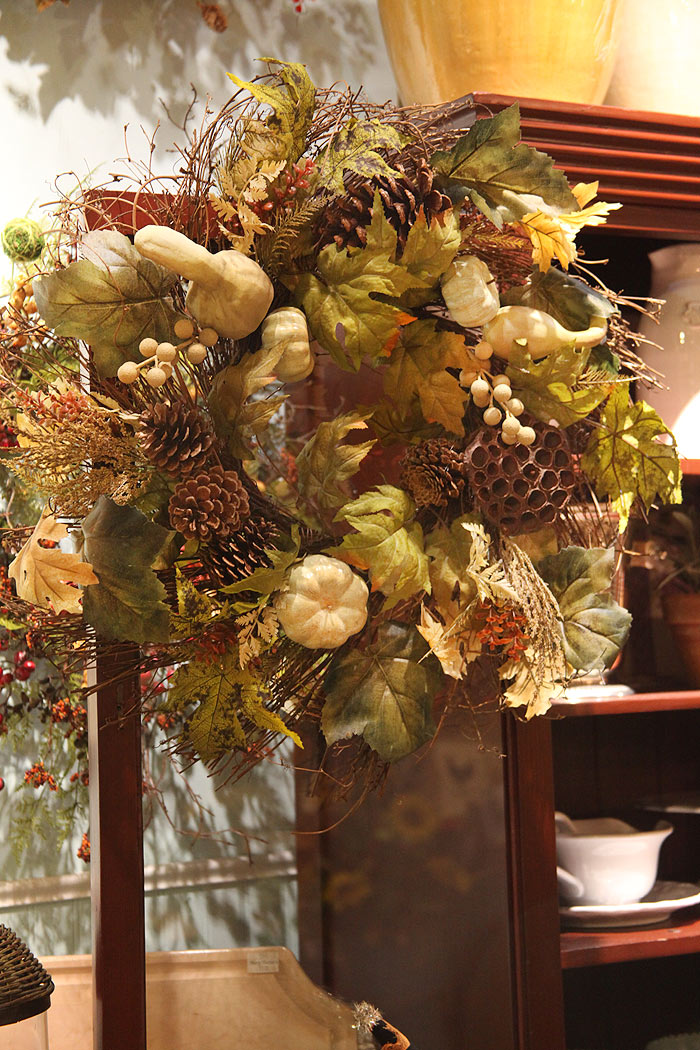
This wreath is perfect if you are looking for something bushy and significant… perfect for large doors or doors with a lot of design elements.
· Posted in Uncategorized ·
April 25th, 2013
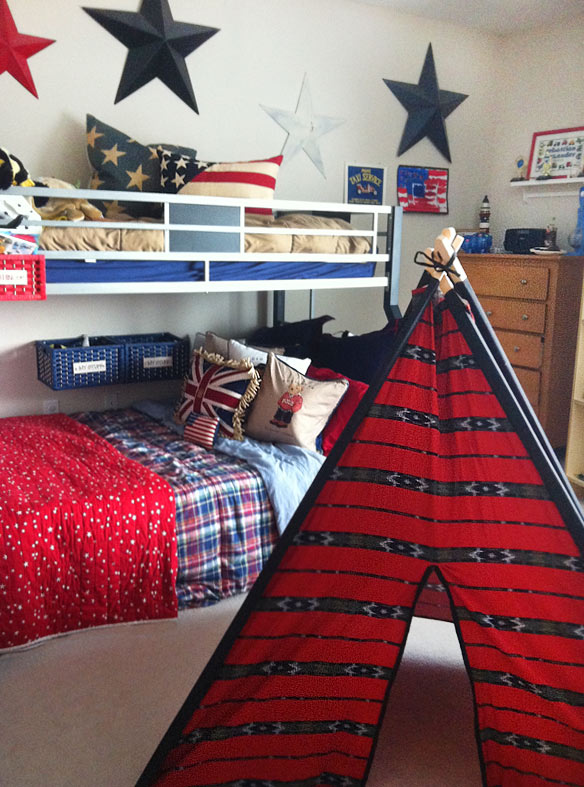
For anyone out there who loves a great bargain, you would be high-fiving me right now! When I found this wonderful Teepee for my boy’s room, I got all kinds of excited!! The perfect place for a good book, pretend play, or just to get away from the world! For anyone who loves to design and entertain, “thrifting” and “garage saling” are a great way to accumulate treasures without breaking the bank. My boys are going to love playing in this teepee and I’m going to love passing it on to another child when they have outgrown it!
· Posted in Uncategorized ·
April 9th, 2013
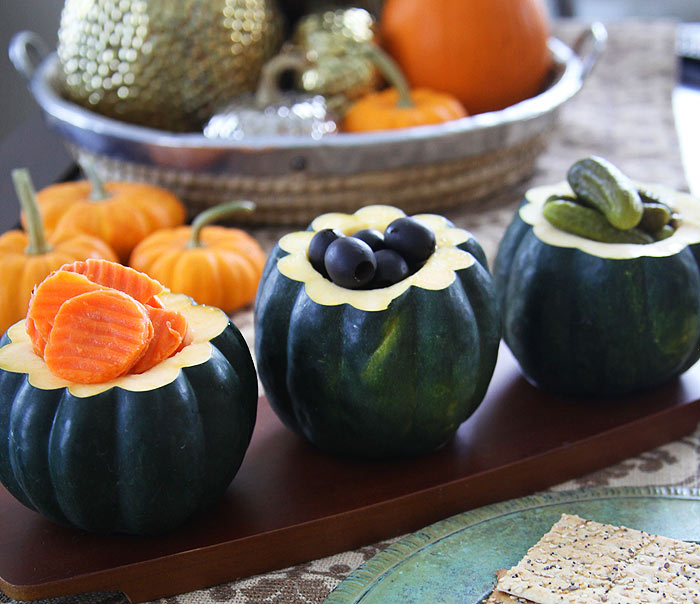
This is truly one of my favorite fall entertaining ideas. Not much to do except cut an acorn squash, scoop out the seeds, and serve anything your heart desires in it. They look so beautiful as a set of three. Or, you can create a whole gourd arrangement with different sized gourds and fill them with dips, vegetables, baby corn, or anything you love. I guarantee, it will be the talk of your table!
· Posted in Uncategorized ·
February 27th, 2013
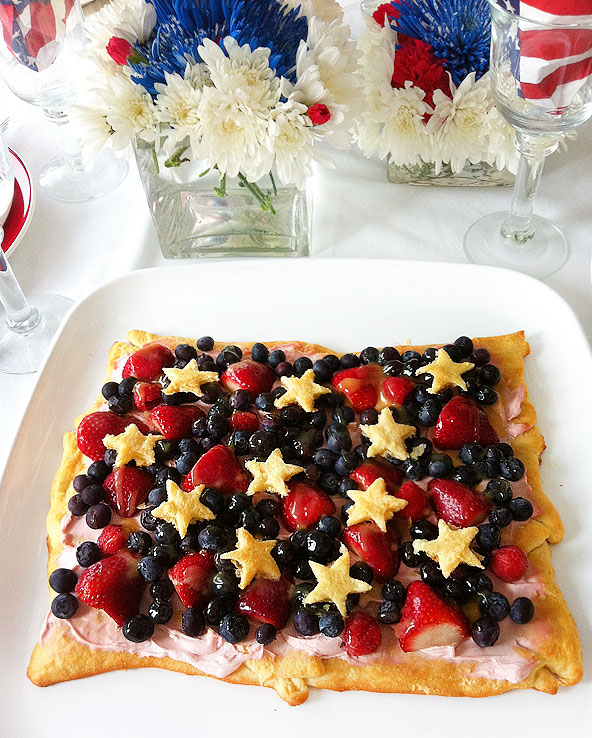
This Memorial Day I hosted a brunch for a lovely couple who came to visit us from St. Louis. I made a Russian/American menu for the main course but my most favorite dishes were the desserts! I scoured Pinterest and found some great inspiration. Here is a “Patriotic Torte” which I whipped up after seeing a few on Pinterest. I loved how all the ingredients worked well together. If you would like to try something different and substitute any of the ingredients, I recommend using puff pastry instead of croissants and yogurt instead of cream cheese. I’ll be trying both of these substitutions when I make this dessert again for the Fourth of July! Here’s the recipe:
Ingredients
- 2 cans of croissant dough (or you can use puff pastry)
- 2 small tubs Strawberry or Blueberry cream cheese
- 1 carton Strawberries
- 1 carton Blueberries
- 1 jar Prepared Lemon Curd (available at any grocery store with the jams and preserves)
Preparation
Roll out the croissant dough but do not take apart. Instead, pinch the seams together so that you can create a solid bed of croissant dough as your “crust”. Add the dough from the second can to the crust but reserve 1/4 of the dough to cut out your stars. The other 3/4 of the dough can be added to create the crust. Your end result should be a rectangular croissant crust.With a small or large cookie cutter, cut out the stars and set aside.Bake the crust and the stars according to package directions.Once ready, remove the crust from the oven and let cool.
Once the crust is cool, spread all of the strawberry or blueberry cream cheese on the crust.
Cut strawberries in half and place on top of the cream cheese. Then add the blueberries.
Heat lemon curd in a sauce pan and add about 1/4 cup of water so it liquifies and becomes a thinner sauce. Once it turns into liquid, sprinkle all over the top of the strawberries and blueberries. For best results, brush all the fruit with the liquid lemon curd so they have a shiny appearance.
Presentation
Once the torte cools, you can serve it. However, it is even more delicious 1-2 days after you make it! This is a perfect recipe for preparing “ahead”!
· Posted in Uncategorized ·
February 27th, 2013
Do you know that A Super Bowl Party is the second biggest eating day of the year, right behind Thanksgiving? But unlike Thanksgiving, Super Bowl parties focus on a menu filled with heart-stopping junkfood and an endless supply of alcohol. It’s no wonder that most people consume their entire day’s caloric intake in just one Superbowl meal.
But as with all parties, your guests expect to be indulged, not put on a diet. And since for some guests, the food may be even more important than the game itself, it’s important not to bring out the tofu sliders and kale chips and instead, make some quick alterations to the indulgent treats your guests have come to love.
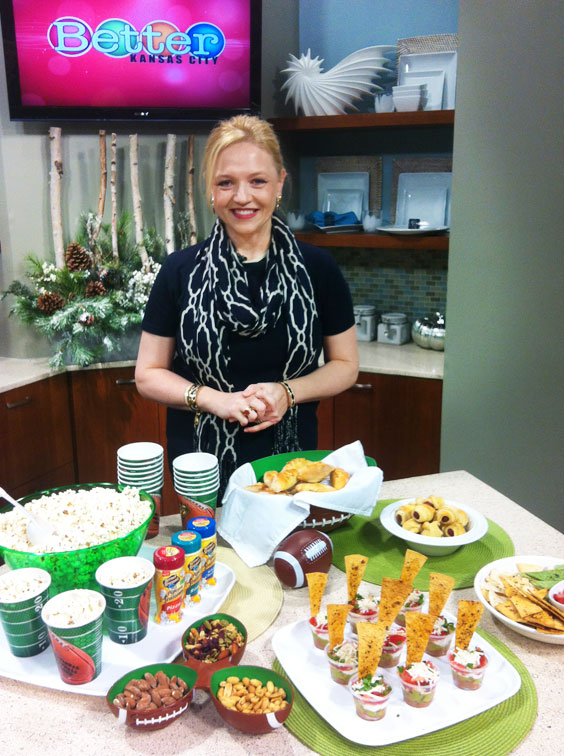
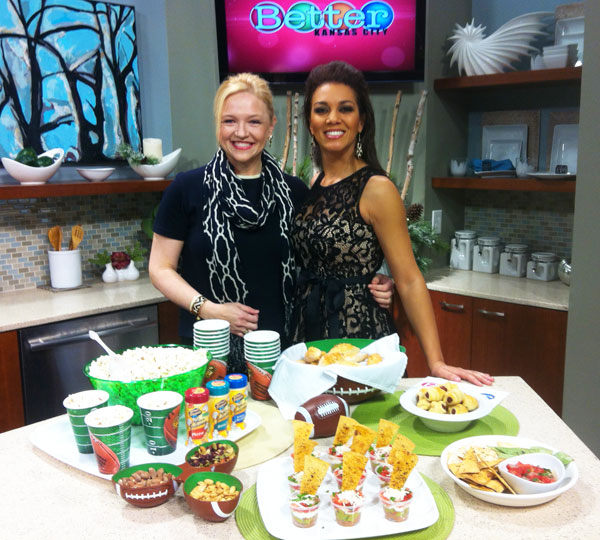
I had a chance to show off some healthy Super Bowl party ideas to the folks at Better Kansas City and the best part… these ideas can be incorporated into appetizer menus for ANY party! Below is a photo of myself with one of the wonderful hosts of Better Kansas City, Kelly Jones. Don’t let her glamorous looks fool you, Kelly is a SERIOUS football fan! So, without further delay, here are my top healthy Super Bowl ideas you can easily “sneak” into your party menu!
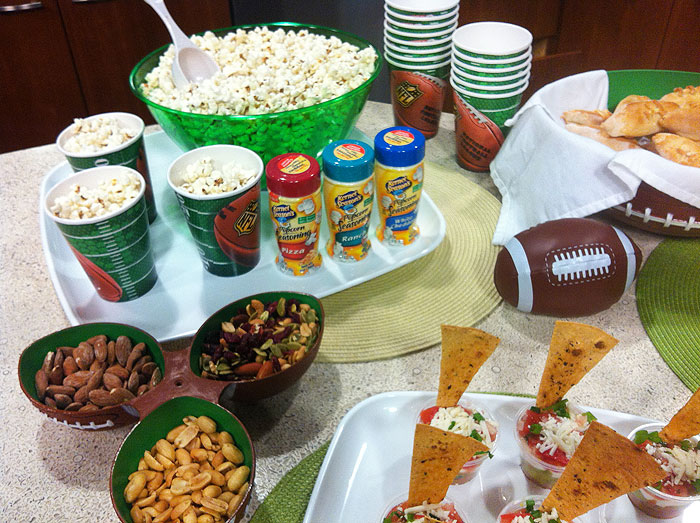
THE POP-CORN BAR:
As many of you know, pop corn is an amazing snack. It’s fat free, gluten free, and packed with fiber… which you’ll probably need after a night of junk food feasting. Create a “station” where people can fill a cup of pop-corn and offer a variety of pop-corn seasoning. The seasoning can be purchased at most super markets and come in a variety of flavors, such as ranch, pizza, and white cheddar. Or, offer various flavored salts and herbs. For an added treat, incorporate different nuts into the pop-corn bar/station which can be added to their pop-corn mixture. Even a nutty trail-mix filled with dried cherries, cranberries, and roasted seeds will guarantee to score a touch-down with your guests!
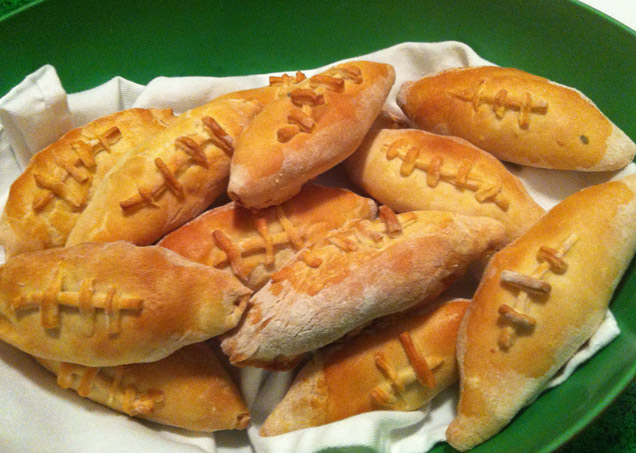
FOOTBALL PEROSHKI
These are russian meat filled pies. Now, you can fill them with anything… leans meats, broccoli and cheese, pizza and cheese, and even sweets. They are made with regular store-bought biscuit dough and filled with whatever you choose. And they also happen to look just like footballs. And if you think you need to make them even more authentic, add a seam to the top and the peroshki will look EXACTLY like a football! A great alternative to sliders or even… dare I say… oily pizza. FOR THE FULL RECIPE, CLICK HERE.
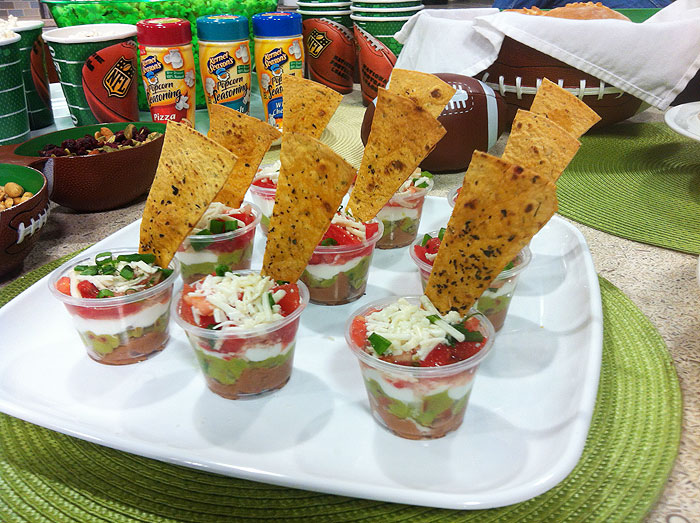
SEVEN LAYER DIP
The King of all high calorie dips, the seven layer dip is the ultimate power junk food! It combines multiple layers of unhealthy ingredients into one artery clogging dip! But my alternative not only shaves a number of calories but also looks great when sitting on your buffet.
The number one tip… start with fresh ingredients, such as home-made salsa and guacamole. Then, instead of real sour cream, use greek plain yogurt. It has a similar taste to sour cream, I promise no one will be able to tell. Last but not least, serve the dip in individual cups. The presentation is beautiful and you won’t see your guests doing the ultimate “no-no”… double dipping! And, if you want to receive RAVES all evening, calculate the calorie content of your seven-layer dip in each individual cup. If your guests know that each cup contains 50 calories, they’ll be able to keep track of their calorie intake, which is a huge help for your health and calorie-conscious party goers. Add baked chips (more info. below) and you’ve got a winning combination!
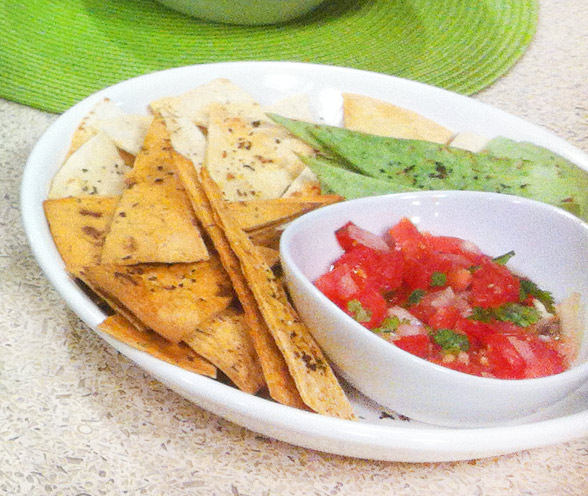
BAKED CHIPS AND FRESH HOME-MADE DIP
Chips and dip are staples of any good party, and super bowl parties are no exception. But instead of surrendering to the fats and calories, make a healthier alternative that everyone will love! Simply purchase flour tortillas at the store and cut them up, brush them with a little olive oil and sprinkle with salt and your favorite herbs. You’ll have a “gourmet” looking baked chip that is a healthier and even better tasting alternative to the store-bougt ones. Less sodium, less trans fat, and a TON of flavor!
PIGS IN A BLANKET
Last, but certainly not least (in calories or fat) is the ultimate “heart stopping” junk food… Pigs In A Blanket. With enough sodium and trans fat to leave you in an ER, making this snack healthier is not only easy but a health necessity!! When purchasing the sausages, choose the turkey sausages which are a reduced fat version and will cut close to 75% of the fat… yes, 75%! Hillshire Farms makes delicious turkey mini-sausages. The reduction in calories is also significant. For an added benefit, use reduced fat croissants to help this snack be a true winner! Just applying these two easy alterations can significantly reduce the impact on your guests’ waistline!
· Posted in Uncategorized ·
|
|
|