October 26th, 2015
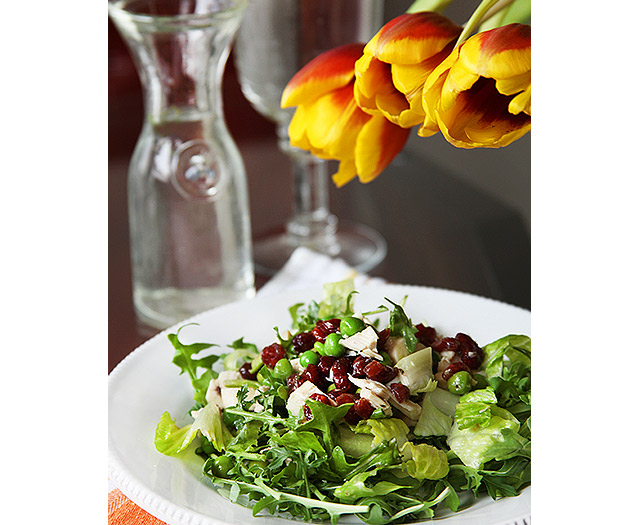
This salad is perfect for anytime. It is bursting with flavor and a treat for anyone who likes a salad bidding to be a meal!
Ingredients
- 1 medium smoked chicken (available at any grocery store)
- 1 cup dried cranberries
- 1 cup frozen peas
- 2 ripe avocados
- 1 lemon
- 1 head lettuce
- 1 bag arugula
- To Make Dressing
- 3 tbsp olive oil
- 2 tbsp walnut oil
- 3 tbsp lemon juice
- 2 tbsp fresh mixed herbs (a mixture of fresh herbs such as parsley, lemon thyme, mint, etc.)
- Salt and Pepper
Preparation
Divide and carve the chicken cutting to make bite sized pieces for the salad. Cover the divided and cut chicken and store in refrigerator.Put the cranberries in a bowl of water and let stand, covered, for 30-45 minutes.
Meanwhile, blanche the frozen peas and refresh them under cold water.
Slice or cube the avocados and squeeze lemon juice on them to prevent discoloration.
Combine the lettuce and arugula and toss with avocados and peas. Add the chicken.
Combine all the dressing ingredients and shake well. Add salt and pepper to taste and shake well again until all the ingredients are well blended and taste the way you want.
Drain the cranberries and mix them with the dressing, then pour over salad and serve immediately.
· Posted in 30 Day Salad Challenge, Low Carb, Recipes, Salads ·
October 24th, 2015
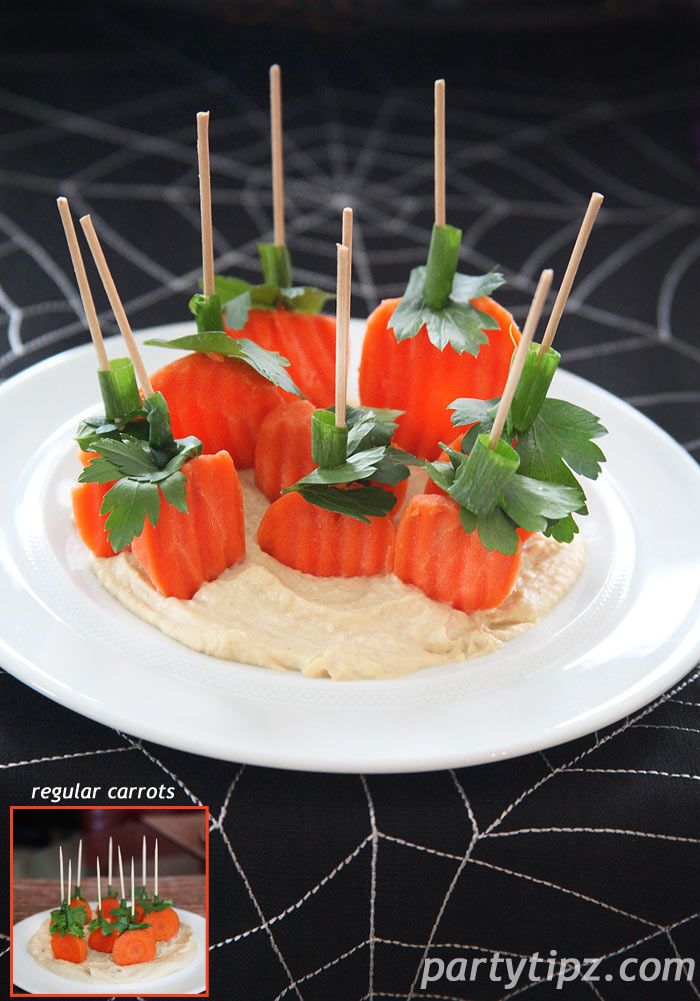
Seriously, how can you not fall in love with this great idea for an appetizer? It’s easy to put together and fun for guests to nibble on. All you need are carrots, parsley, green onion, toothpicks, and hummus.
A few years ago I posted this recipe (on the bottom left) but then realized that you can use pre-cut and bagged carrots (main image) instead of cutting them yourself. Best part? The pre-cut and bagged carrots have ridges and are different shapes, a lot like pumpkins. Still yummy but now you can save a step and not have cut the carrots!!!!
Ingredients
- 1 pkg Hummus
- 2 carrots
- 1 green onion
- 1 bunch fresh parsley
- toothpicks
Preparation
Just slice the carrots, take some parsley leaves and attach them to the carrot with a toothpick. Slide a piece of green onion over the toothpick to have a look of a stem and arrange on a bed of hummus. Told ya it was simple! Thanks to the folks at Disney magazine for inspiring me with this recipe.
· Posted in 31 Days of Halloween, Guilt Free Party Snacks, Halloween, Low Carb, Recipes ·
October 22nd, 2015
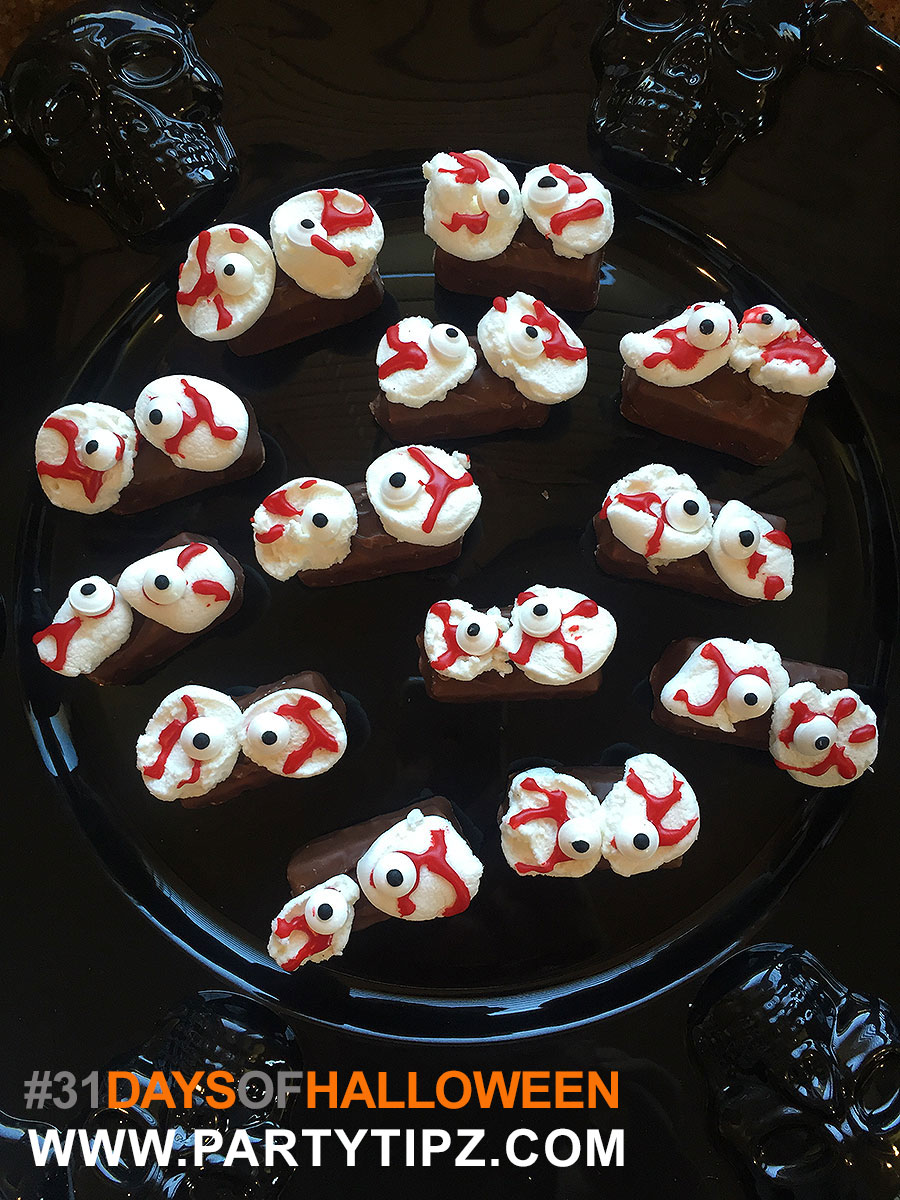
Here’s a fun Halloween recipe which will take you five to ten minutes to prepare! This was fun to make and fun to eat! My kids loved it and the kids at my Halloween Taste Test Kitchen gobbled these little cuties up within minutes. What do I like most about it. Portion size! Since you are working with snack-sized chocolates, you immediately have your portion sizes figured out for you! Trust me, you’ll love that!!
INGREDIENTS
1 bag of Snack sized Three Musketeers chocolates
1 bag of marshmallows
1 package of candy googly eyes
1 bottle or bag of ready-made red icing
PREPARATION
Arrange the Three Musketeers chocolates on a plate or platter. Take a marshmallow and start slicing it to create the large portion of the eye. Take the slices of marshmallows and adhere them to the candy. Adhere the googly eye to the marshmallow. Finally, pipe the red icing on to the marshmallow to make it look like a bloodshot eye. The first and the lasts slices of the Marshmallow will not be sticky on one side. If you will be using these pieces, adhere them with the red icing.
· Posted in 31 Days of Halloween, Halloween, Recipes ·
October 20th, 2015
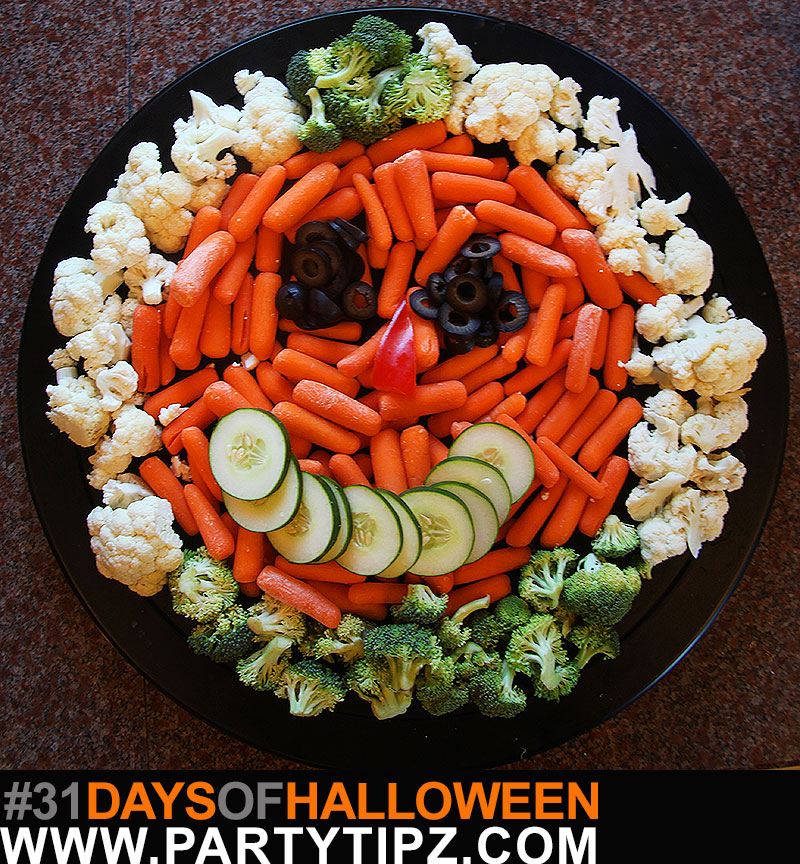
Who says you can’t eat healthy during Halloween? This super easy veggie platter was a hit at my taste test kitchen. Kids loved the selection of veggies and you can even customize the platter to incorporate the vegetables your kids prefer… sugar snap peas instead of broccoli, white asparagus instead of cauliflower, I can go on and on!
· Posted in 31 Days of Halloween, Halloween, Low Carb ·
October 19th, 2015
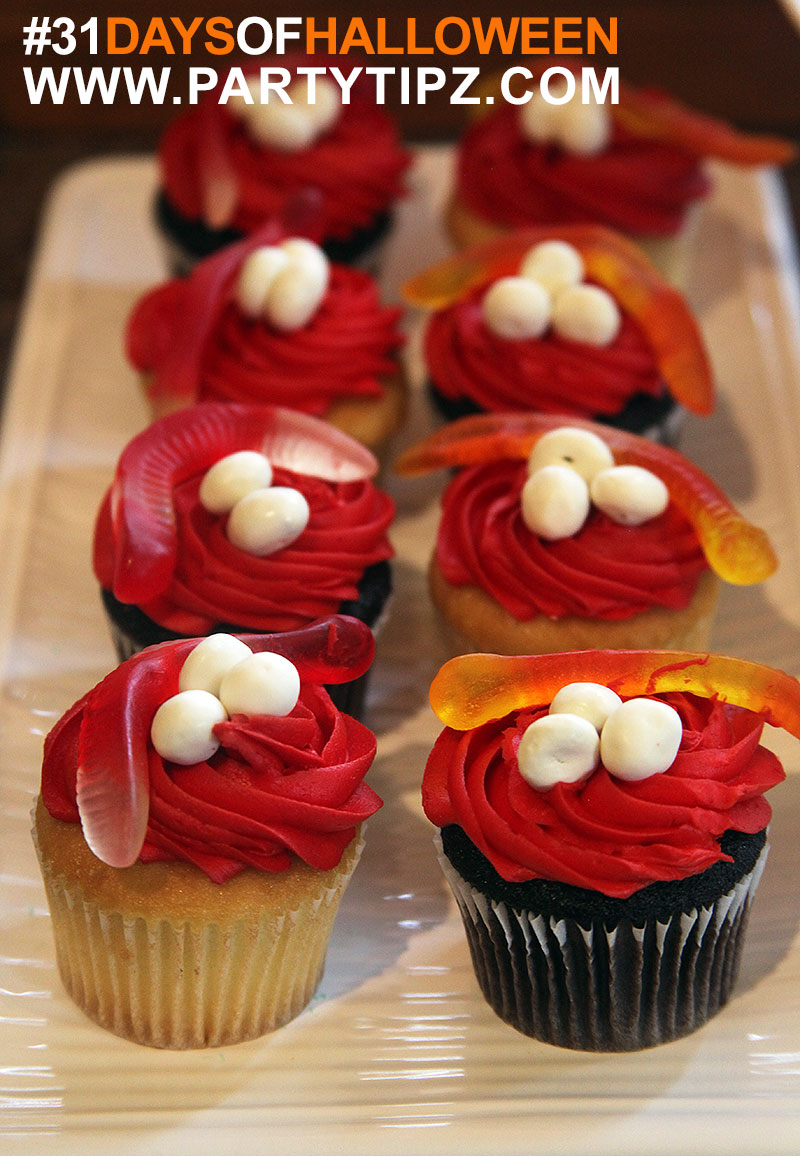
These “snake nest” cupcakes were a hit at my recent Halloween taste test kitchen. Moms loved the recipe because you can prepare the cupcakes in a matter of minutes!
All you need are ready-made iced cupcakes, yogurt covered raisins, and gummy worms. Place two or three yogurt covered raisins (“eggs”) on top of each iced cupcake and place a gummy worm (“snake”) around the eggs. Place a small printed sign saying “BEWARE: Snake Nest Cupcakes” and watch them disappear!
· Posted in 31 Days of Halloween, Halloween, Recipes ·
October 18th, 2015
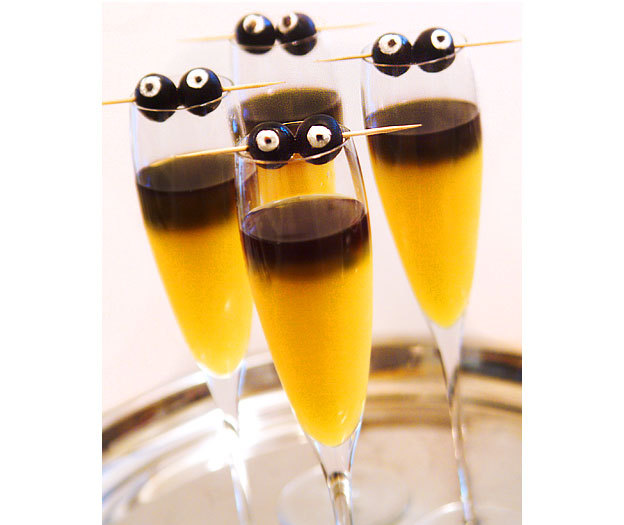
If you want a smiles from your guests this Halloween, make sure to surprise them with these adorable yet spooky Googly Goblin Cocktails at your next party!.
Ingredients
- 5-6 oz Orange Juice
- 1 shot Black Vodka
- Black Olives
- Cream Cheese
Preparation
Pour orange juice into a glass about half way. Pour black vodka carefully over the orange juice. A great tip is to pour the vodka over the back of a spoon so the vodka runs down the side of the glass. For “eyes” use pitted black olives stuffed with cream cheese. Cut up one olive into tiny little pieces, and use those pieces for eyeballs. Pierce the eyes over wooden toothpicks and place on the rim of the glass…. enjoy!
· Posted in 31 Days of Halloween, Halloween, Recipes ·
October 7th, 2015
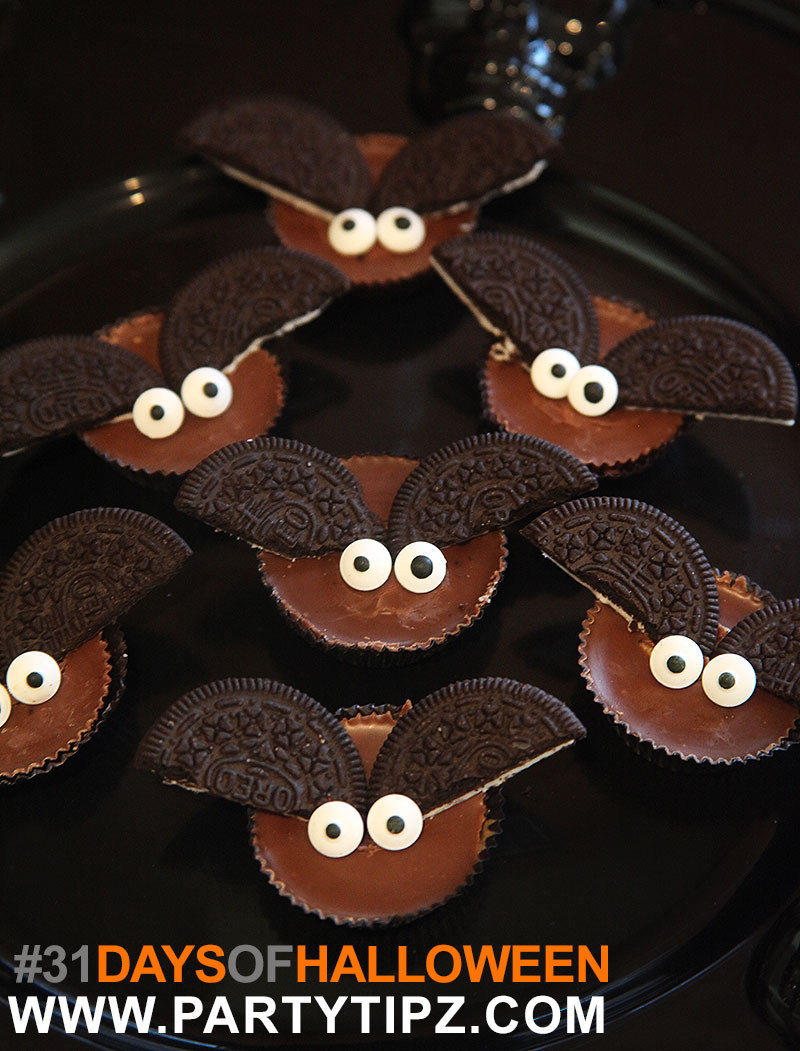
Super easy and super fun! These Halloween Spooky Bats can be created in minutes and kids LOVE them. Just a few ingredients will bring a huge impact!! They are a perfect addition to your next Halloween dessert buffet. All you need are some Oreo’s, Reese’s Peanut Butter Cups, and Googly eyes. I have also seen this idea with small Reese’s Peanut Butter cups as well. You can add both sizes to your presentation to make it look like there are large and small bats.
1 package of Oreo Cookies (I used the reduced fat ones)
1 package of Reese’s Peanut Butter Cups
1 package of Googley Candy Eyes (you can purchase these at Michael’s or Jo-Ann’s in the baking section)
Cake icing or melted chocolate
Simply unwrap the Reese’s Peanut Butter Cups and place on tray or plate. Take out an Oreo cookie and cut it in half. Some of the cookies may not cut in half perfectly, so be ready for some scraps you can snack on! Take the half of Oreo cookie apart and add a bit of cake icing or melted chocolate so the “wings” so that they can adhere well. Then, place the two halves on top of the Reese’s. The straight side should face the bottom.
Place a bit of cake icing or melted chocolate on the back of the Googley eyes and place on the wings, so that half the eye is on top of the wing and the other half is resting on the Reese’s. Let dry for a few minutes and enjoy!
· Posted in 31 Days of Halloween, Halloween, Recipes ·
October 6th, 2015
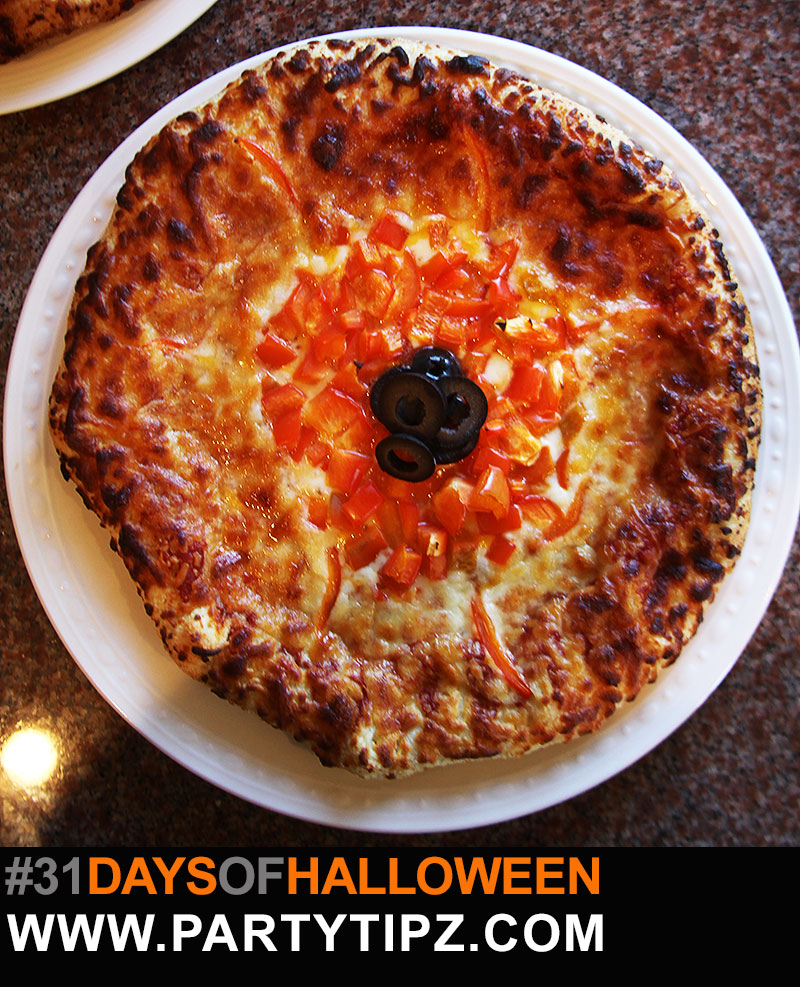
What are you looking at?! This giant Eye Ball Pizza is going to have your guests take a second look at what they are about to eat? And isn’t that exactly what you want at your next Halloween party?! This pizza was a huge hit at my recent taste testing Halloween kitchen and I’m sure it will be a huge hit at your party as well. You can make your own pizza, buy a frozen one, or just order a cheese pizza from your local pizzaria.
This idea is super easy and requires very few steps.
- Home-made, ready-made or frozen cheese pizza
- 1/2 red bell pepper
- 3 olives (sliced)
Take the pizza out of the box. Dice the peppers and arrange them in a circle in the middle of the pizza. Take your olive slices and place them right in the middle of the bell pepper. Bake according to package directions and enjoy. This pizza is a vegetarian option. If you will be serving meat lovers, you can use pepperoni instead of bell peppers.
· Posted in 31 Days of Halloween, Halloween, Recipes ·
October 5th, 2015
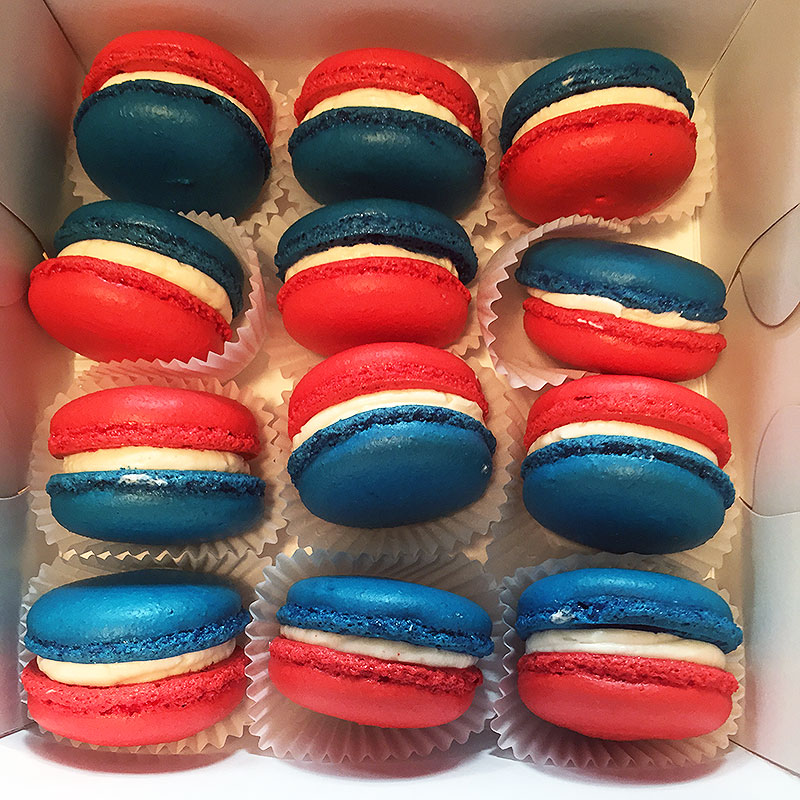
I love Fourth of July , for so many reasons! Firstly, it’s a casual celebration, which means I don’t have to stress too much about what to prepare, in fact, it is a perfect celebration for potlucks! And that is exactly what I did this year. I just wanted it to be relaxed, fun, and easy. So, I asked several of my friends to bring their favorite dish while I prepared a few surprised for the kids! After dinner, we went to my friend Danna’s house and enjoyed watching the kids do sack races and a plethora of other fun activities. Danna made mint juleps while my friend Rhae provided the red, white, and blue macarons. It all turned out great and below are some photos from this fun day!
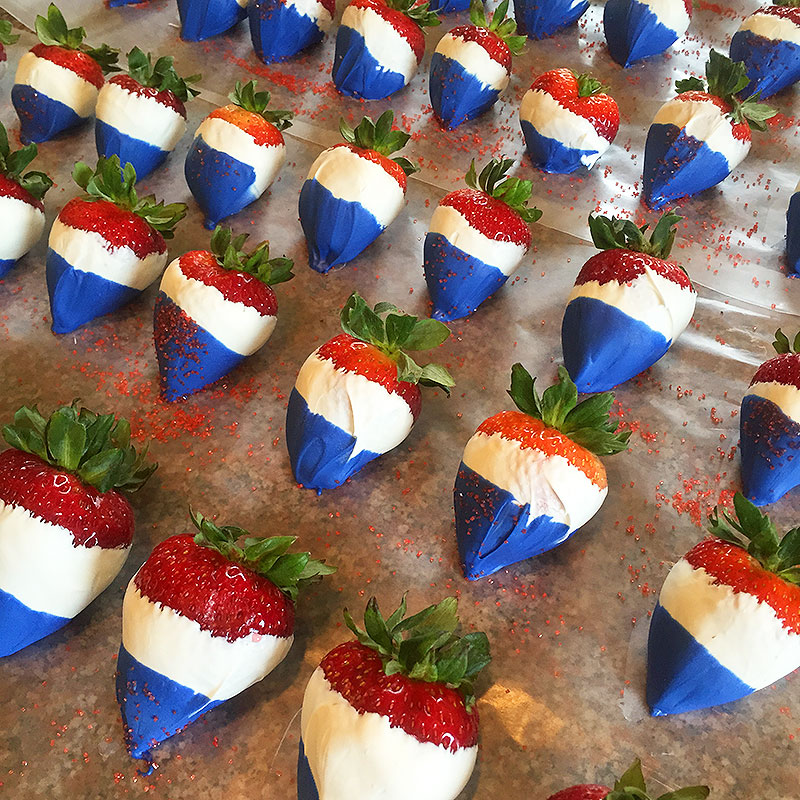
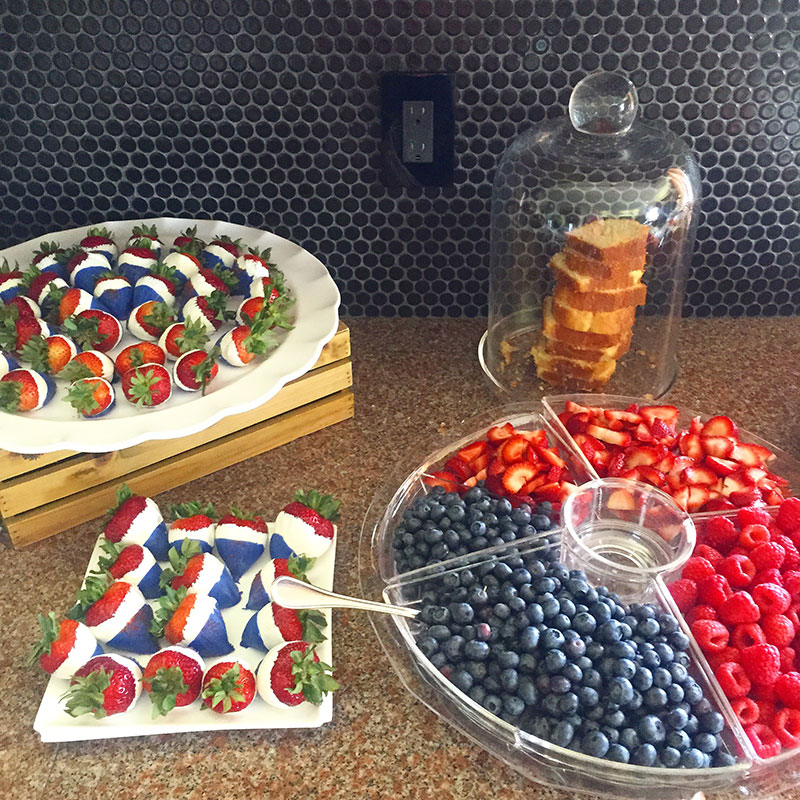
Red, White, and Blue Strawberries. Just buy white and blue candy coatings and dip away!!
Fruit shortcake dessert bar. Just combine fruit, pound cake, and whipped cream and allow your guests to build their own masterpiece which they can top off with some patriotic strawberries.
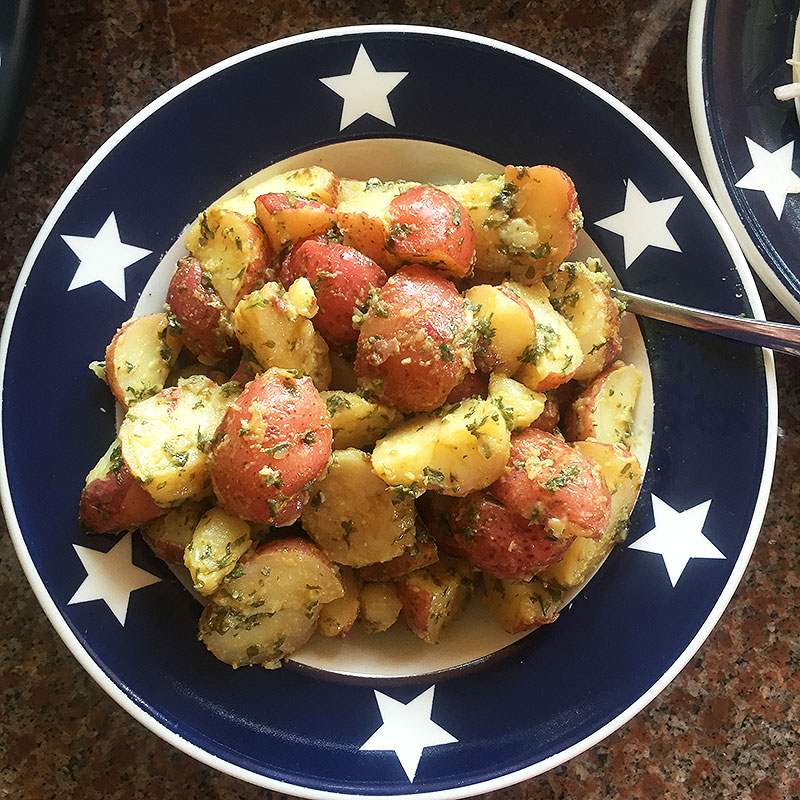
Danna’s gorgeous potato salad
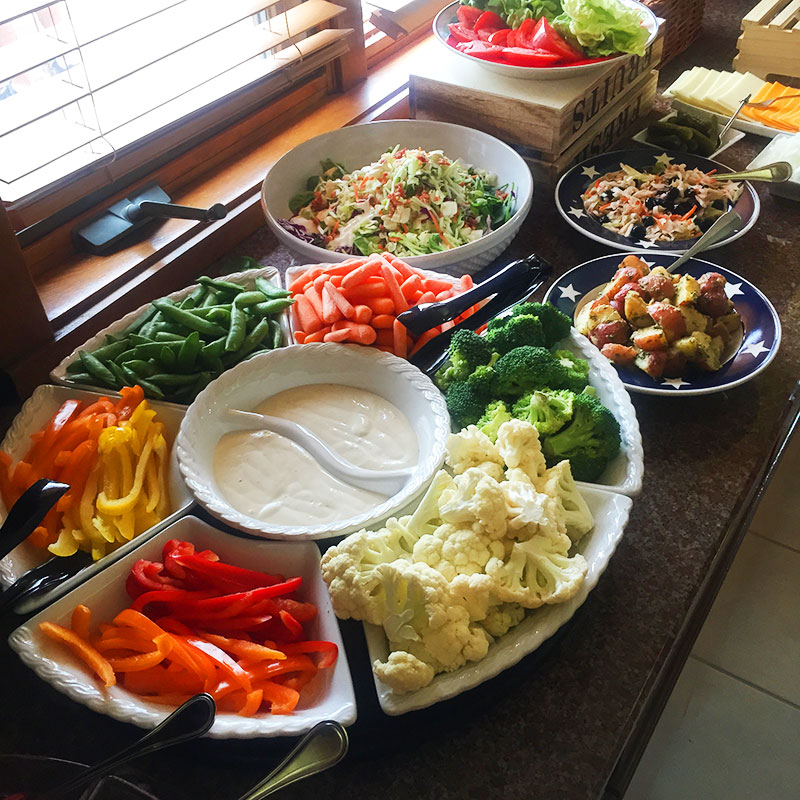
Our 4th of July potluck buffet with a burger bar.
Hanging out at Danna’s house

Rhae’s red, white, and blue macarons.
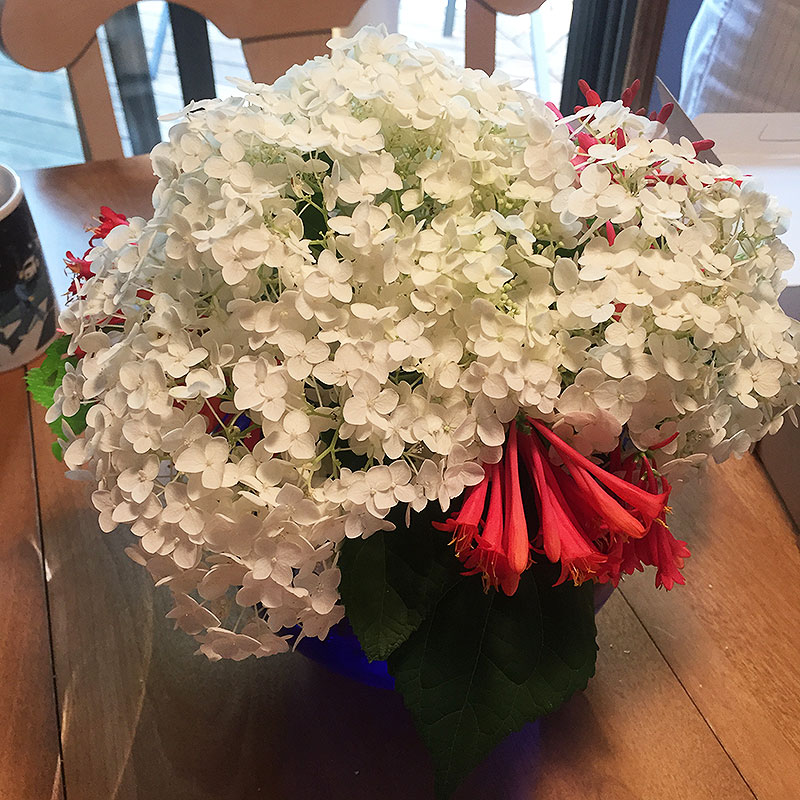
Danna’s beautiful red, white, and blue centerpiece straight from her beautiful garden.
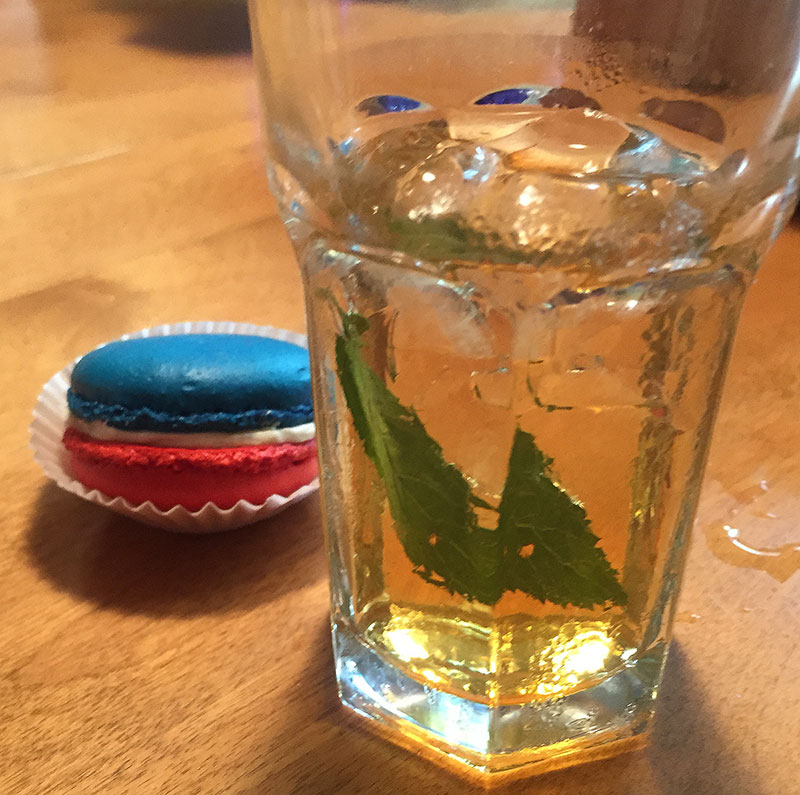
Danna’s mint julep paired with Rhae’s macaron… DELICIOUS!!!
Our kids watching fireworks… priceless!!!!!

· Posted in 4th of July, Fourth of July, Parties, Salads ·
October 5th, 2015
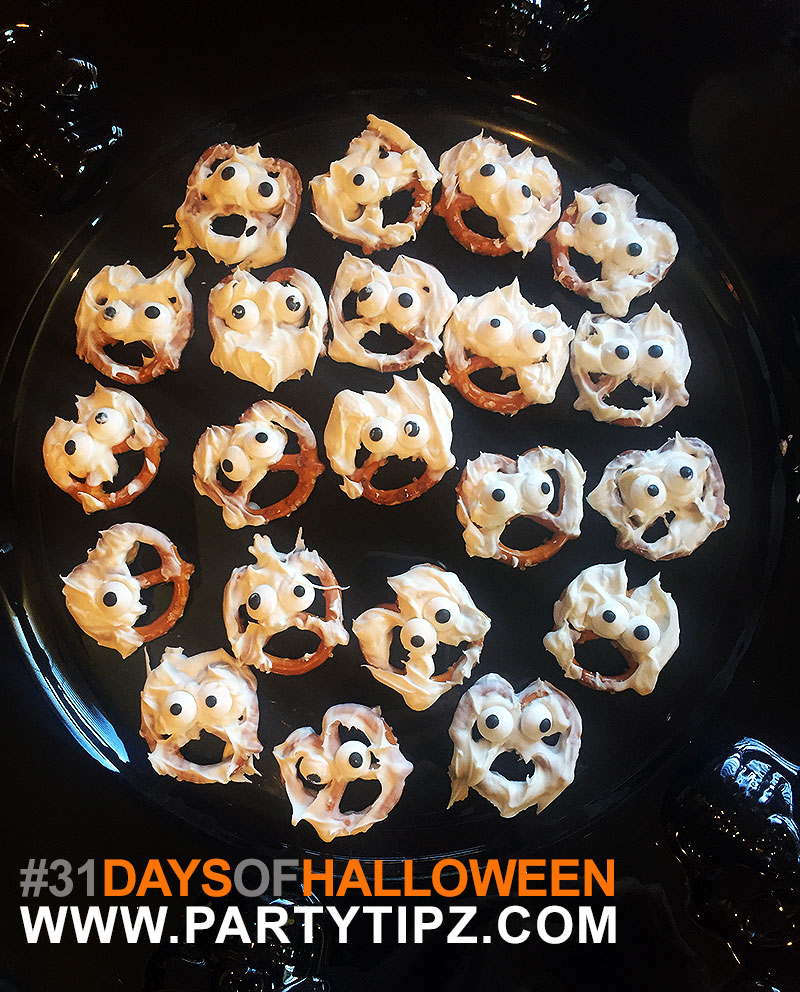
Looking for a fun recipe to do with the kids?! Here it is!!! My friend Tara sent this my way and of course I had to try it out at my recent taste testing! The best part of the entire process was that the less perfect the pretzels looked, the scarier they turned out!!! Each one is unique and I dare say, they look a bit spooky!!! It was a TOP PICK at my recent taste testing Halloween Kitchen.
1 bag of pretzels
1 bag white candy melts
2 containers of googley eyes (you can purchase these at JoAnn’s or Michael’s in their cake baking section)
Lay out a sheet of wax paper for your finished dipped pretzels. Melt the candy melts according to package instructions. Dip the pretzels in the candy melts. You can either swipe up or swipe down. You can even try swiping them to the left or right. If you look at my pretzels, you can see which ones were swiped up while they were dipped and which ones were swiped down. Either one will produce good results.
Place the covered pretzels on the wax paper and place two eyes on them. You may need to make sure that the holes, where you will place the eyes, have a good amount of candy melts within them. The holes need to have candy melts otherwise the eyes will just fall through the hole and not adhere.
Let dry and place on a black platter for a spooky look!
· Posted in 31 Days of Halloween, Halloween, Recipes ·
|
|
|