October 27th, 2014
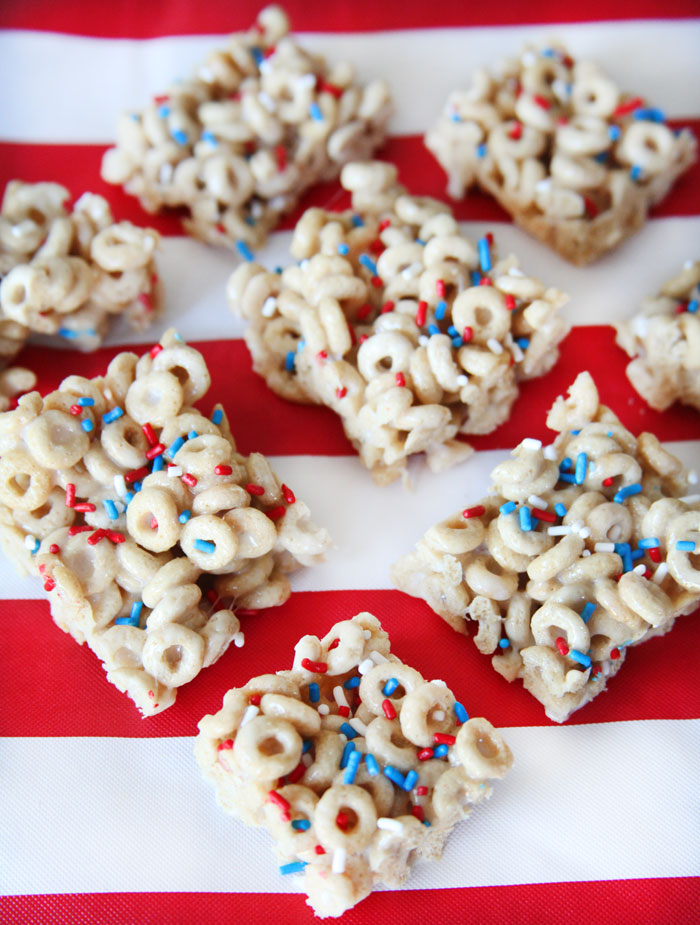 Do you love marshmallows and Cheerios? I do too! And as much as I would love to tell you that I came up with an incredible new recipe, that just isn’t the case. But I’m on a 4th of July recipe marathon, so this should count… soldes chaussures adidas right? As you can tell, this is a simple modified recipe of Marshmallow Treats and I used Cheerios instead of rice cereal. Chaussures Asics Femme Honestly, you can substitute any cereal for this and it will come out delicious! Don’t forget the red, white, and blue sprinkles for the 4th of July feel! WARNING: These lasted about 10 minutes in my house… nike air max 1 ultra flyknit femme chances are, they’ll disappear just as quickly in yours! Do you love marshmallows and Cheerios? I do too! And as much as I would love to tell you that I came up with an incredible new recipe, that just isn’t the case. But I’m on a 4th of July recipe marathon, so this should count… soldes chaussures adidas right? As you can tell, this is a simple modified recipe of Marshmallow Treats and I used Cheerios instead of rice cereal. Chaussures Asics Femme Honestly, you can substitute any cereal for this and it will come out delicious! Don’t forget the red, white, and blue sprinkles for the 4th of July feel! WARNING: These lasted about 10 minutes in my house… nike air max 1 ultra flyknit femme chances are, they’ll disappear just as quickly in yours!
Ingredients
- 4 oz butter
- 10 oz bag Marshmallows
- 4-5 cups Cheerios
- red white and blue sprinkles
- 9 x 9 square pan
In a small saucepan cook the butter over low heat, until the butter is fully melted. Add the marshmallows little by little and stir until they are fully melted. goedkoop nike air max 2017 Add the cereal cup by cup. If you like to have super gooey bars, you may want to use 3-4 cups of cereal. shirt-tshirt If you like to have a nice balance, add more cereal 4-5 cups (or even six). Believe it or not, but I don’t like my bars to be super gooey, so I use more cereal. Stir until the cereal is fully coated.Press it into the pan. You may want to put some butter on your hands or a rubber spatula to prevent it from sticking. Sprinkle with sprinkles. Cool in the refrigerator for an hour. nike schoenen nederland Cut… serve…
· Posted in 4th of July, Fourth of July, Parties, Recipes ·
October 24th, 2014
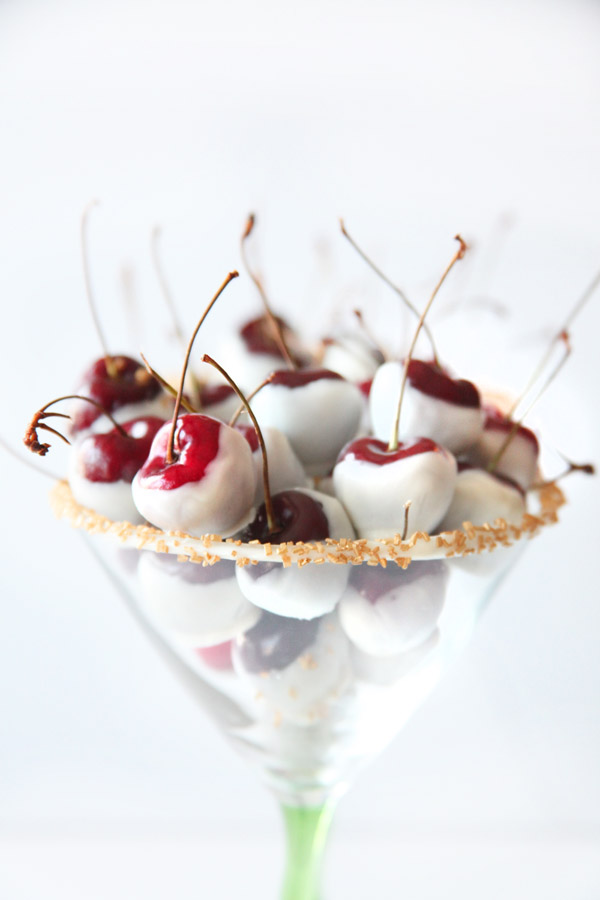
Can you guess what’s in season? Cherries, cherries, cherries!!! Why am I so excited? Because typically cherries are really expensive, I can easily pay $10 or more for a few pounds… but not when they are in season! I love cherries and honestly, I don’t need to do anything to them. I can just sit down and enjoy them individually, but when I’m planning a party, there is nothing like serving these cherries in a light candy coating! You can do chocolate, vanilla, or whatever coating you choose. Serve them in a martini glass with the rim dipped in candy coating as well, and you WILL be rewarded with oohs and aahs from your guests…this I guarantee!!
And the best part, it’s the easiest dessert to make. No baking, mixing, or tons of ingredients. So without further delay, here is the recipe:
INGREDIENTS:
1 pound of cherries
1/2 bag of white candy coating ( available at Michael’s or JoAnn’s). You can use chocolate too, I just like the contrasting colors of white and red. Great for the holidays too!
PREPARATION:
Melt candy. Wash cherries well and dry them completely. Put out parchment paper to rest your cherries on after you cover them with candy. Choose the cherries with stems, eat the ones that are missing the stems!!! While holding the stems, dip the cherries in the candy coating and place them on top of the parchment paper. Let them dry and serve. For an extra “wow”, dip a martini glass rim in the candy coating and add some gold or silver sprinkles. Let dry. Serve the cherries in the martini glass. These are also great to make a day ahead of time, store them in the refrigerator inside the glass.
· Posted in Decadent Desserts, Parties, Recipes ·
October 17th, 2014

Get ready for the ultimate 4th of July dessert… Red, White, and Blue Cheesecake Stuffed Strawberries! Place them on top of a cupcake or eat them on their own, I guarantee that it will be a huge hit at your next patriotic party! CLICK HERE FOR THE RECIPE.
· Posted in Fourth of July, Memorial Day, Parties, Recipes ·
June 28th, 2014
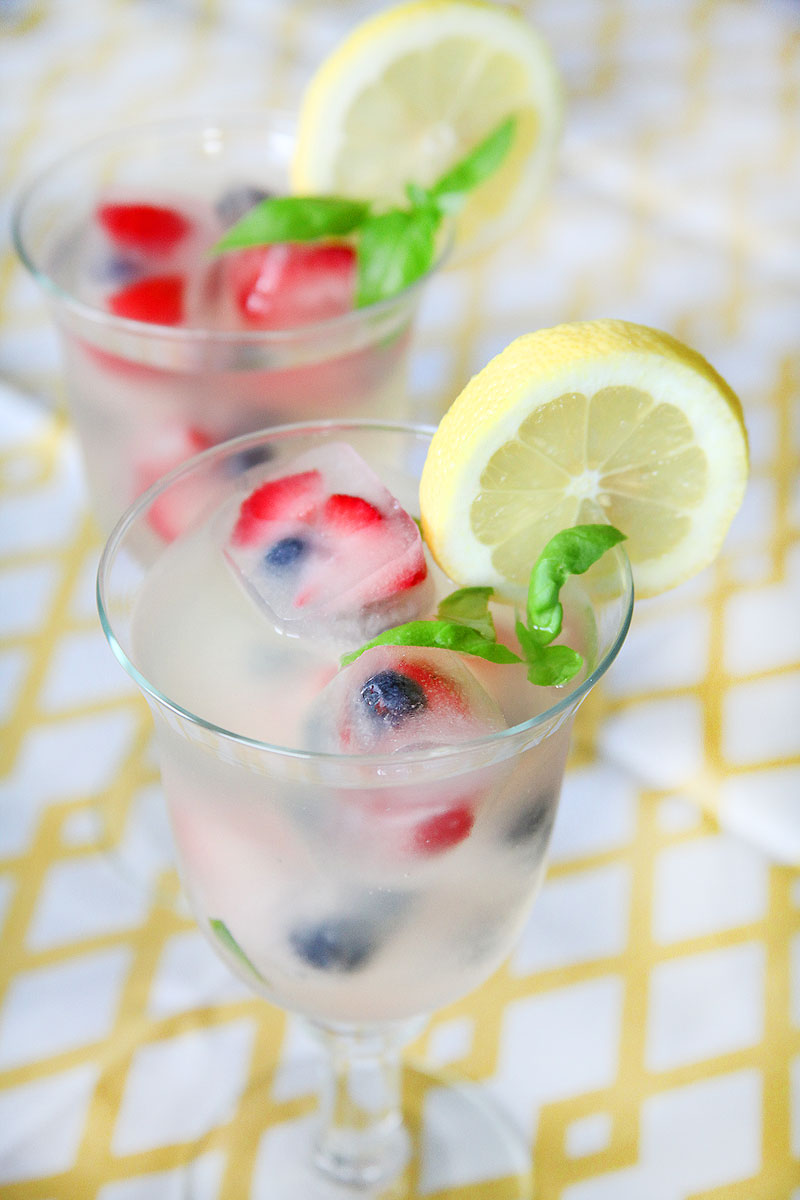
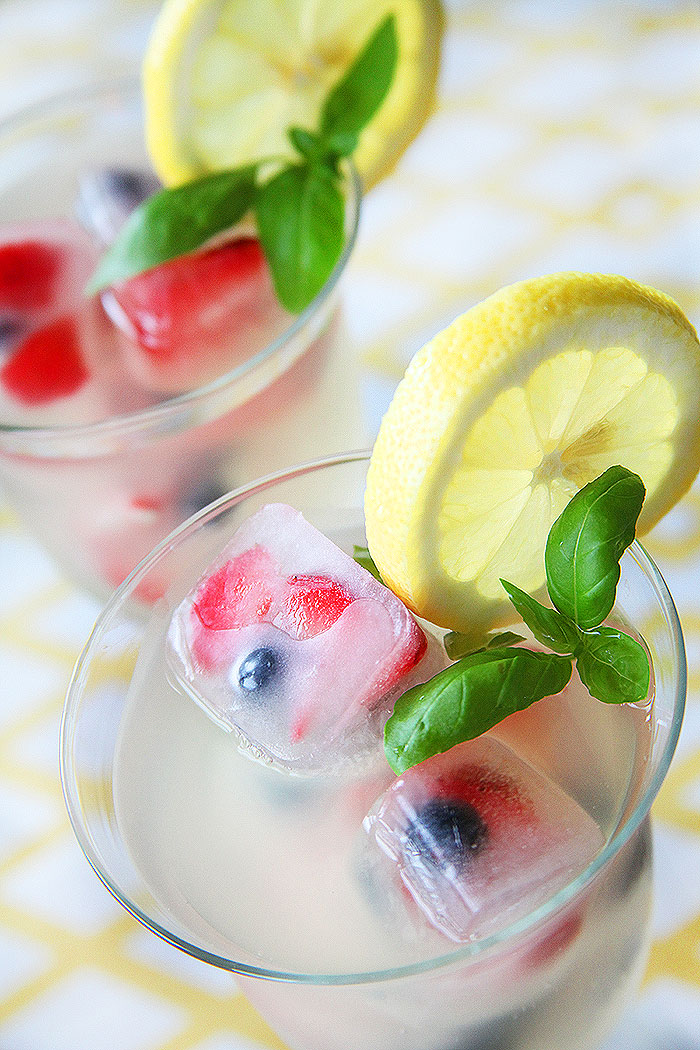
Brace yourselves, because I’m about to introduce you to a fabulous drink that not only YOU will enjoy, but your party guests as well. Its key ingredient… of course lemons… but the other is agave nectar! I’ve heard “agave this” and “agave that” for years. But to be honest, I don’t have too many issues agains sugar, so as long as there is moderation, I don’t really mind using it in my drinks and desserts. HOWEVER… I had to learn more about this agave nectar everyone is buzzing about. So, I did and I must say… I really like it! Plus, it’s kind of cool to tell people that they are drinking a delicious concoction you created with agave nectar! If you are interested in learning the difference between agave and sugar, here’s a link to a great article.
Lastly, I highly recommend you make the ice-cubes. They really add personality (and the actual blueberries) to this drink. Oh, one more thing… if you would like to save calories, you can flavor your Fresca with this lemonade. I will use 1/2 glass of lemonade and 1/2 glass of Fresca and it makes a wonderful lower calorie version of this drink. Also, if you would like to take this drink up a notch, add a shot of vodka, and you’re set! Well enough talk… here is the recipe.
Ingredients
Ice Cubes (these are very important)
2/3 cup agave
2 cups water
1 cup blueberries (I added strawberries as well)
Fresh Lemonade
2/3 cup agave
4-5 cups water
1 cup fresh squeezed lemon juice (about 5-6 lemons)
1 fresh-sliced lemon
3-6 basil springs
For Blueberry Ice Cubes
Combine agave with water. Pour into an ice cube tray. Add whole blueberries (I added strawberries too) and freeze for 3 hours or more.
For Fresh Lemonade
In a large pitcher, combine lemon juice, 4-5 cups of cold water and agave until desired sweetness is achieved. Chop 2-3 springs of basil or mash up the leaves. The goal is to get the oils out of the leaves. You may drop the chopped pieces in the lemonade. You may want to fish out the basil before serving, although I leave mine in the lemonade. Chill in the refrigerator for one hour. Serve with blueberry ice cubes, fresh lemon slices, and basil springs.
· Posted in 4th of July, Fourth of July, Fun Cocktails, Memorial Day, Parties, Recipes ·
June 27th, 2014
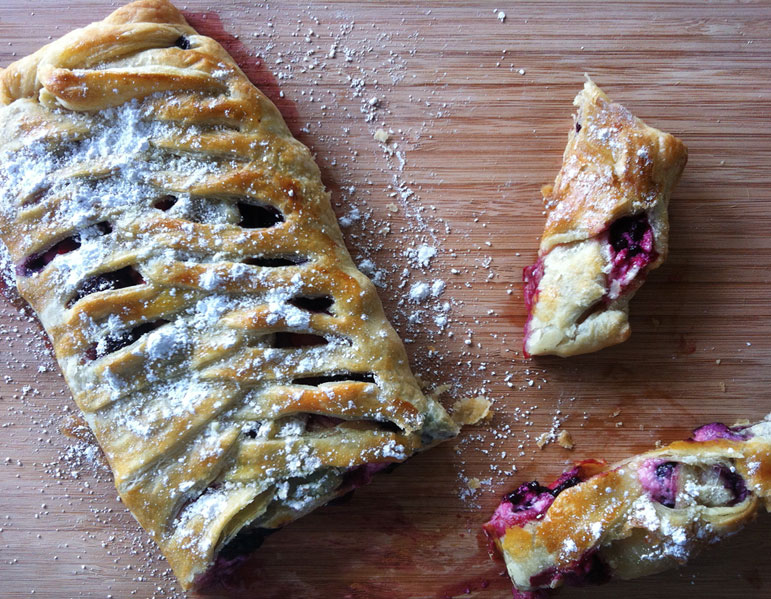
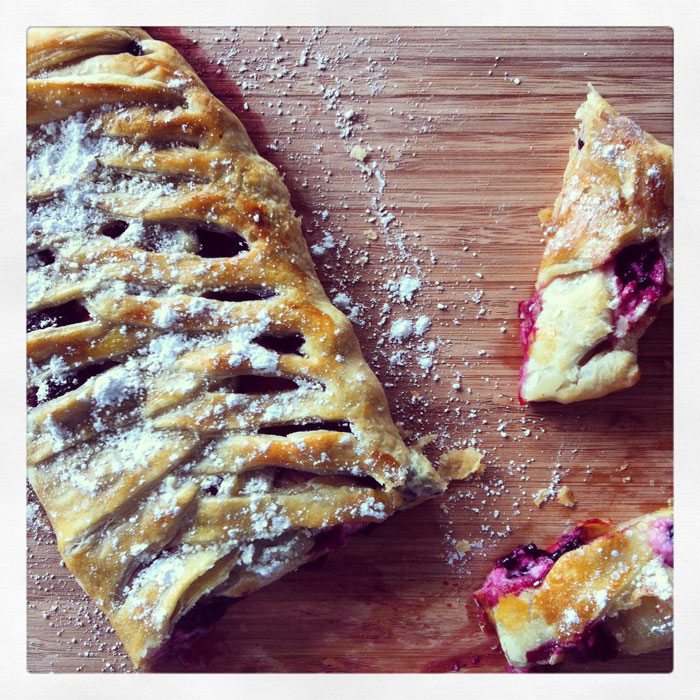
There are great recipes and then there are “trendy” great recipes. This is one of the trendiest things to do this summer… braiding and pastry puffs! I’ve watched several shows on HGTV where similar desserts have been showcased and even though braiding and pastry puffs have been done for many years (especially with meats and fish), this year, it seems to be the “thing to do”. I’m not opposed to trendy recipes… but when it’s coupled with the words “super easy” and “delicious”, it’s an absolute must for me to try. And so I did, and from the very first try, I came out with a stunning dessert that my family gobbled up within minutes. Seriously, this is a no-fail! This is wonderful to serve with whipped cream, cool-whip, or the my ultimate favorite, a scoop of ice cream (while the tart is hot!). Okay, enough with the chit chat, here’s my recipe. Also, the Pepridge Farm Puff Pastry web site has TONS of recipes, including one similar to this. A great resource if you love to bake with puff pastry.
INGREDIENTS:
1 Sheet of ready-made puff pastry dough (thawed at least 45 minutes)
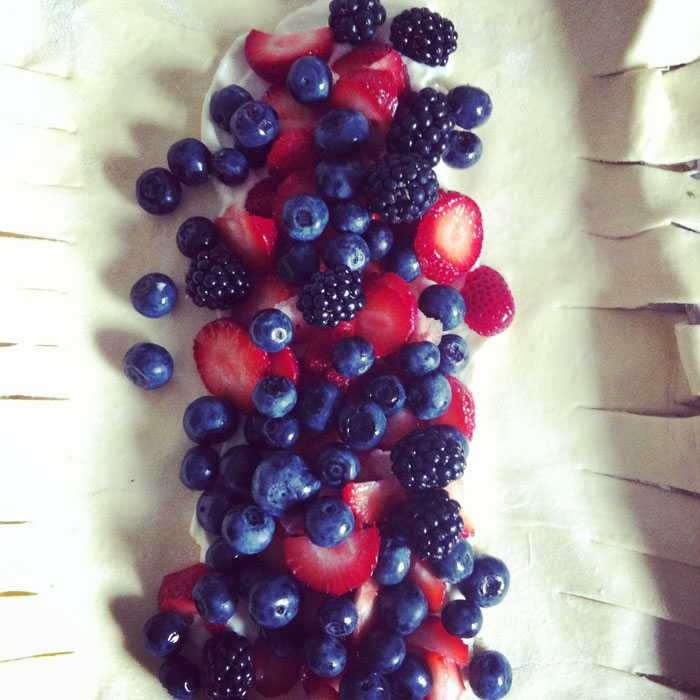
2 cups of mixed berries (you can use strawberries and blueberries for the patriotic look or add blackberries and raspberries for a wild berry feel)
1 8-0z package of cream cheese (softened)
1/2 cup of sugar
1 tsp vanilla extract
1 egg (for brushing)
powdered sugar
PREPARATION
Unfold your puff pastry and roll it out a bit to make it flatter and larger. Place it on top of a well-greased baking pan.
Heat the oven to 400°F. Beat the egg and water in a small bowl with a fork.
Beat cream cheese at medium speed with an electric mixer until creamy; gradually add sugar and vanilla, beating well.
Spoon the cream cheese filling lengthwise down the center of the pastry. Then top the cream cheese filling with berries. Cut slits 1 inch apart from the 2 sides of the pastry rectangle to within 1/2 inch of the cream cheese mixture.
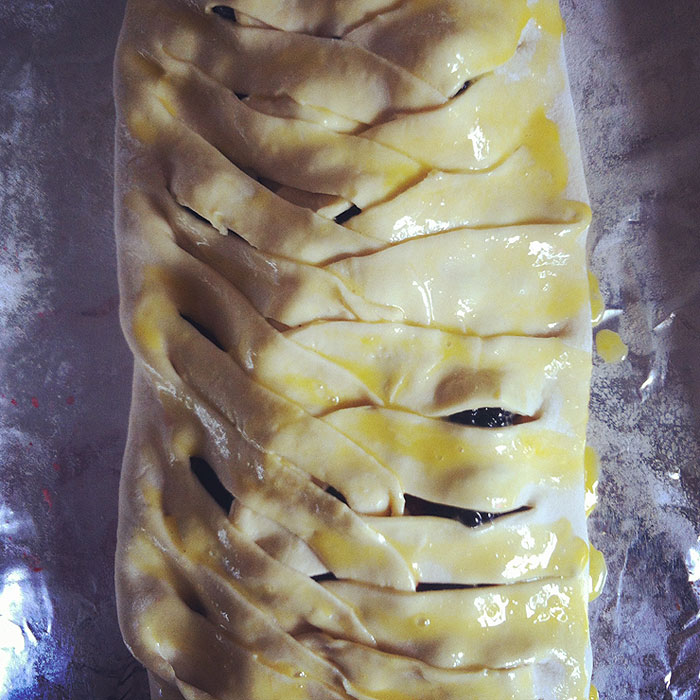
Starting at one end, fold the pastry strips over the berries and cream cheese, alternating sides, to cover cream cheese and berries. Brush the pastry with the egg mixture.
Bake for 15-25 minutes or until the pastry is golden brown. Let the pastry cool on the baking sheet on a wire rack for 20 minutes and sprinkle with powdered sugar. Enjoy with whipped cream, ice cream, or even on its own!
· Posted in 4th of July, Fourth of July, Memorial Day, Parties, Recipes ·
May 26th, 2014
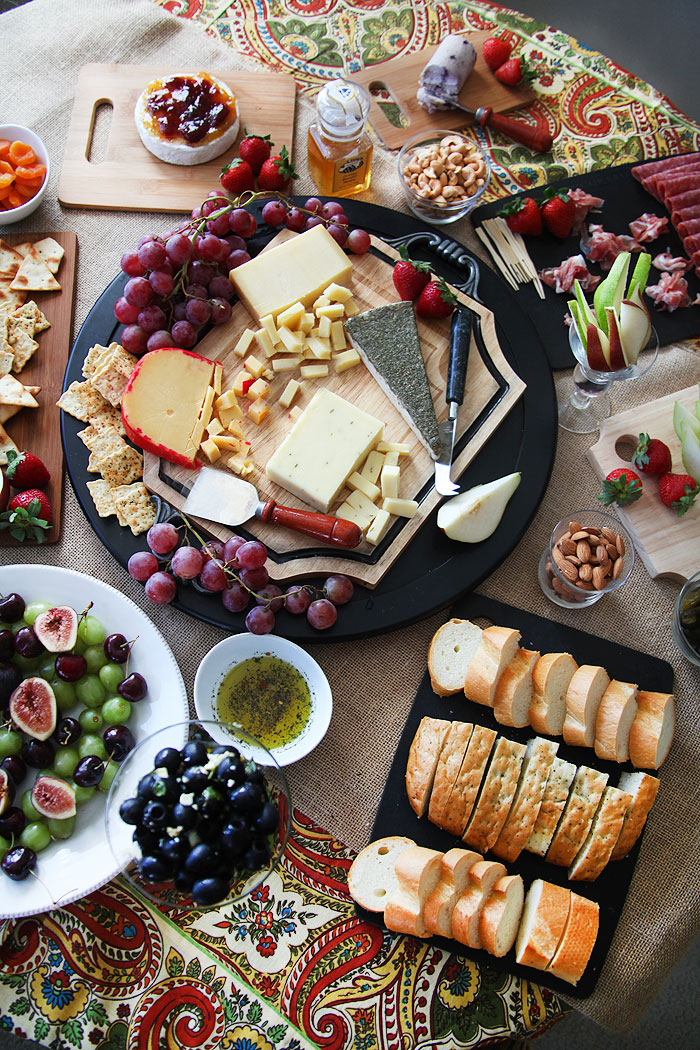
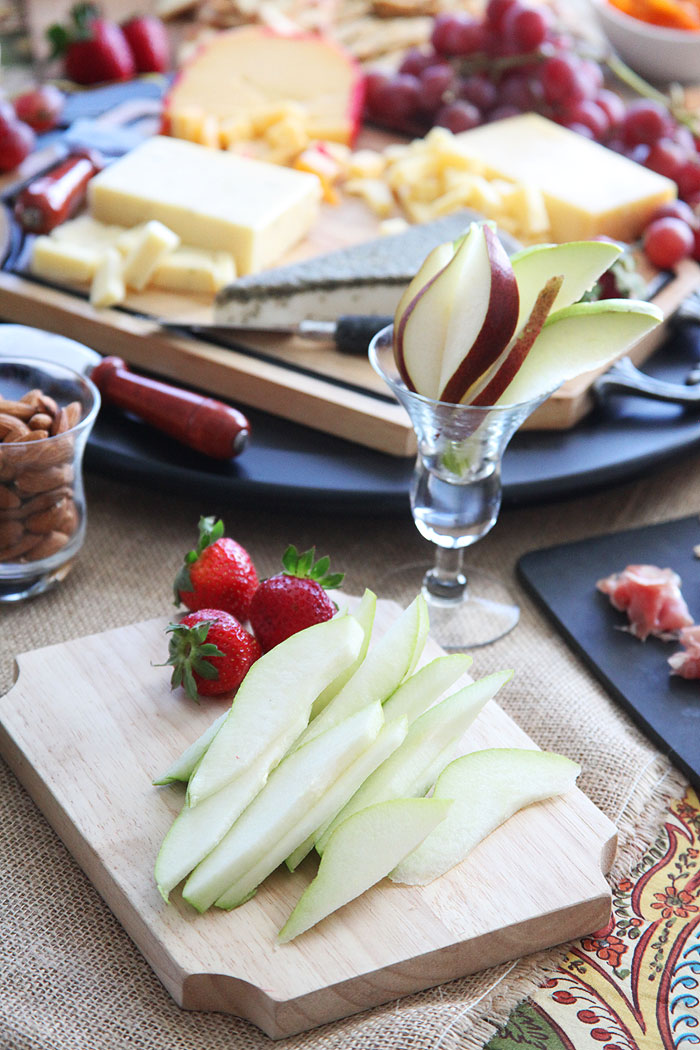
If you are one of those people who can’t seem to get out of the “cheese and crackers” plate, you will LOVE this article!
A few weeks ago, I invited one of my favorite couples to my place for an “ultimate” cheese experience. Knowing that cheese was their weakness, I thought… why bother with dinner, we’ll just make the appetizer our main meal… needless to say, my guests loved it!
Something I hear from many of my friends is that they can’t seem to get creative with the cheese plate. It seems like it’s always an after thought with the main meal taking most of the priority. Well, here is a cheat sheet of some of my favorite things to add to a cheese spread. Use all these ideas, or just a few. I guarantee these items will always be a success!
Marinated Olives
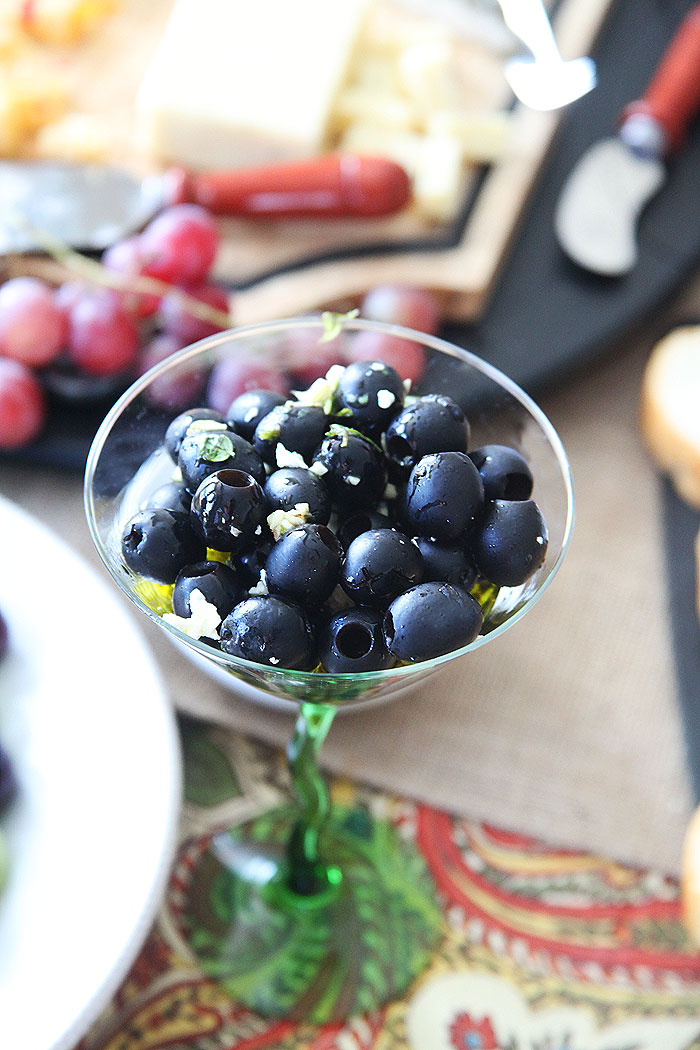
Olives are a staple on a cheese plate, however marinated olives are even better! Most supermarkets have a plethora marinated olives at their deli section and I love that you can buy them by the pound and choose the amount you would like to serve. However, they tend to be a bit pricey and if you are sticking to a budget, making your own is always a better option. I simply mix a little garlic (not too much) and my favorite spices (but not too spicy) in olive oil and pour over my favorite olives. Let them stand for an hour and you should have a great addition to your cheese plate.
A Variety of Cured Meats
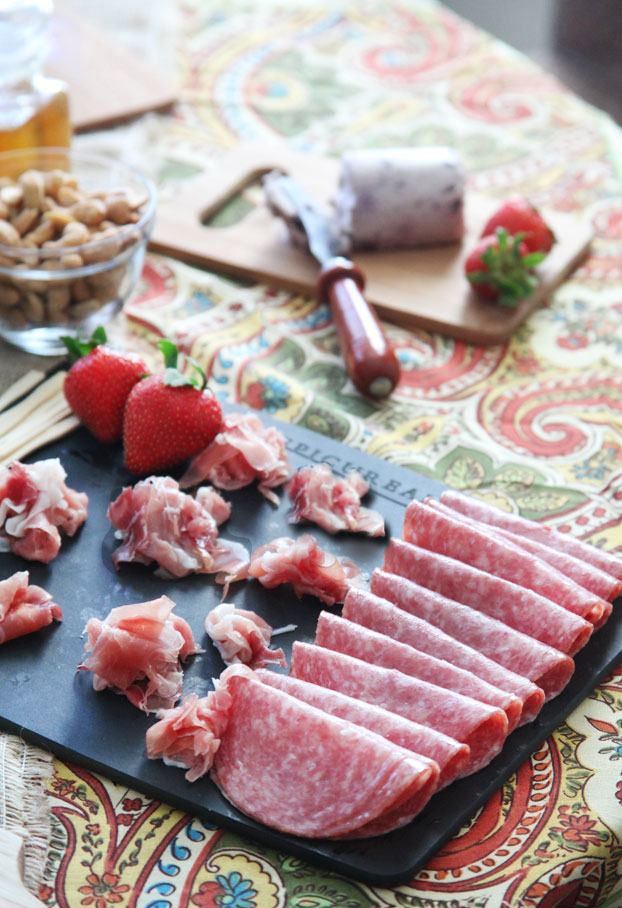
Whether you choose salami, prosciutto, or ham, cured meats are always a delicious addition to any cheese platter. If you don’t like cured meats, you could also serve deli meats, such as roast beef, turkey, or chicken slices. Your guests will love making their own combinations of cheese, crackers, and meats.
A Variety of Breads
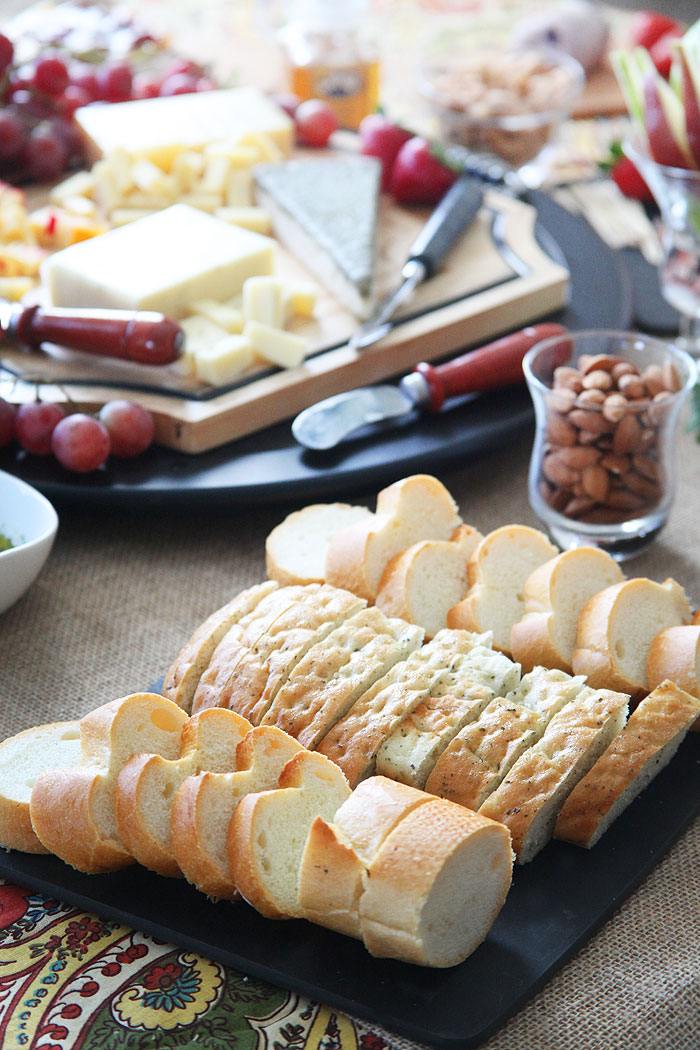
Most people opt for crackers with their cheese. And if you are serving a cheese plate as an appetizer, before a big meal, this will probably be a great option. However, if you would like the cheese spread to be your main meal (maybe for a wine tasting party), consider adding various kinds of breads to the table. Bread can fill up those hungry guests and adding additional bread accoutrements such as olive oil dip and soft cheeses will guarantee that no one walks away from your party hungry. Also, consider using breads that are “out of the box” and your guests would not normally consider purchasing, such as olive ciabatta any flavor challahs, egg breads, etc. Of course, have one “neutral” bread that everyone would like such as a french baguette.
Fruit
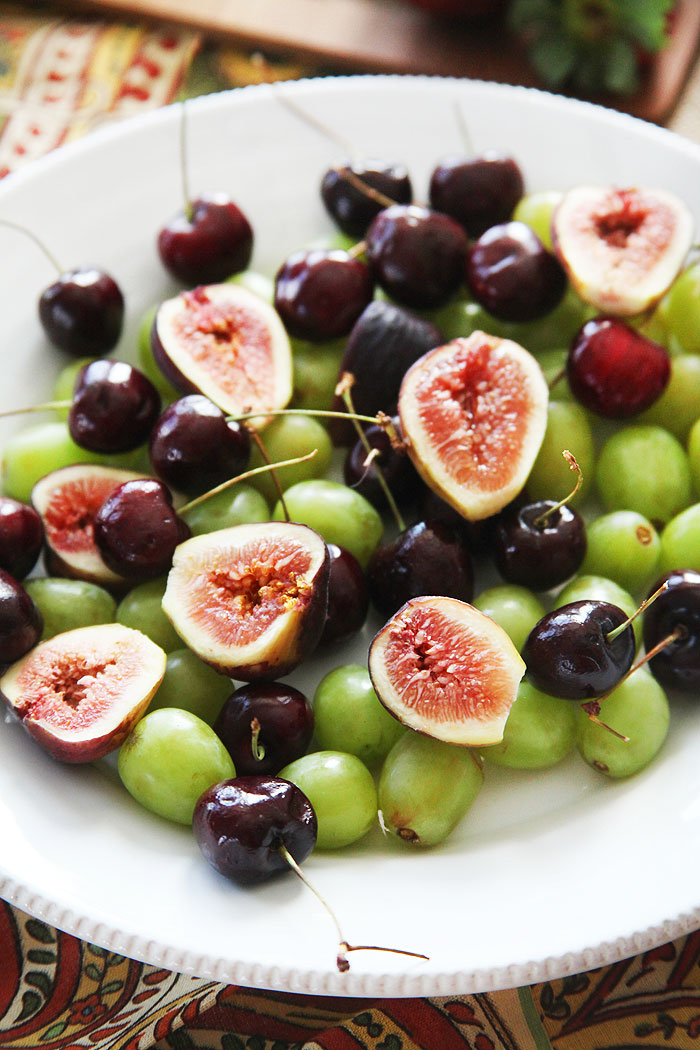
Fruit is a MUST!! Fruits are beautiful, delicious, and best of all, help the digestive process. Fruits have always complemented cheese and the best part of creating a cheese platter is adding fruit which may be out of the box a bit. Grapes are always great, but fruits such as figs, cherries, and strawberries look beautiful and taste great with cheese. Of course, doing a bit of research and checking to see which cheeses go with which fruit is always recommended. For example, stay away from any high acid or citrus fruit. But it’s not rocket science so don’t overthink it! And don’t forget, dried fruit is wonderful too!!
Honey
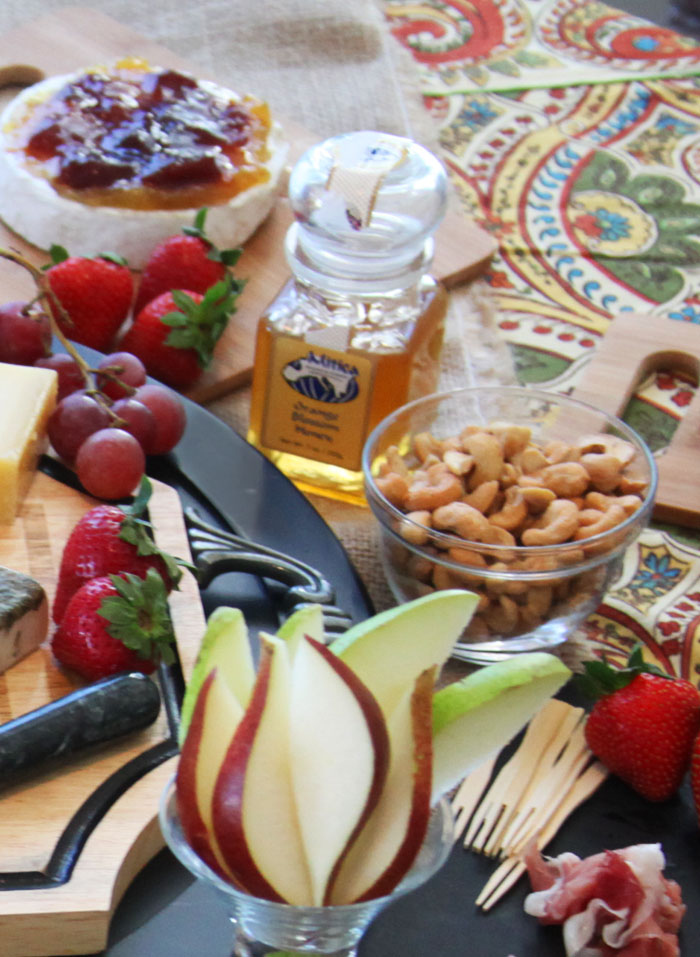
Honey is a wonderful addition to any cheese platter. It is the perfect juxtaposition of sweet and sour. Generally, I recommend you use varietal honey which is made from bees who pollinate on just one flower rather than bees that pollinate a bunch of different kinds of flowers. Also, just drizzle a little honey on the cheese, don’t soak it. A little goes a long way!
Honeys goes really well with aged cheeses that have a good amount of nuttiness. Parmigiano-Reggiano, a tangy Cheddar, or any of the alpine cheeses (Comté, Gruyère, Appenzeller). Other sweet and creamy cheeses like ricotta, goat cheese, or feta are wonderful with a citrus based honey. Don’t forget the blue cheeses which are spectacular with honey. For some, the spicier the better, but you may want to experiment to see what you and your guests like the best.
Other Wonderful Additions:
Pepperoni Chips – Simply place pepperoni slices in your oven at 375 degrees for 5-10 minutes or until they get crispy and serve!
Chocolate – Did you know that dark chocolate and Parmesan cheese have been scientifically proven to work well together. That’s right, scientists have actually proven that these two items are perfect for pairing. Here’s the link to the full article on HuffingtonPost Taste, it’s fascinating. And the good news is that your guests will be WOWed by your brilliance 🙂 Another cheese you may want to try with chocolate is mozzarella cheese. But don’t over do it, just a small amount will make a huge impression!
Fondue – So many of us think that we have to have wedge cheese on our cheese plate, but a hot delicious and creamy fondue will bring oohs and ahhs! Plus, they are very easy to make
Nuts – Don’t forget the nuts!! Almost any nut will look wonderful on your cheese plate. You can do a little research to see which nuts pair well with cheeses, but honestly, it’s hard to go wrong. My ultimate favorites are almonds and cashews. They work well with most cheeses.
Preserves – Fig preserves are incredible on top of a delicious brie! Other preserves such as plum, apricot, and even wild blueberry are unbelievable!! Stop in at your local supermarket or gourmet grocer and talk to the cheese monger about the best pairings for their cheeses. I find that the people behind the counter can answer all my questions and even teach me a thing or two! Also, if there is a special gourmet cheese section at your grocer, take a look around to see if other items are displayed. Many times, the cheese section has all you need to find the perfect preserves.
Things to avoid would be vegetables, spicy foods, heavy garlic flavored crackers and breads, citrus or high acid foods, and Tannic Red Wines.
· Posted in Appetizers, Cheese, Parties, Recipes ·
May 22nd, 2014
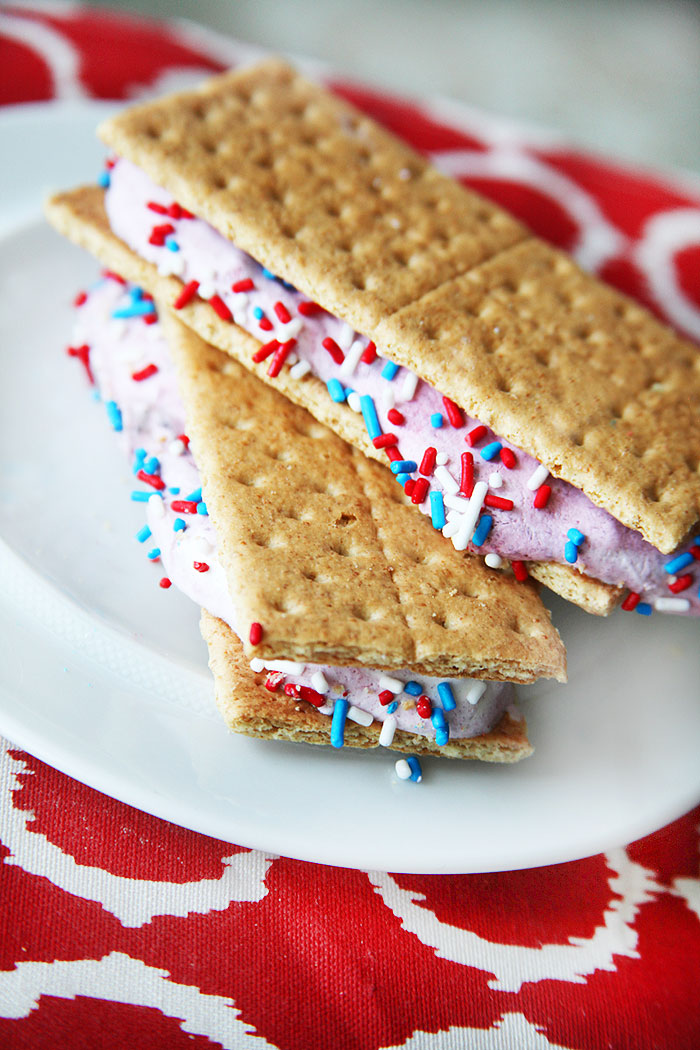
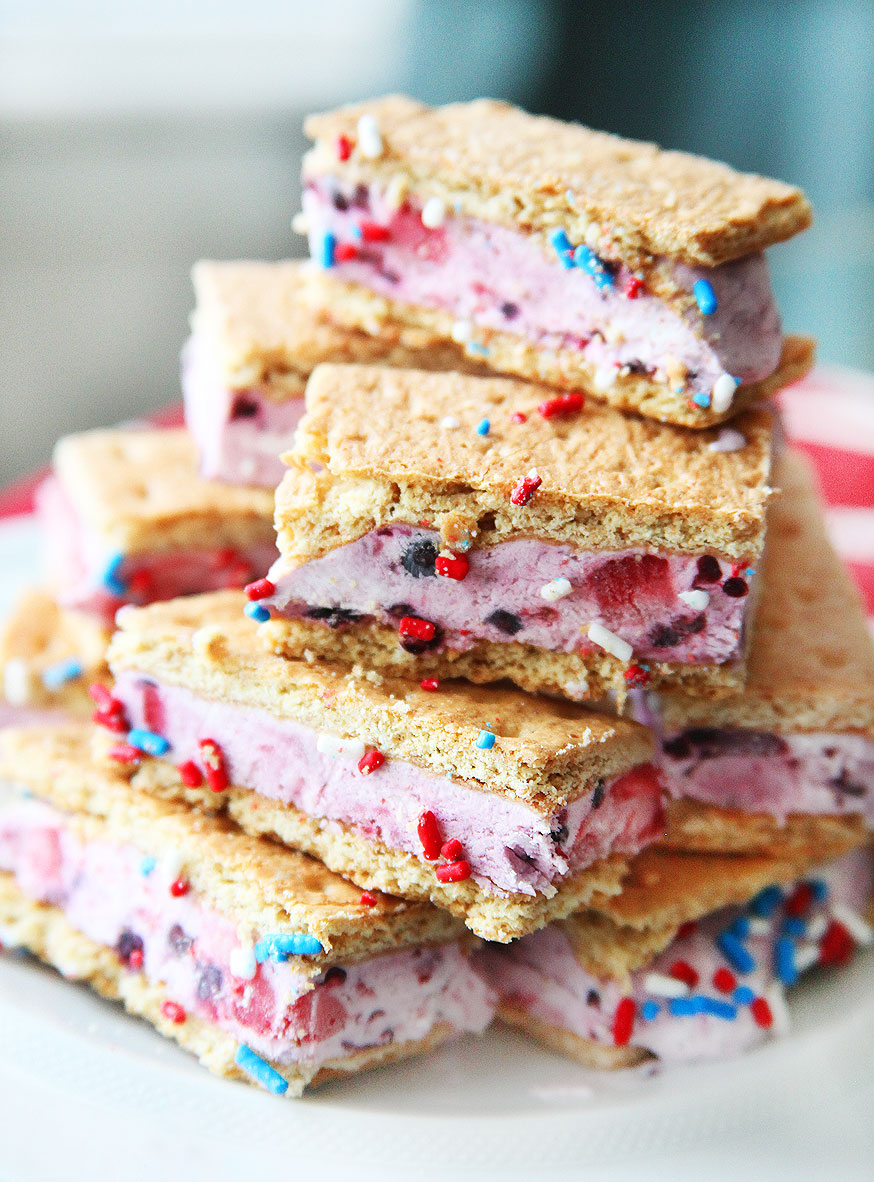
When I find a great recipe, I don’t hesitate for a moment to try it. Here’s a recipe I found on the box of Honey Maid graham crackers. I LOVE ice cream sandwiches, but let’s be honest, they are not the healthiest of choices. These however, are a winner! You’ll be using fresh berries, banana, yogurt, graham crackers, and fat free whipped topping. If you want to cut even more calories, omit the banana, these sandwiches will still come out wonderfully!! Pictured are the sandwiches “whole” or cut into smaller pieces, according to the perforations on the crackers.
Ingredients
- 10-1/2 HONEY MAID Honey Grahams (you can use the whole cracker or broken into quarters (42 rectangles)
- 1/2 cup sliced fresh strawberries
- 1/2 cup chopped bananas
- 1/2 cup cup blueberries and/or blackberries
- 1 cup vanilla nonfat Greek-style yogurt
- 1 cup (or more) thawed frozen reduced-fat whipped topping
Preparation
LINE 9-inch square pan with foil or parchment paper, with ends of foil extending over sides. Arrange half the graham pieces, in 3 rows of 7 pieces each, on bottom of pan. Or, you can use the whole cracker and arrange them into three rows of 3.
PULSE fruits in blender just until blended. (Some chunks should remain.) Alternatively, you can just mash up the fruit in a bowl, this will give the sandwiches large chunks of fruit (this is the method my family prefers). Spoon fruit mixture into medium bowl; stir in yogurt and whipped topping. Spread over graham pieces in prepared pan. Top with remaining graham pieces, aligning to match placement of graham pieces on bottom layer.
FREEZE 4 hours. Use foil handles to remove dessert from pan; cut between grahams to form 21 bars (or eat the whole thing). If you would like to add sprinkles, let stand 2-5 minutes so moisture can cover the yogurt, this way the sprinkles will stick to the yogurt.
Presentation
When cut-up, this makes 21 servings at 50 calories per serving. With 4gm of sugar and 9gm of carbs.
· Posted in 4th of July, Decadent Desserts, Fourth of July, Guilt Free Party Snacks, Parties, Recipes ·
May 17th, 2014
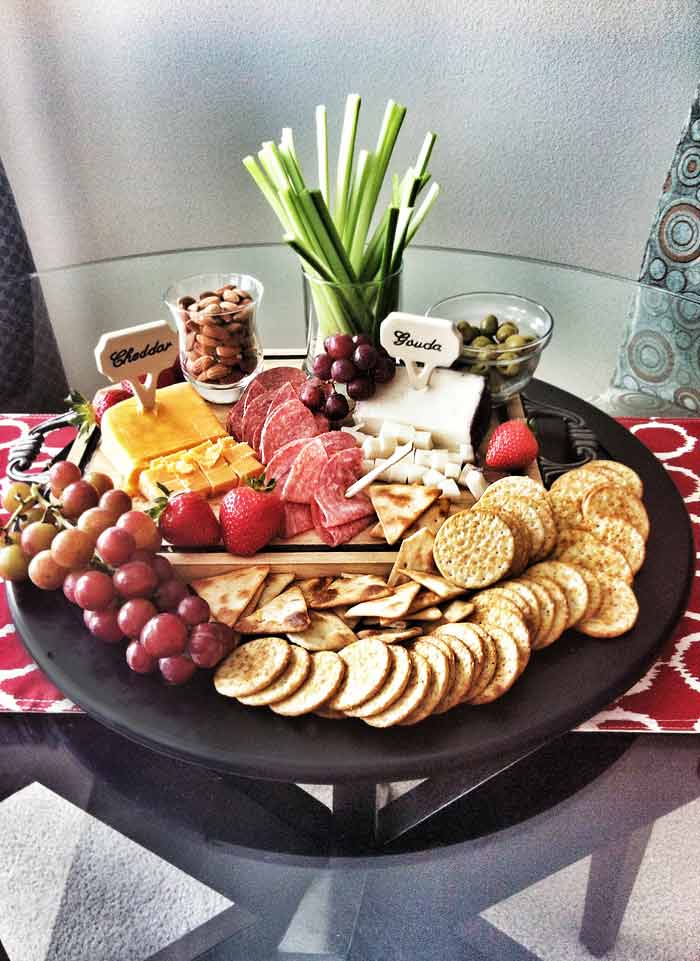
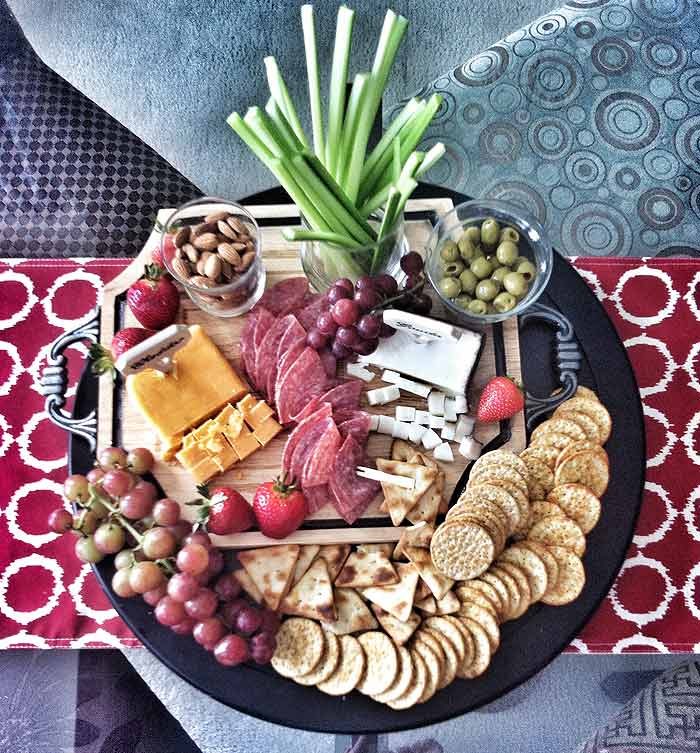
Last night was a wonderful night, which I desperately needed. We had our neighbors over for a dinner which was long overdue. They’ve invited us several times to their beautiful home and we enjoyed many laughs. I promised to have them over, but with my friend’s husband being a pilot, and our lives being crazy, we could not get our schedules synced! But yesterday was that magic Saturday when all the stars aligned… as well as our schedules! We had a wonderful evening filled with great food and conversation.
For an appetizer, I decided to create a cheese platter which would overflow with yumminess! I had a total of three platters, but the one pictured was the main platter which included gouda and cheddar cheeses, salami, almonds, celery, olives, crackers, and fruit. The other platters (not pictured) had a Brie with a combination of fig and cherry preserves and a cured meat platter with prosciutto and grapes. But I really loved how my main platter came out. Nothing fussy just easy and rustic. It was a big hit with our guests and I bet it would be a big hit with yours! And as you can see, it was very easy to put together.!
· Posted in Appetizers, Guilt Free Party Snacks, Parties, Recipes ·
May 13th, 2014
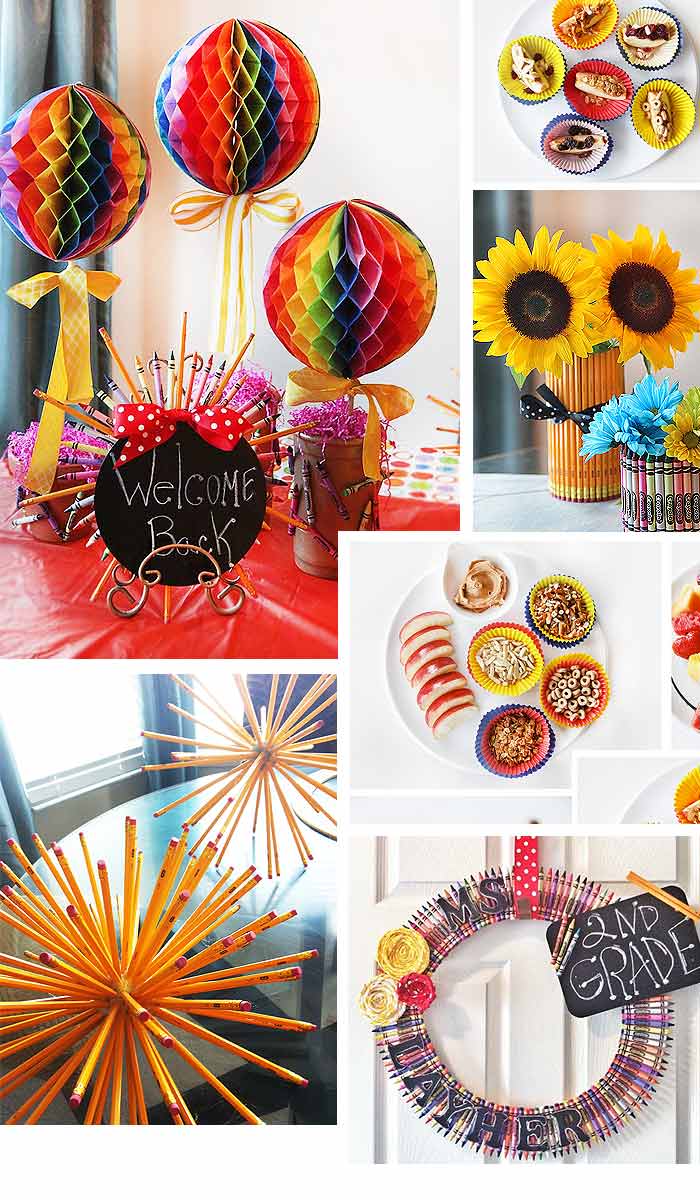
Looking for some fun back to school party ideas! I’ve been busy this year with some fun projects. I hope they inspire you to create something wonderful!
· Posted in Back To School, Crafts, Dollar Store, Fall Season, Parties, Uncategorized ·
May 13th, 2014

If you have been reading my posts this week, you probably know that I was in charge of my son’s back-to-school party this year. I can’t tell you how much fun my kids had watching and helping me with all the wonderful centerpieces. This was one of them! I found this idea on Pinterest and had to give it a try.
My only warning for anyone who wants to try this project is that yes it was easy, however, if you are short on time, this is probably not the project you want to tackle. It takes time for the hot glue to cool and for the pencils to set properly. I worked on this star burst over a period of a week and I worked on both of them at one time. My kids helped by holding the pencils in place as the glue dried, helping the pencil stick properly inside the hole. You can do two, three, or more pencil star bursts at one time, but make sure to wait for each pencil to “set” properly.
Simply purchase a styrofoam ball and create holes with your #2 unsharpened pencil. Add hot glue to the hole and place the pencil inside, holding it while the hot glue cools. You can do two to 3 pencils at one time, but it’s important to make sure they are properly set before moving on. You can do an entire ball as a star burst, or just do half a ball. I did two and it was nice to see multi-sized starbursts on the table. You can also paint the ball yellow, prior to inserting the pencils. I did not do that but wished I thought of it prior to making the starburst. Good thing that kids don’t care!
I did three other projects this year which include (pictured) Tissue Ball Centerpieces, Custom Crayon Teacher’s Wreath, and “Welcome Back” Crayon and Pencil Sign.

· Posted in Back To School, Crafts, Parties ·
|
|
|